-
myLab
-
Services
-
- Acid Number
- Analytical Ferrography
- Base Number: ASTM D2896 vs. D4739
- Demulsibility
- FTIR Direct Trend Methodology
- Fuel Distillation (ASTM D86)
- ISO Particle Count
- Karl Fischer Water Titration
- Optical Particle Classification (OPC)
- Remaining Useful Life Evaluation Routine (RULER)
- SEM-EDS Wear Debris Analysis
- Total Magnetic Iron (TMI)
- Varnish Potential
-
-
Sampling
-
- Coolant Sampling Procedures
- Grease Sampling Procedures
- Oil Sampling Basics (Short Course)
- Oil Sampling Procedures (Video)
- Oil Sampling Procedures: Good-Better-Best (PDF)
- Sample Collection Basics
- Sampling Oil Using a Drain Plug
- Sampling Oil Using a Pushbutton or KST-Series Valve
- Sampling Oil Using a Sample Pump
- Sampling Oil Using Thread-On Probe Style Valves
-
-
Data Interpretation
-
- Analytical Ferrography Reporting
- Basic Testing Interpretation (PDF)
- Common Wear Mechanisms (PDF)
- DEF Specifications: ISO 22241
- Oil Cleanliness: ISO vs. NAS
- Potential Source of Spectrometry Metals (PDF)
- Reading the OA Report (PDF)
- Understanding ISO Particle Counts (PDF)
- Wear Metal Origins (PDF)
- Comparison: Wear Debris Analysis Technologies
- DEF Testing: Data interpretation
-
- Data Interpretation Process (Video)
- Data Interpretation: Compressors (Video)
- Data Interpretation: Diesel Engines (Video)
- Data Interpretation: Grease Analysis for Wind Turbines (VIDEO)
- Data Interpretation: Hydraulics (Video)
- Data Interpretation: Natural Gas Engines (Video)
- Data Interpretation: Oil Analysis for Wind Turbines (Video)
- Data Interpretation: Reducers (Video)
- Data Interpretation: Turbines (Video)
-
-
FAQ
-
Release Notes
- myLab Release: February 2024
- Packaging Update: Outer Black Sample Jar Transition to Sample Bags
- Lab Services Update: October 2023
- myLab Release: December 2022
- myLab Release: November 2022
- myLab Release: October 2022
- myLab Release: August 2022
- mylab Release: June 2022
- myLab Release: March 2022
- myLab Release: November 2021
< All Topics
Print
Managing Shared Logins
PostedJanuary 21, 2022
UpdatedOctober 12, 2022
ByFluid Life
0 out of 5 stars
| 5 Stars | 0% | |
| 4 Stars | 0% | |
| 3 Stars | 0% | |
| 2 Stars | 0% | |
| 1 Stars | 0% |
In this article we will discuss how to create shared logins for groups of people who will view the same information.
If you do not have an Administration icon in your “Tasks” drop down or in your Account tab, you do not have permissions to access this element. For each myLab site there is one Master User that always has this permission, and they can assign it to additional users.
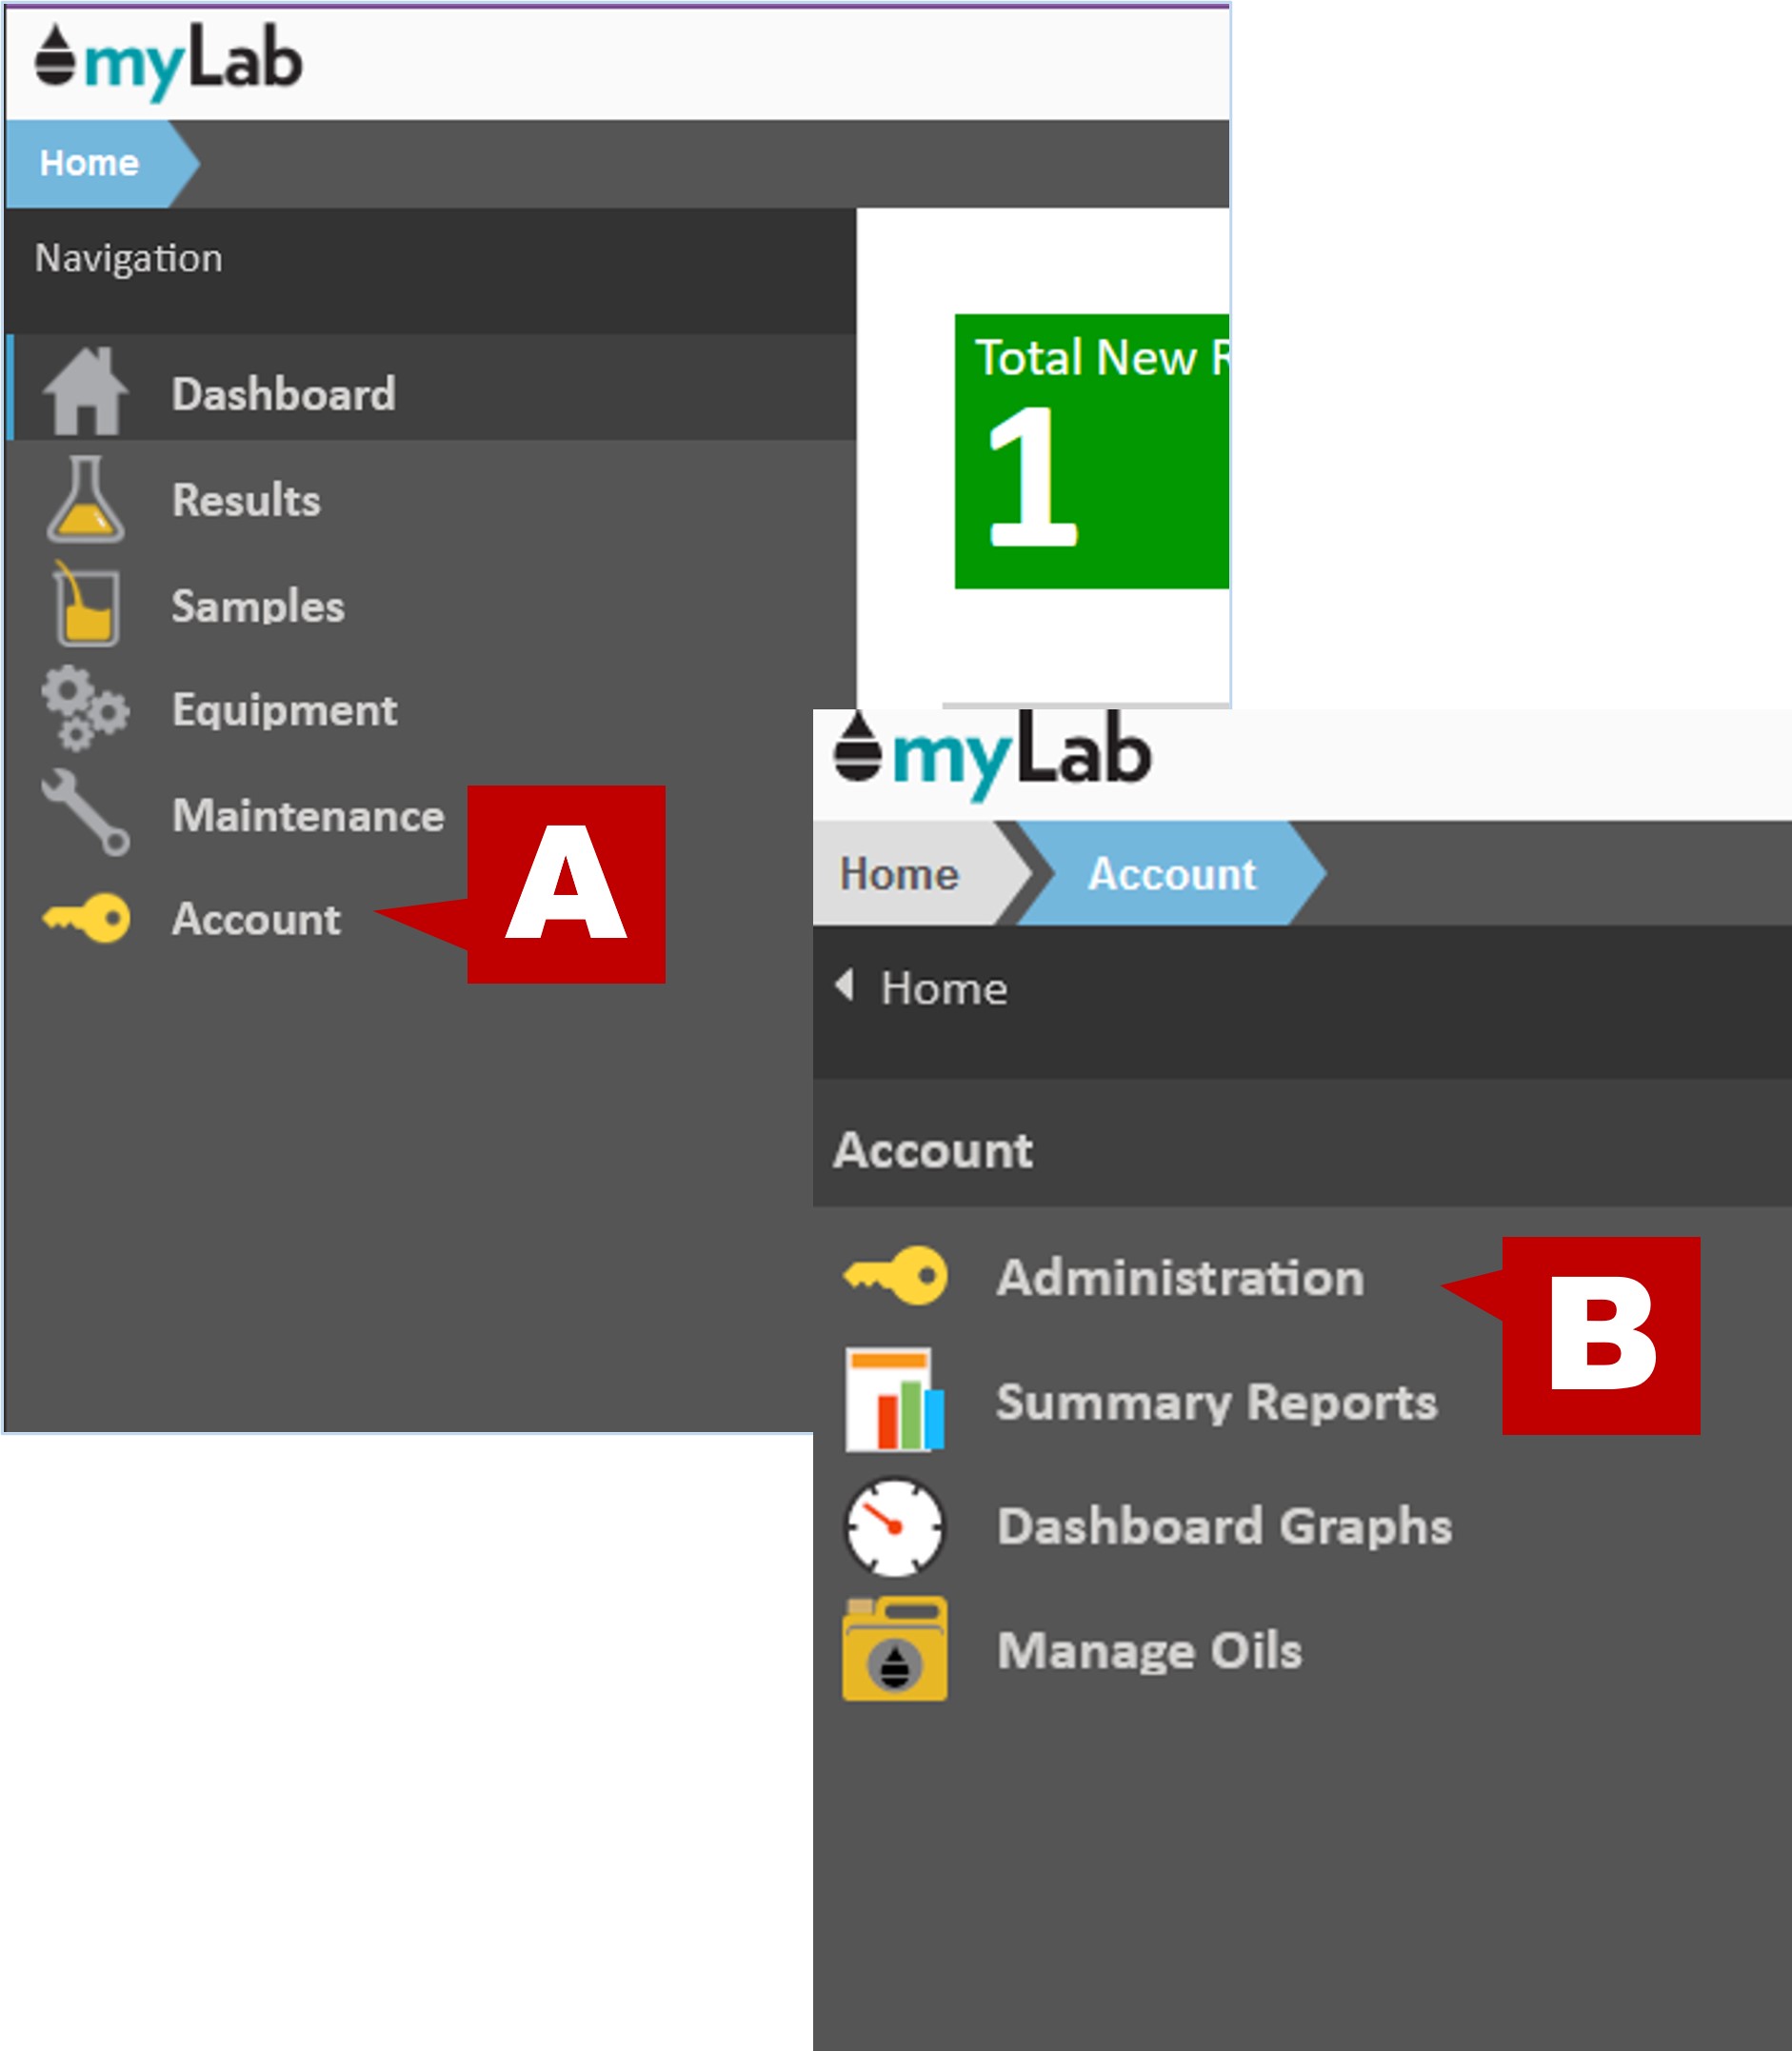
Accessing Shared Logins Manager
- On the myLab Home screen, click on the “Account” tab (A) or the “Administration” icon in the Tasks dropdown.
- Click on “Administration” (B) in the next menu.
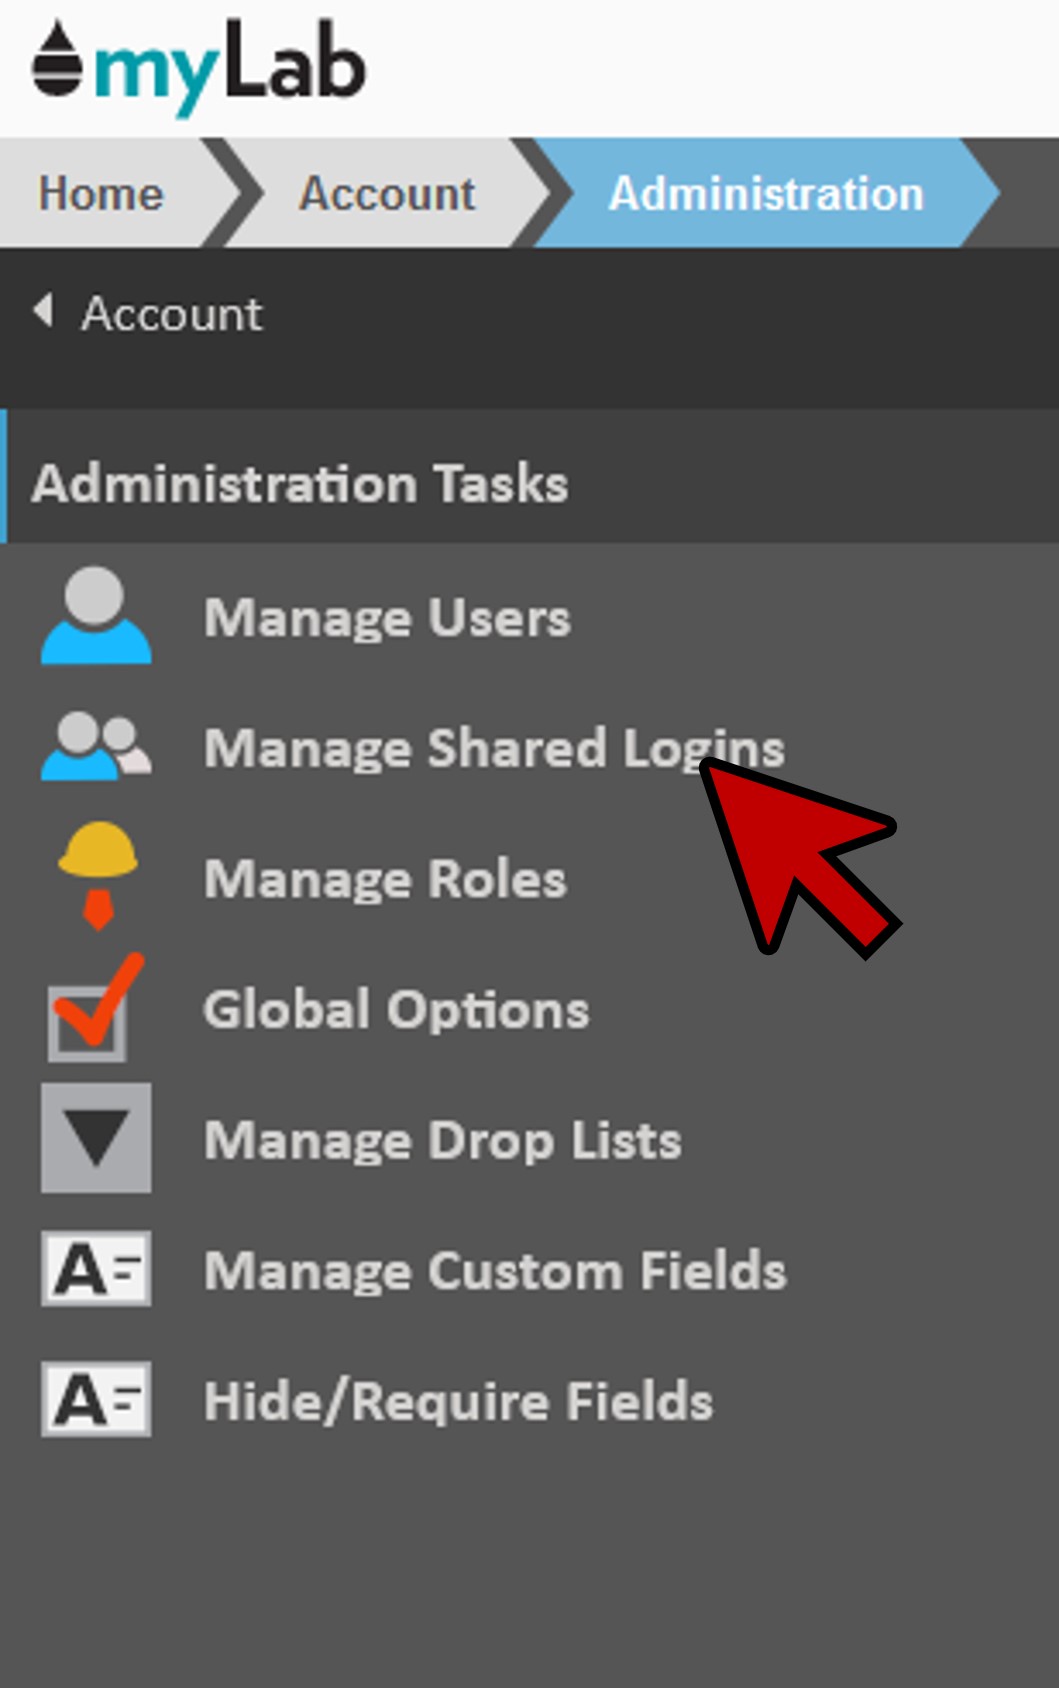
- Click on “Manage Shared Logins”
Adding Shared Login
- In the left-hand panel, click the green “Add Shared Login” button (A). This opens the data entry panel on the right-hand side.
- As the generic login does not require an email address, you would enter in the “Shared Username” and the “Group Name” (B).
- Under the “Info” tab, enter the group password (C).
- Similar to adding New Users, the various tabs allow you to customize the settings for the shared login.
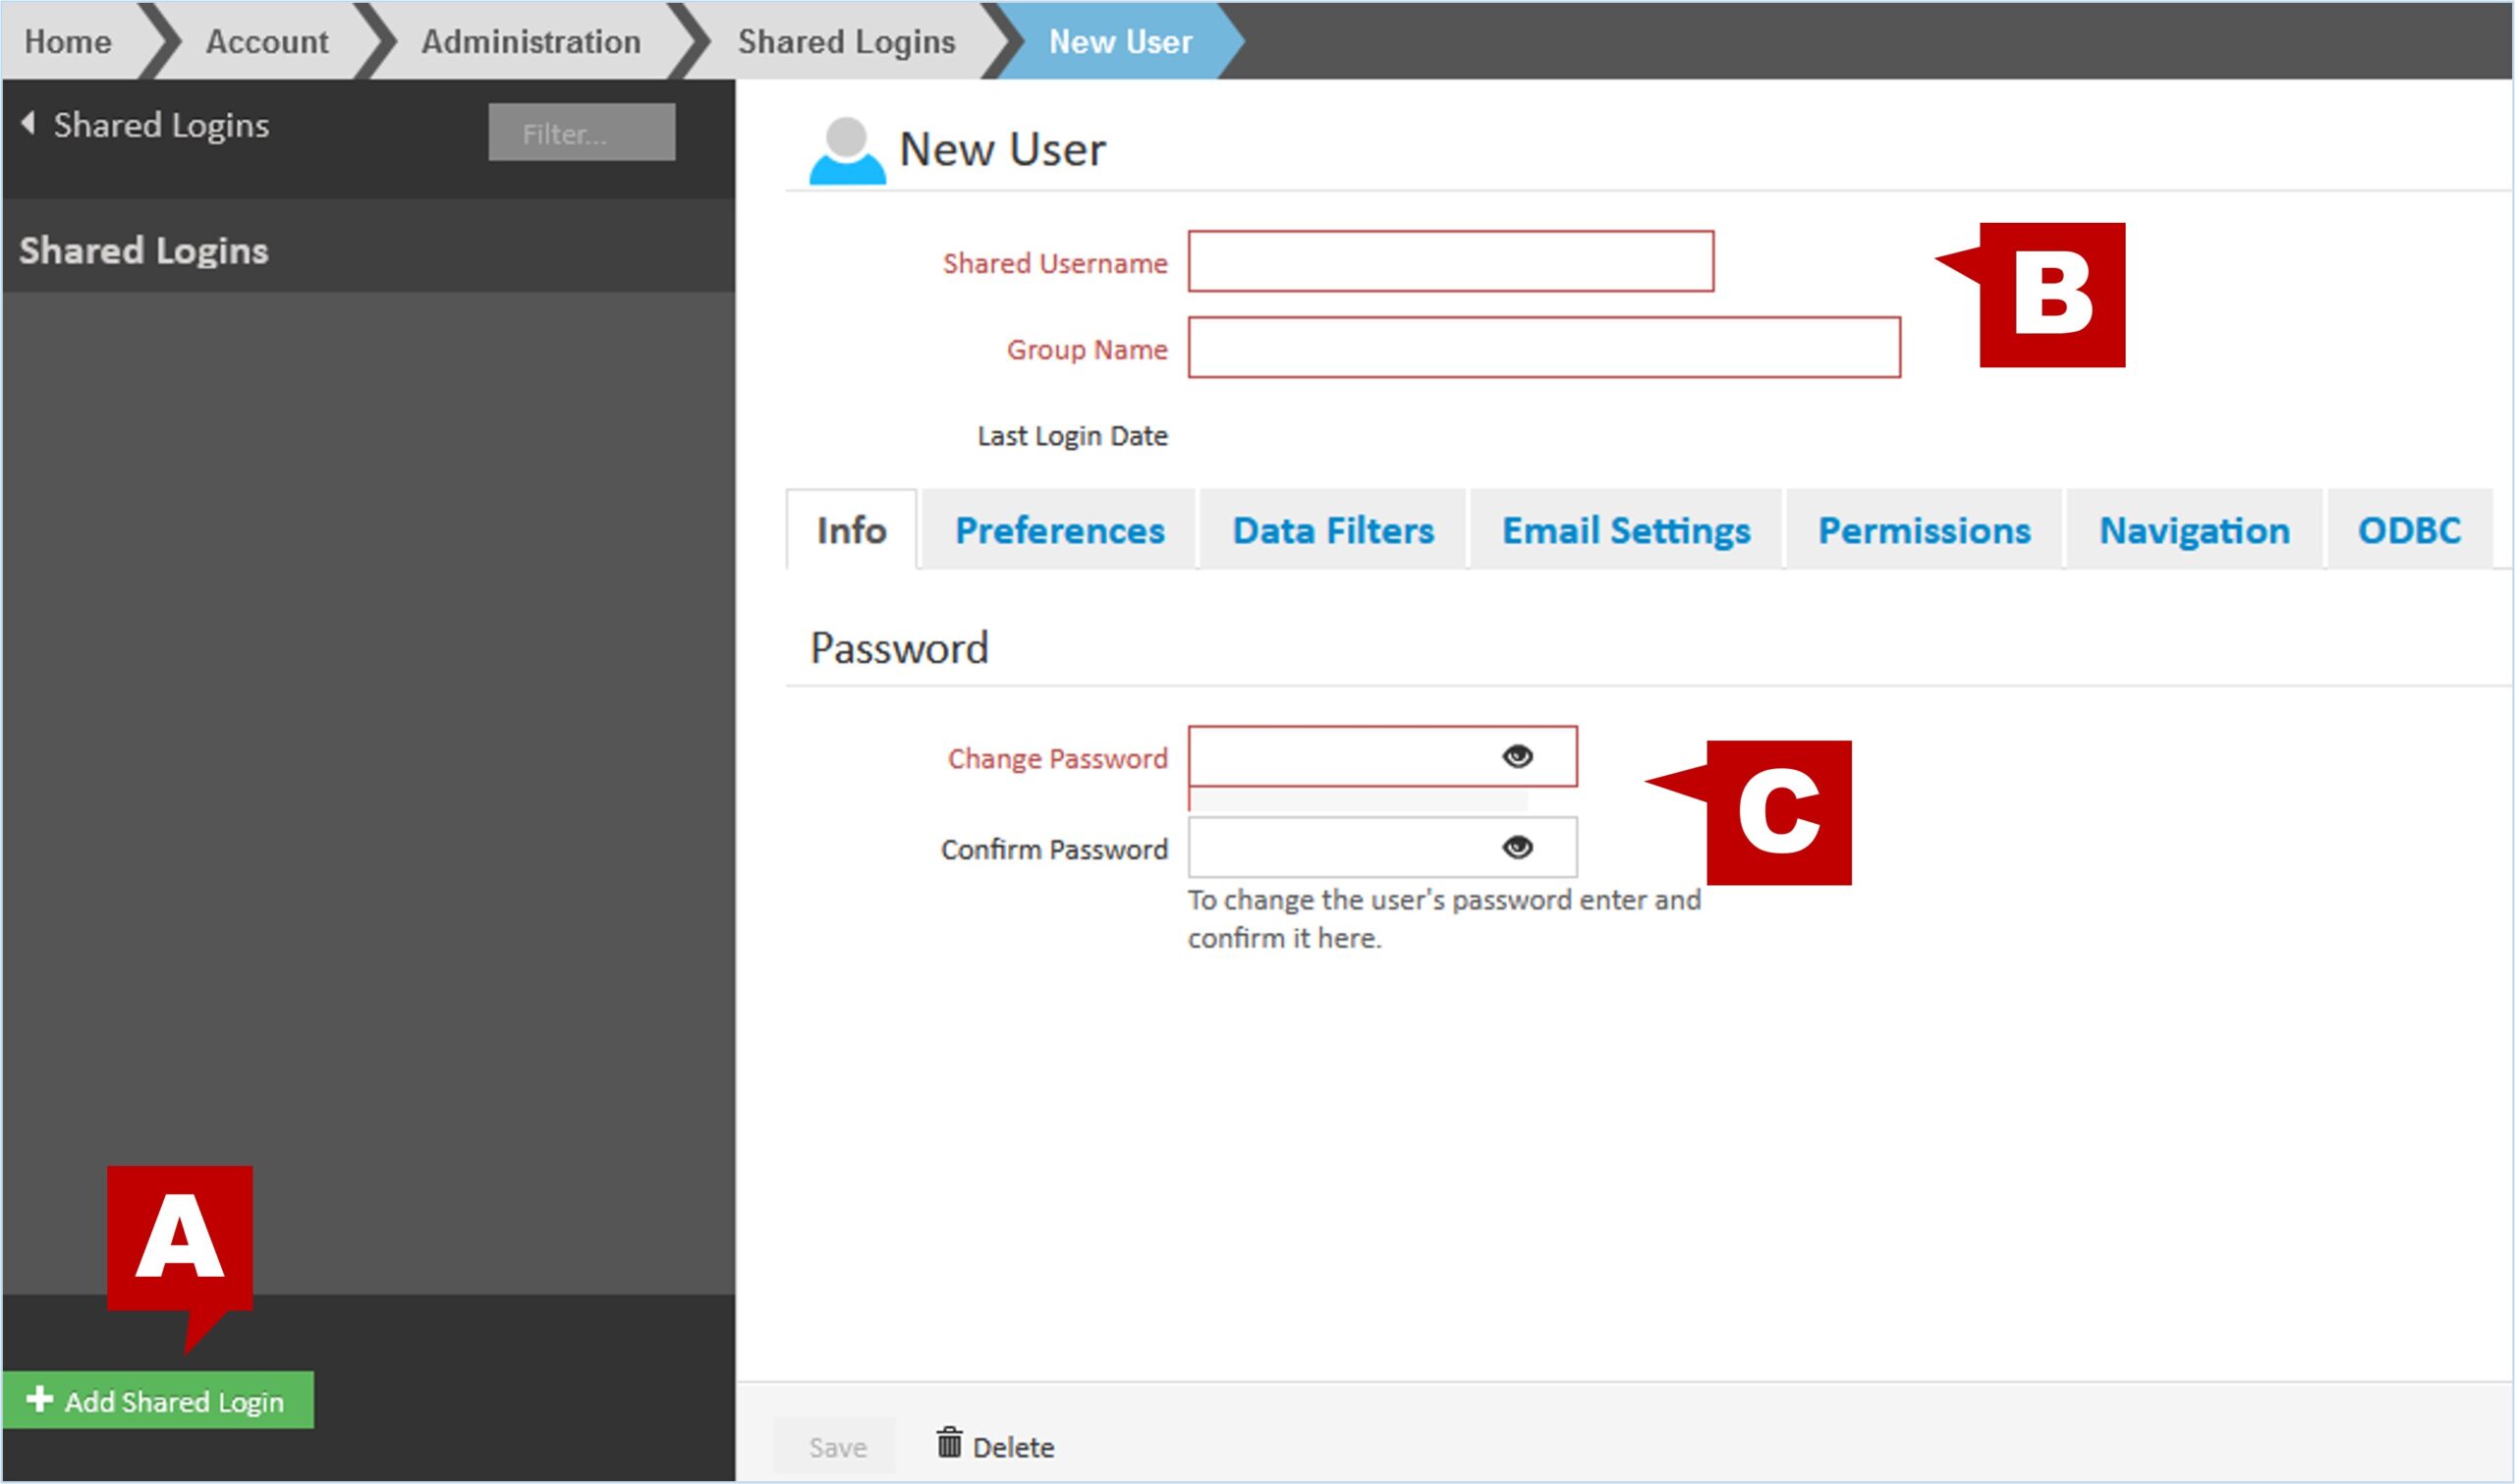
- Once all data entry is complete, click “Save” at the bottom of the panel.
Was this article helpful?
0 out of 5 stars
| 5 Stars | 0% | |
| 4 Stars | 0% | |
| 3 Stars | 0% | |
| 2 Stars | 0% | |
| 1 Stars | 0% |
5
Tags:
Table of Contents