Managing Custom Fields
In this article we will review how to create custom fields for Customers, Units, Components, Samples, and Maintenance Records. Using custom fields allows you to record any information that is specific to your company or industry.
If you do not have an Administration icon in your “Tasks” drop down or in your Account tab, you do not have permissions to access this element. For each myLab site there is one Master User that always has this permission, and they can assign it to additional users.
Accessing Custom Fields Manager
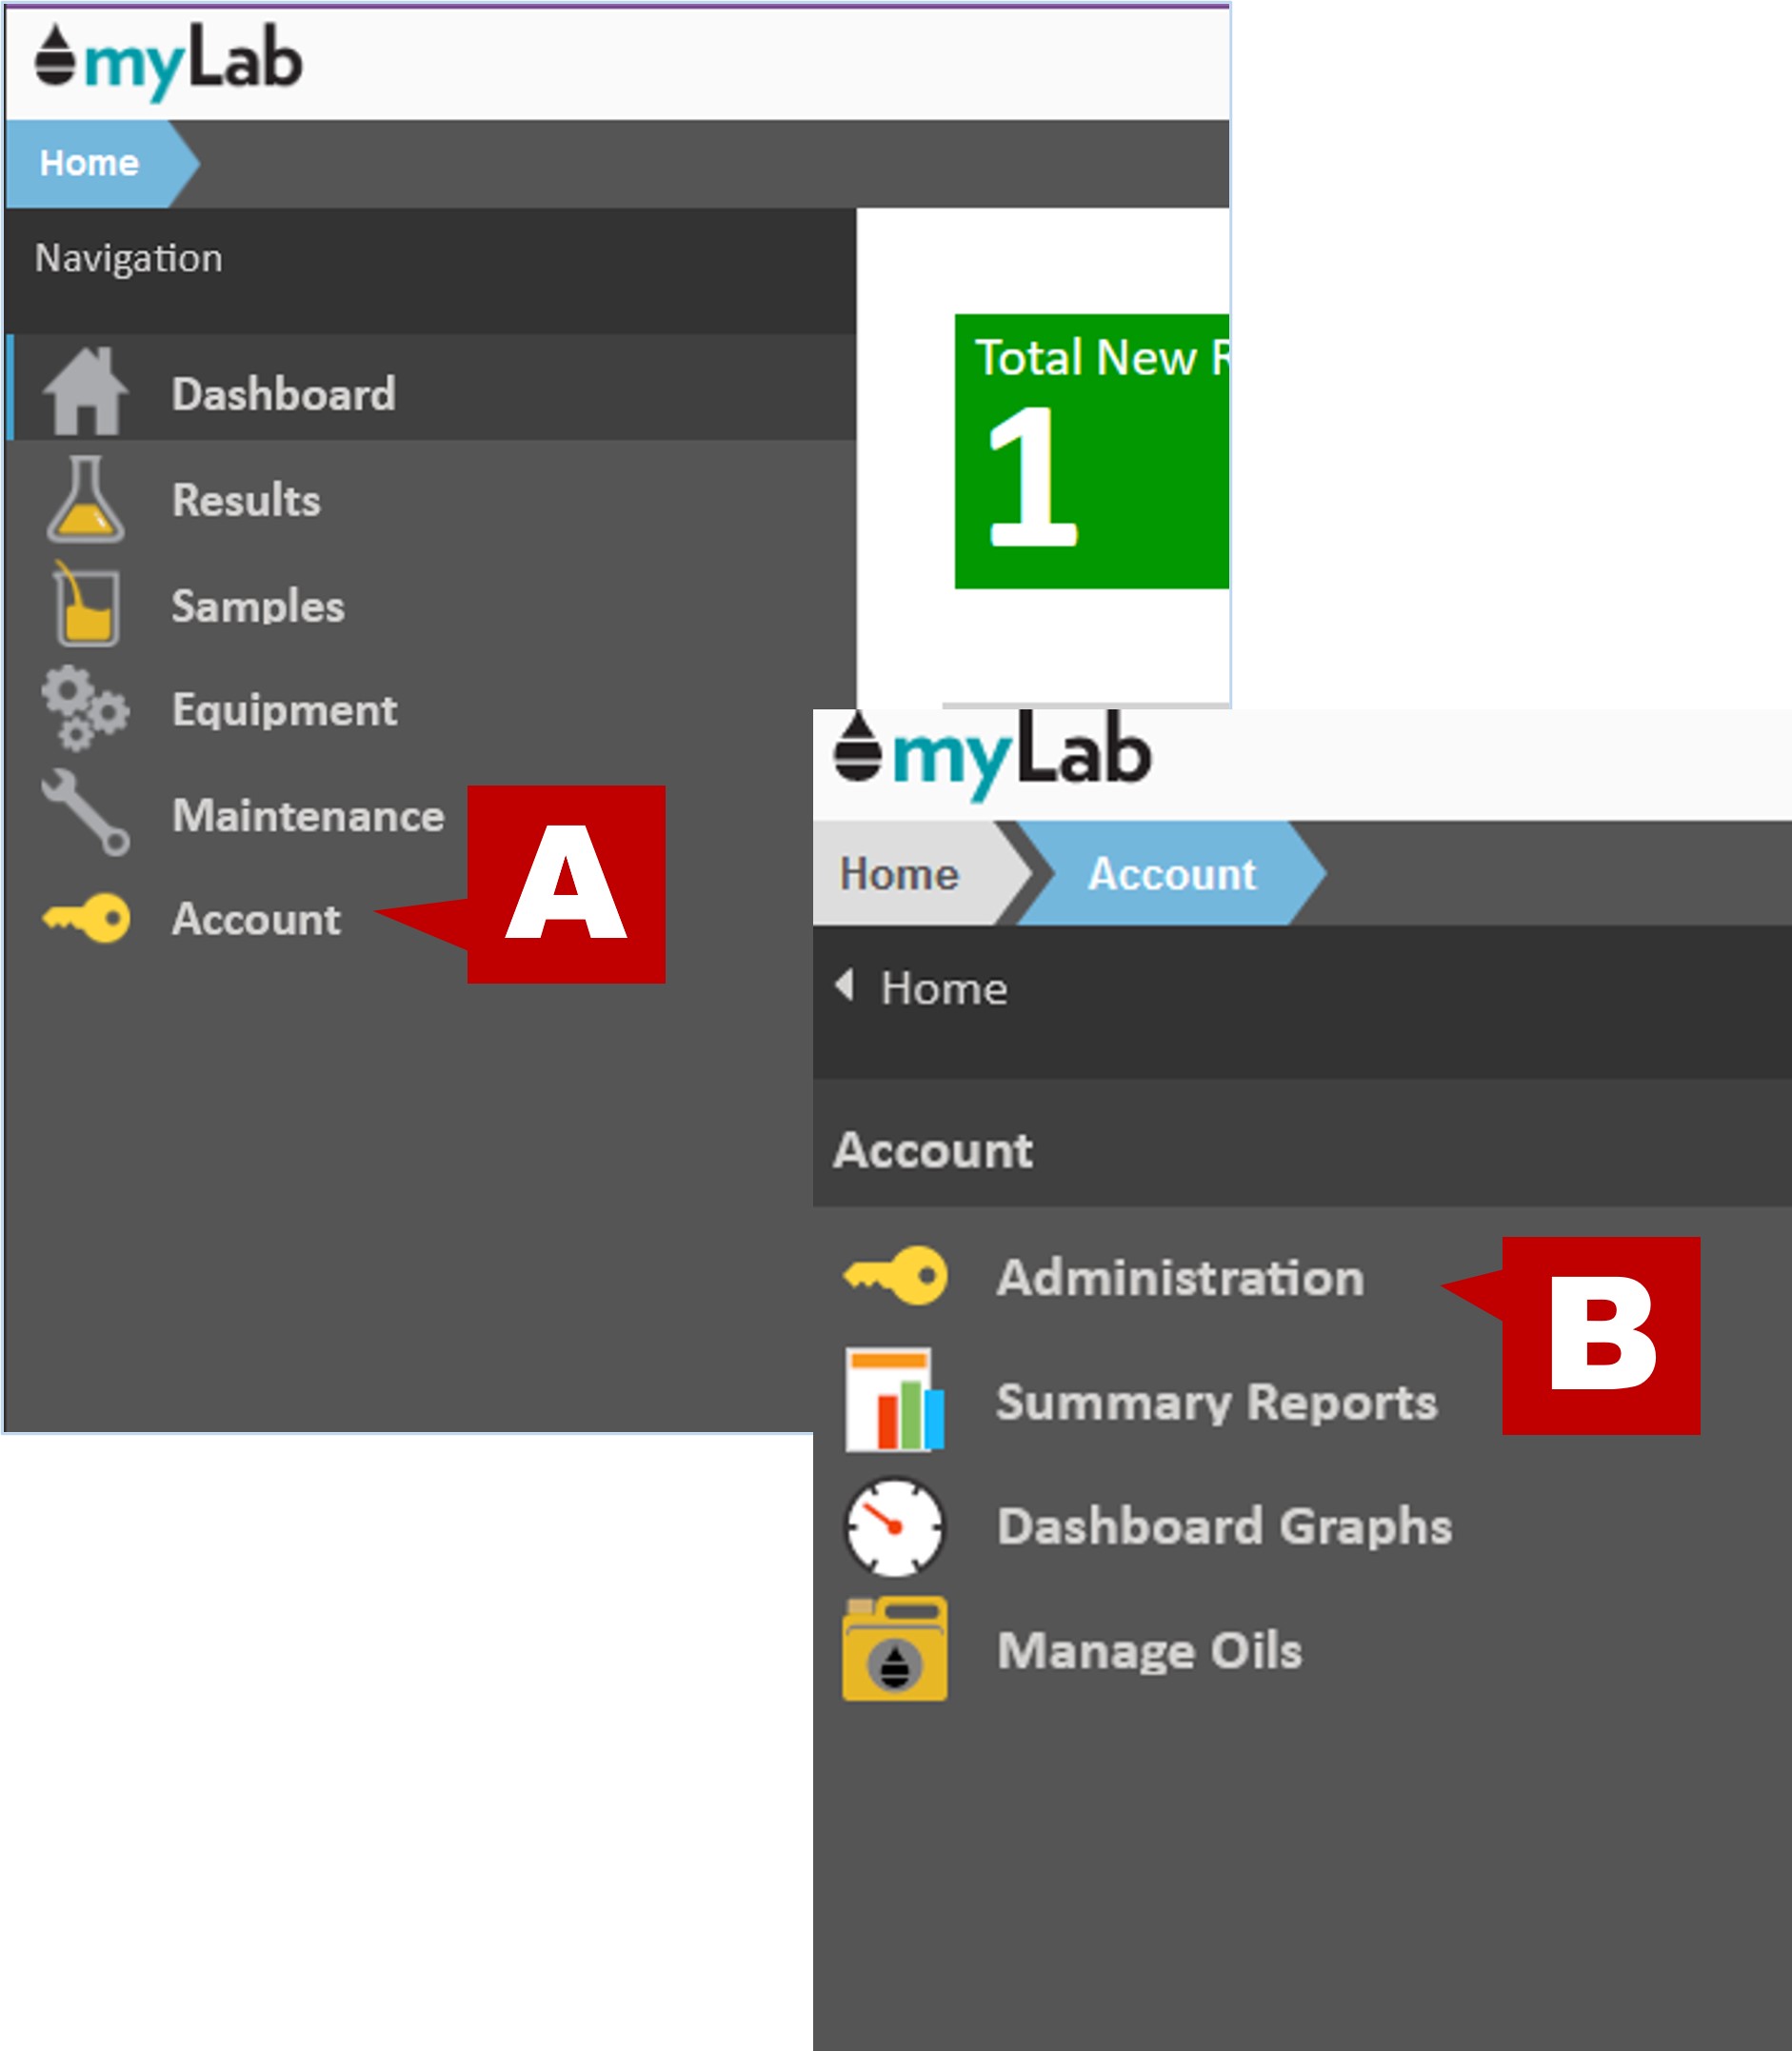
- On the myLab Home screen, click on the “Account” tab (A) or the “Administration” icon in the Tasks dropdown.
- Click on “Administration” (B) in the next menu.
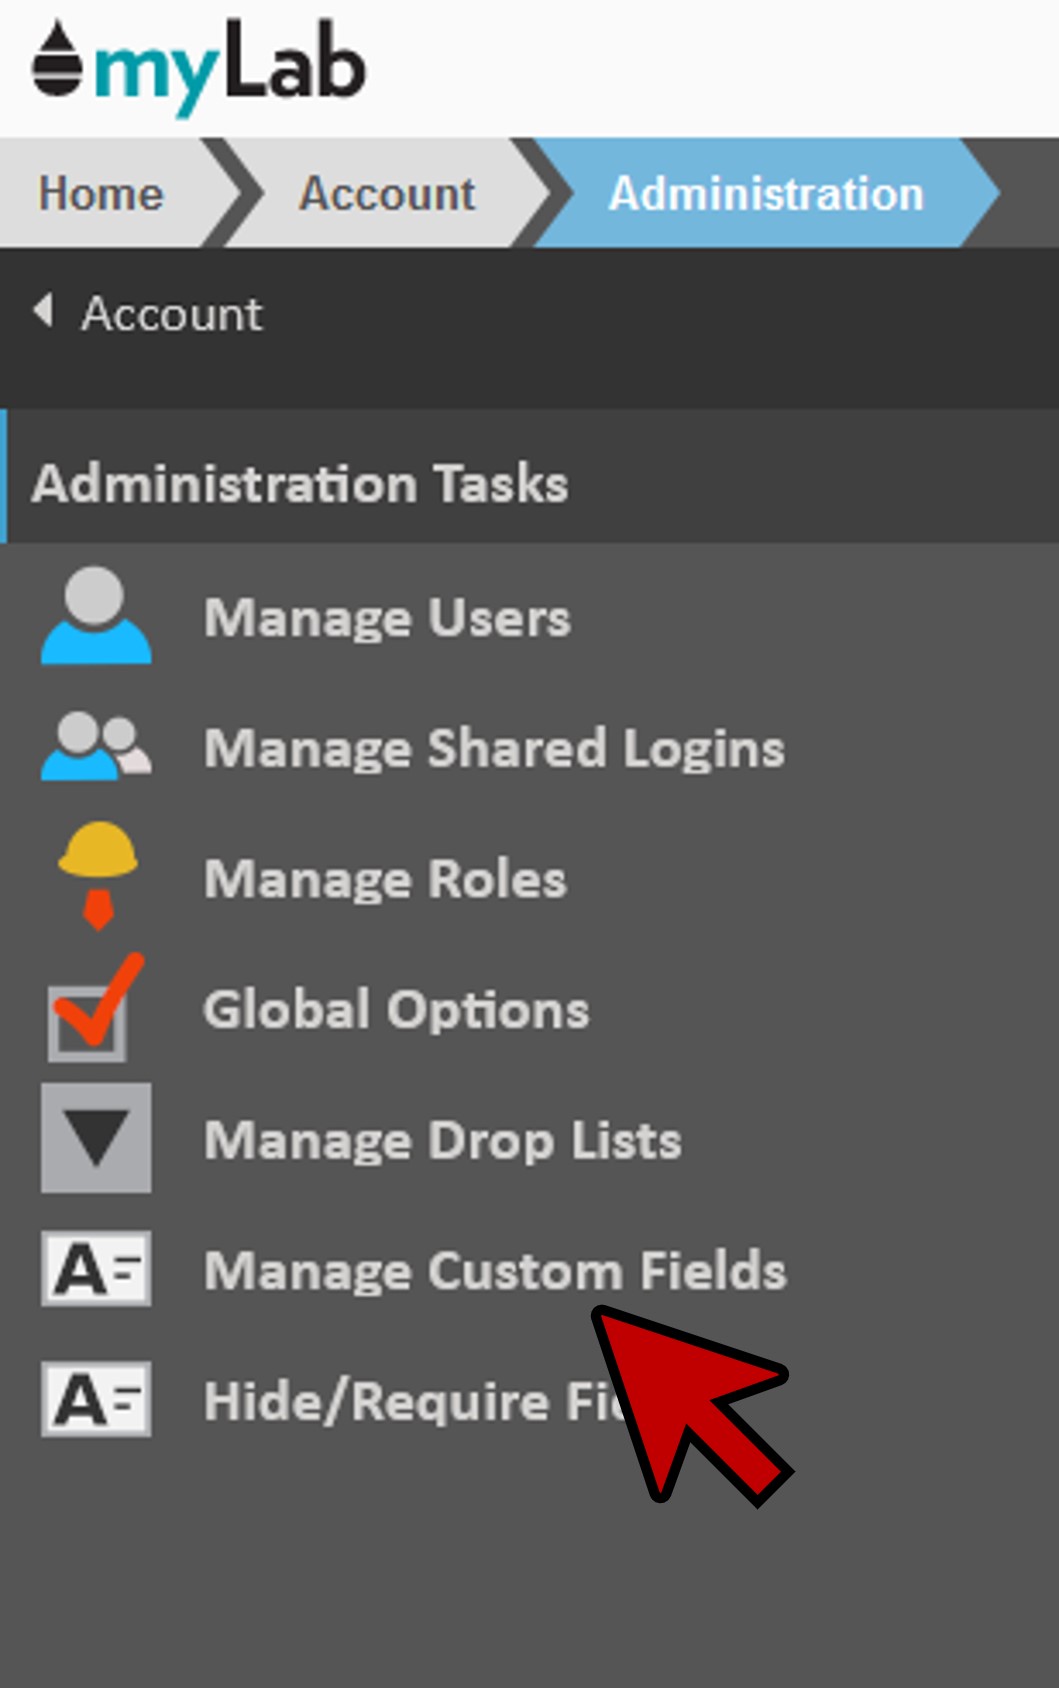
- Click “Manage Custom Fields” to open the Record Types window.
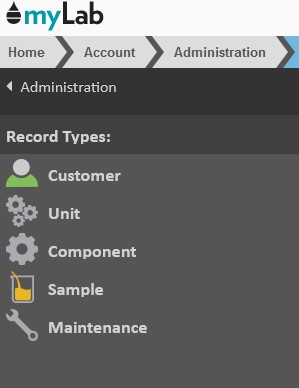
- The available record types of Customer, Unit, Component, Sample, and Maintenance (right image) allow for users to include additional or custom fields for identification or tracking purposes.
Create a New Field
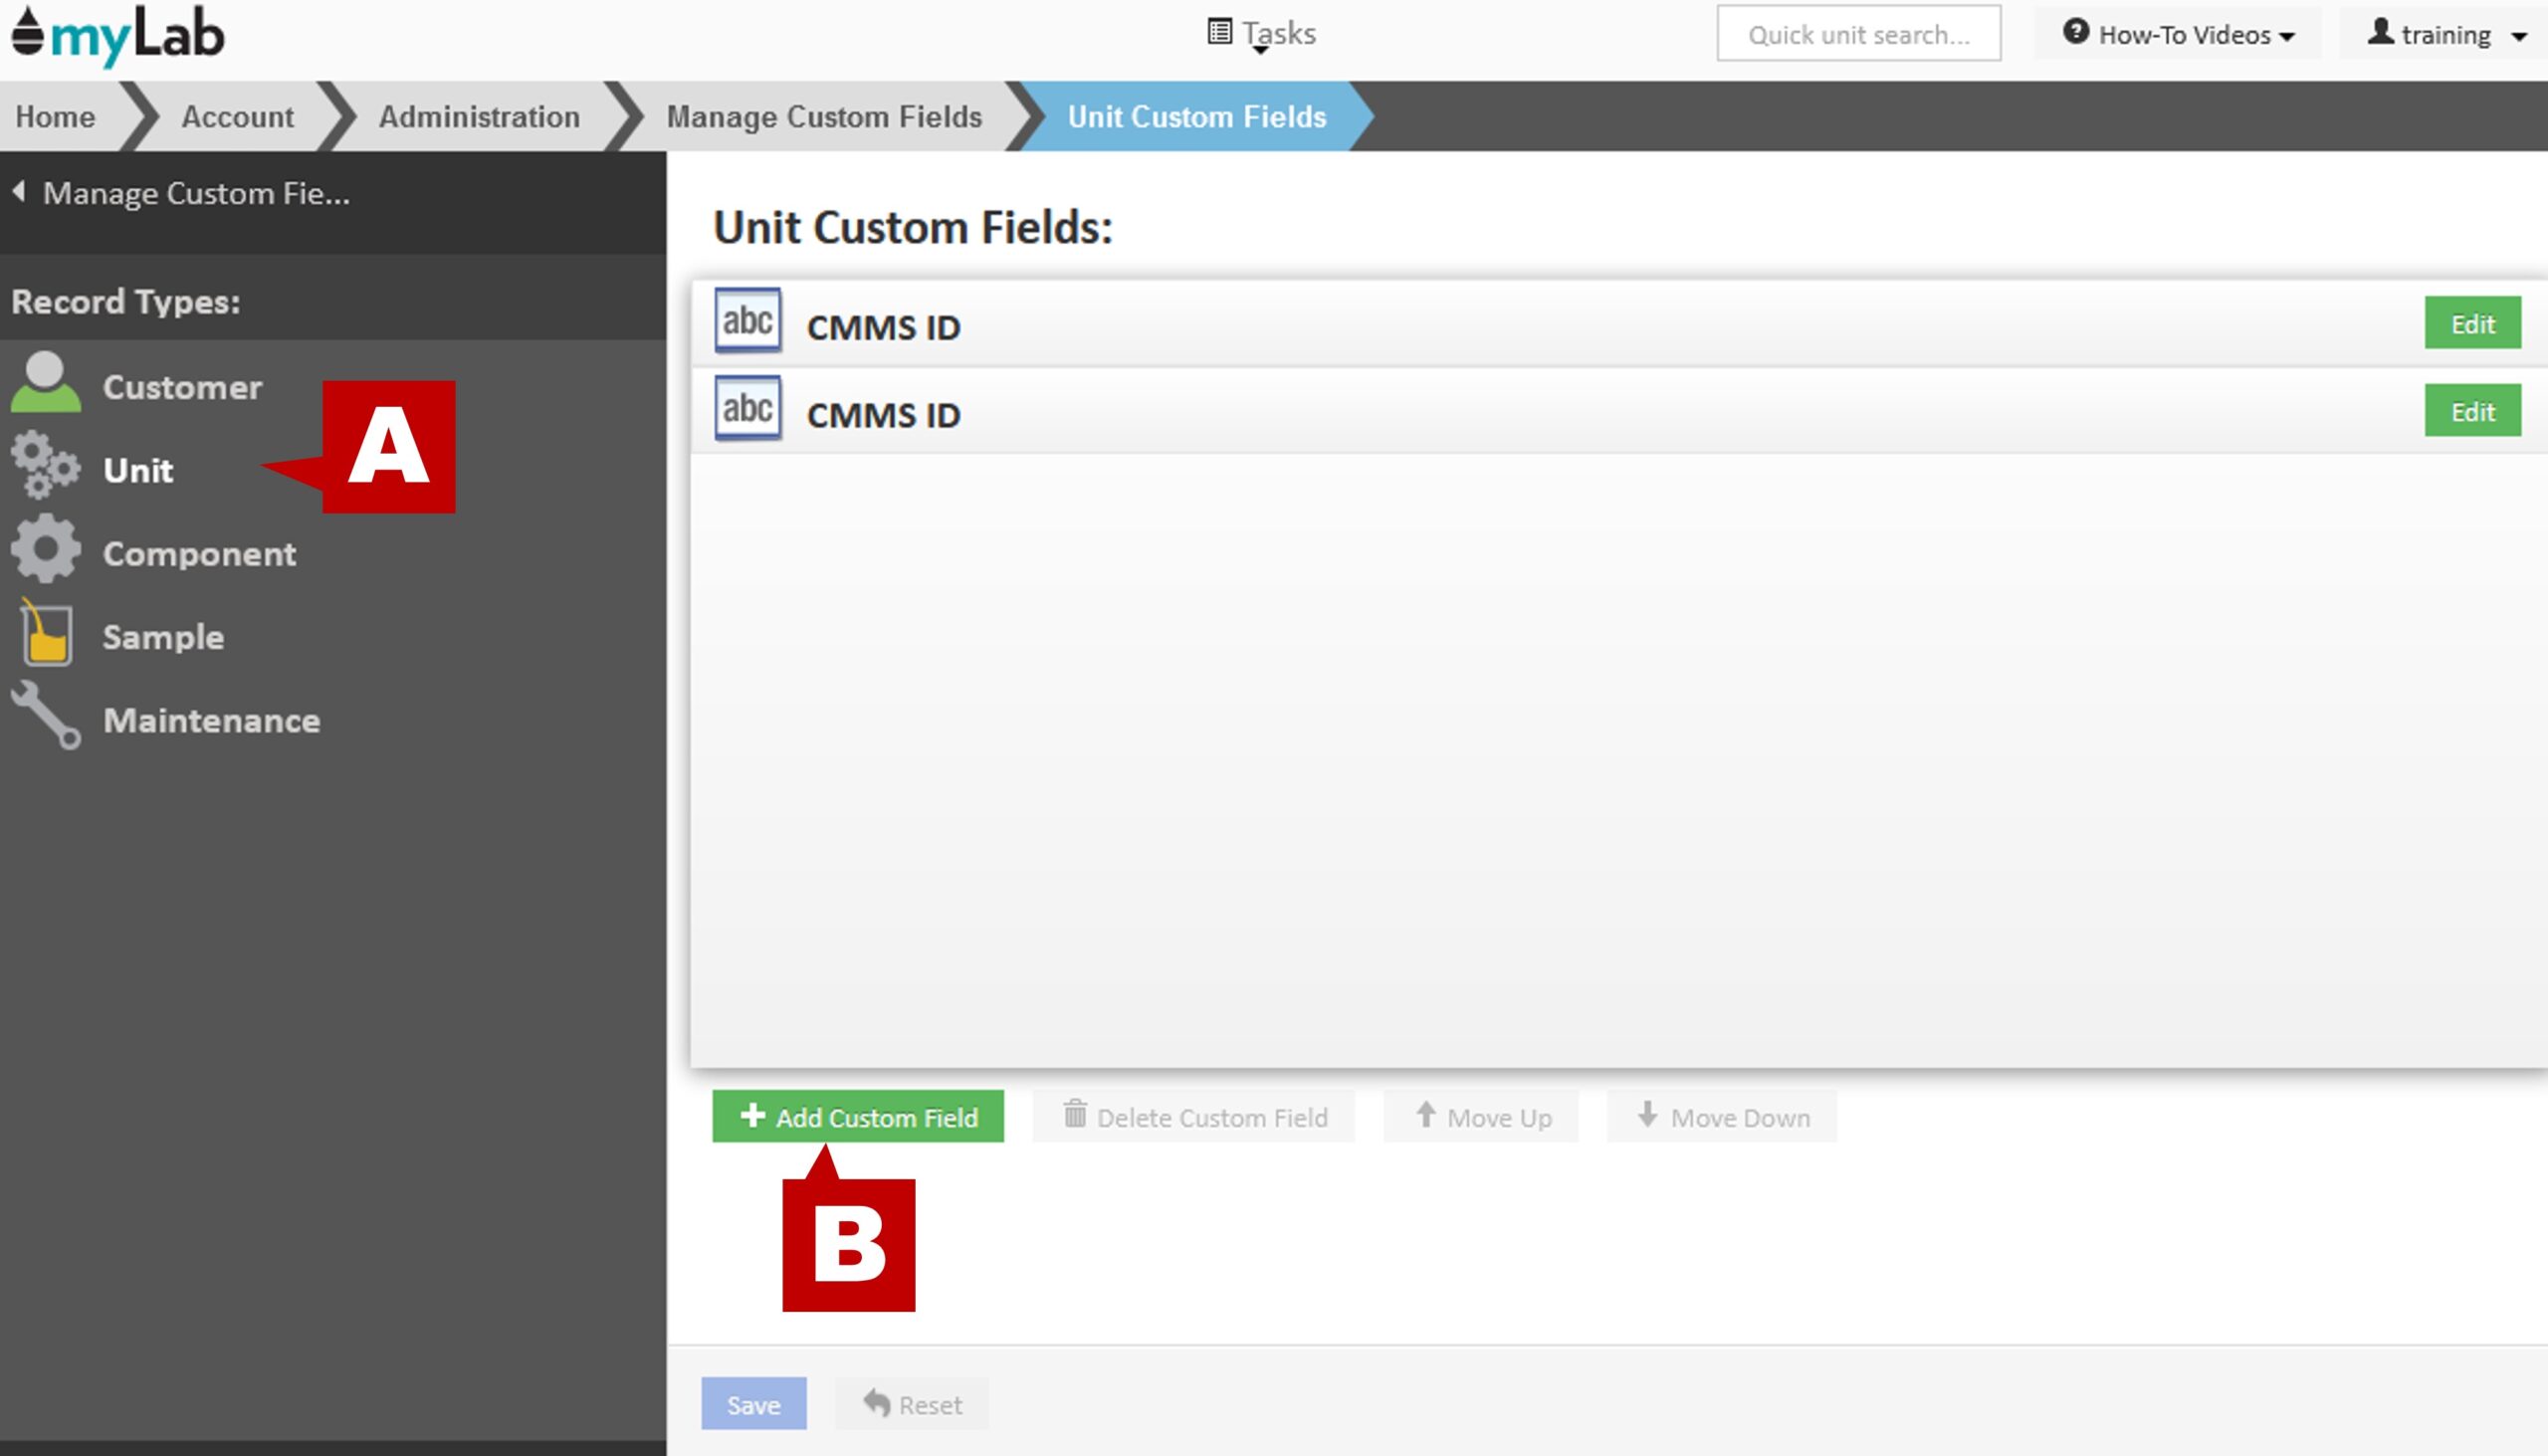
- Select the record type where you want to create your custom field (A). Then on the right panel, click the green “Add Custom Field” button (B).
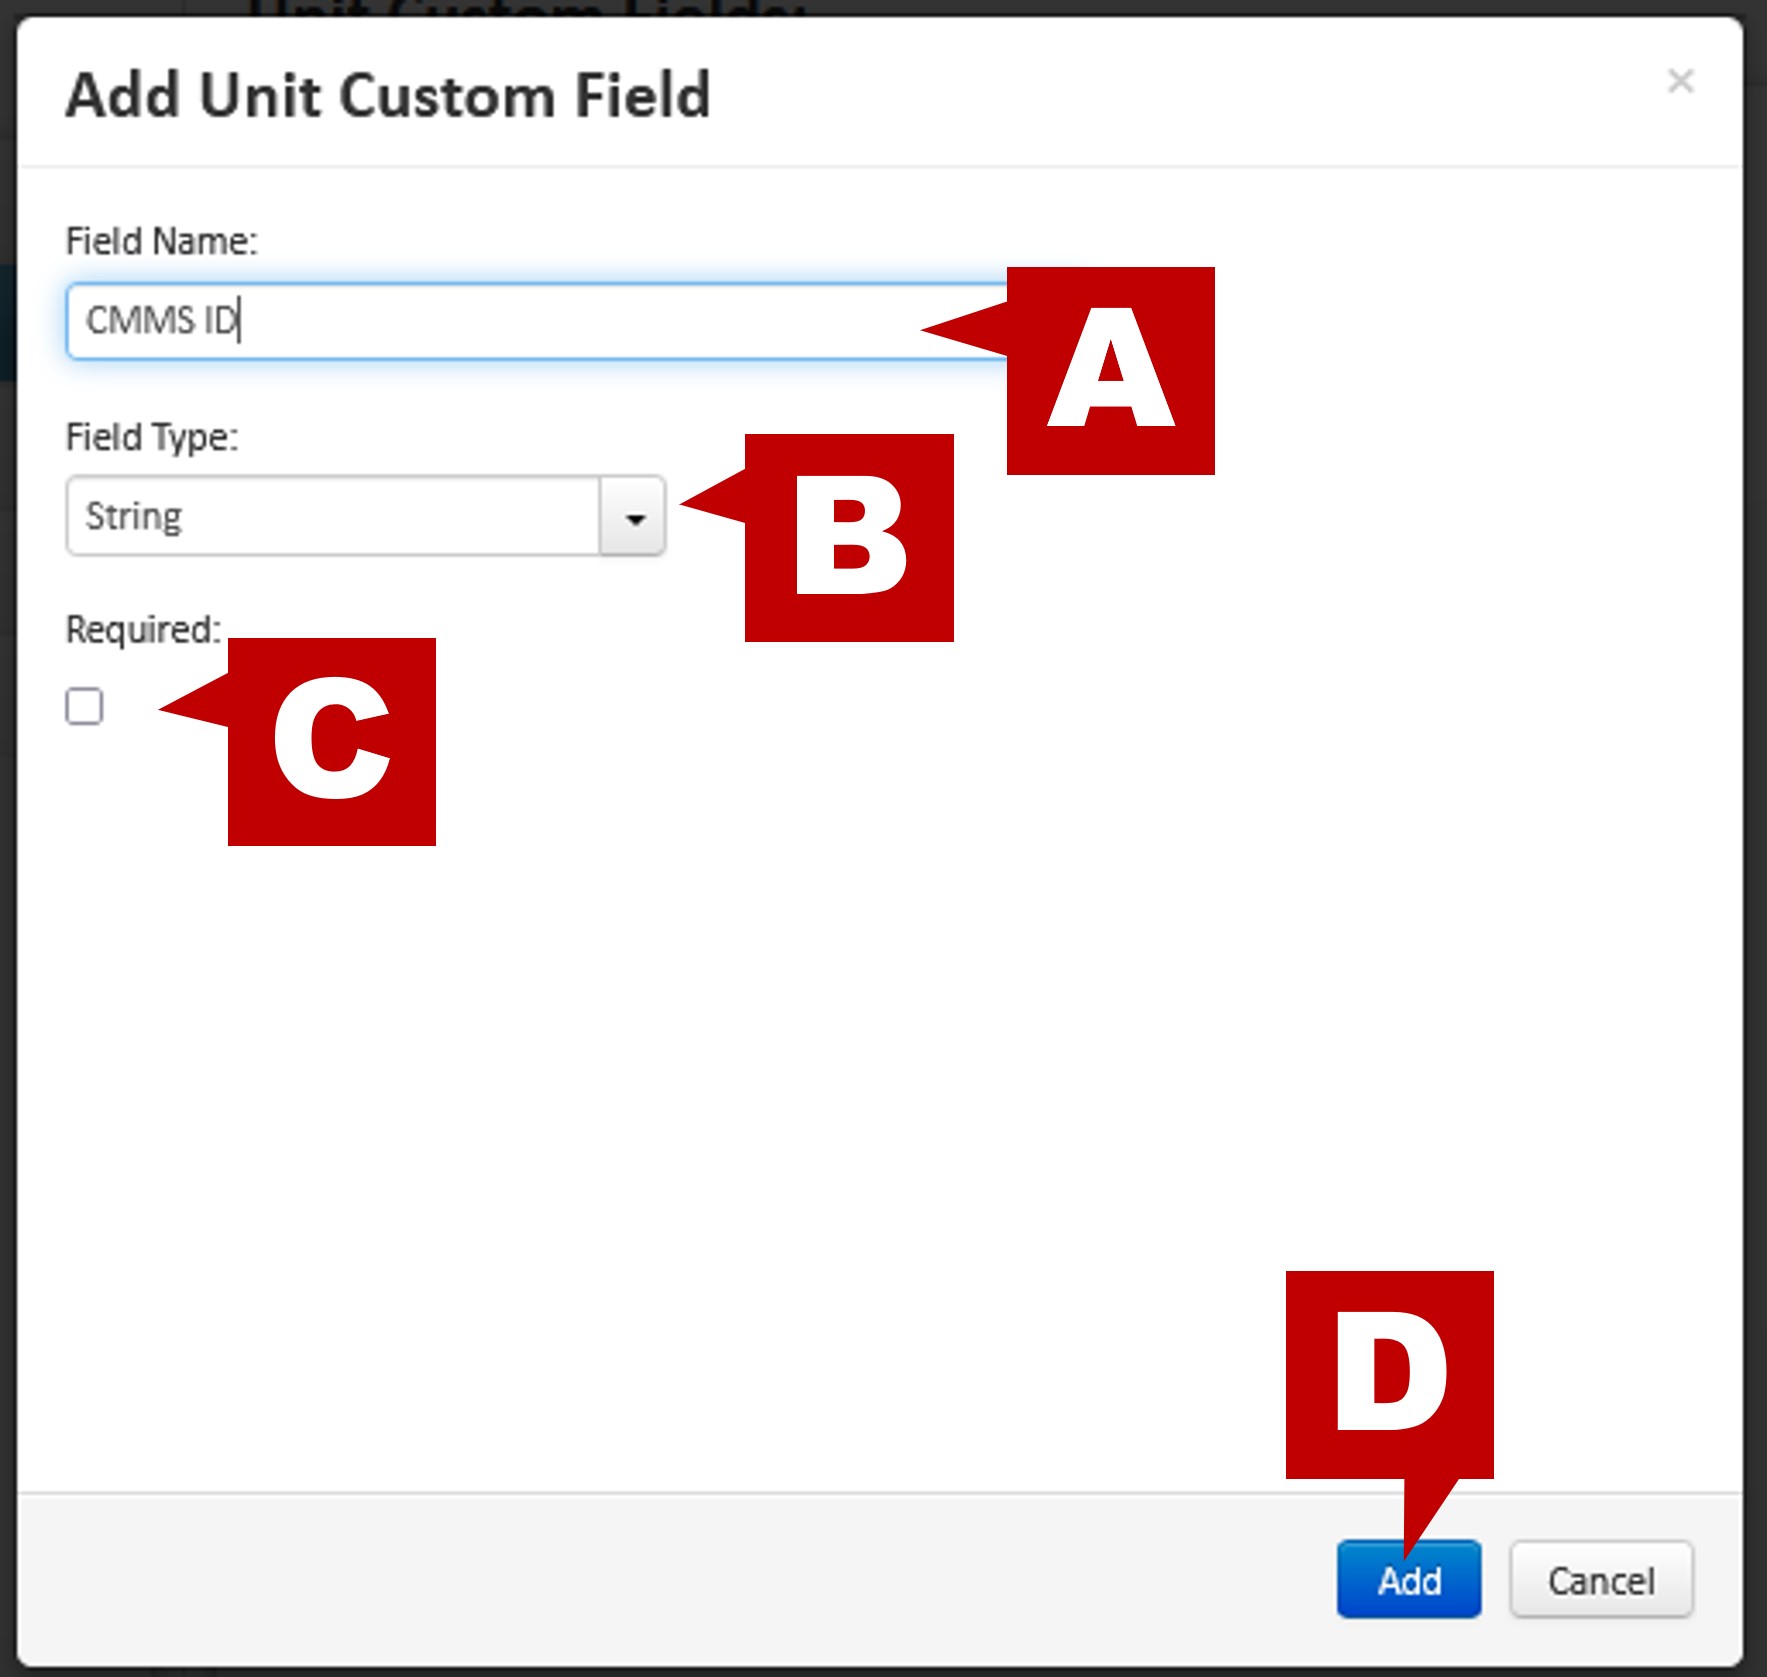
- In the pop-up, enter your field name (A) and choose the field type (B):
- String: mix of characters
- Numbers: numbers only
- Date: date only
- List: list of choices
- Separator: a space between custom fields so you can group them
- At this time you can also select if the field is required by clicking the “Required” checkbox (C).
- Click “Add” (D).
- The new field now appears in the custom field list (A). Click “Save” to save your changes (B).

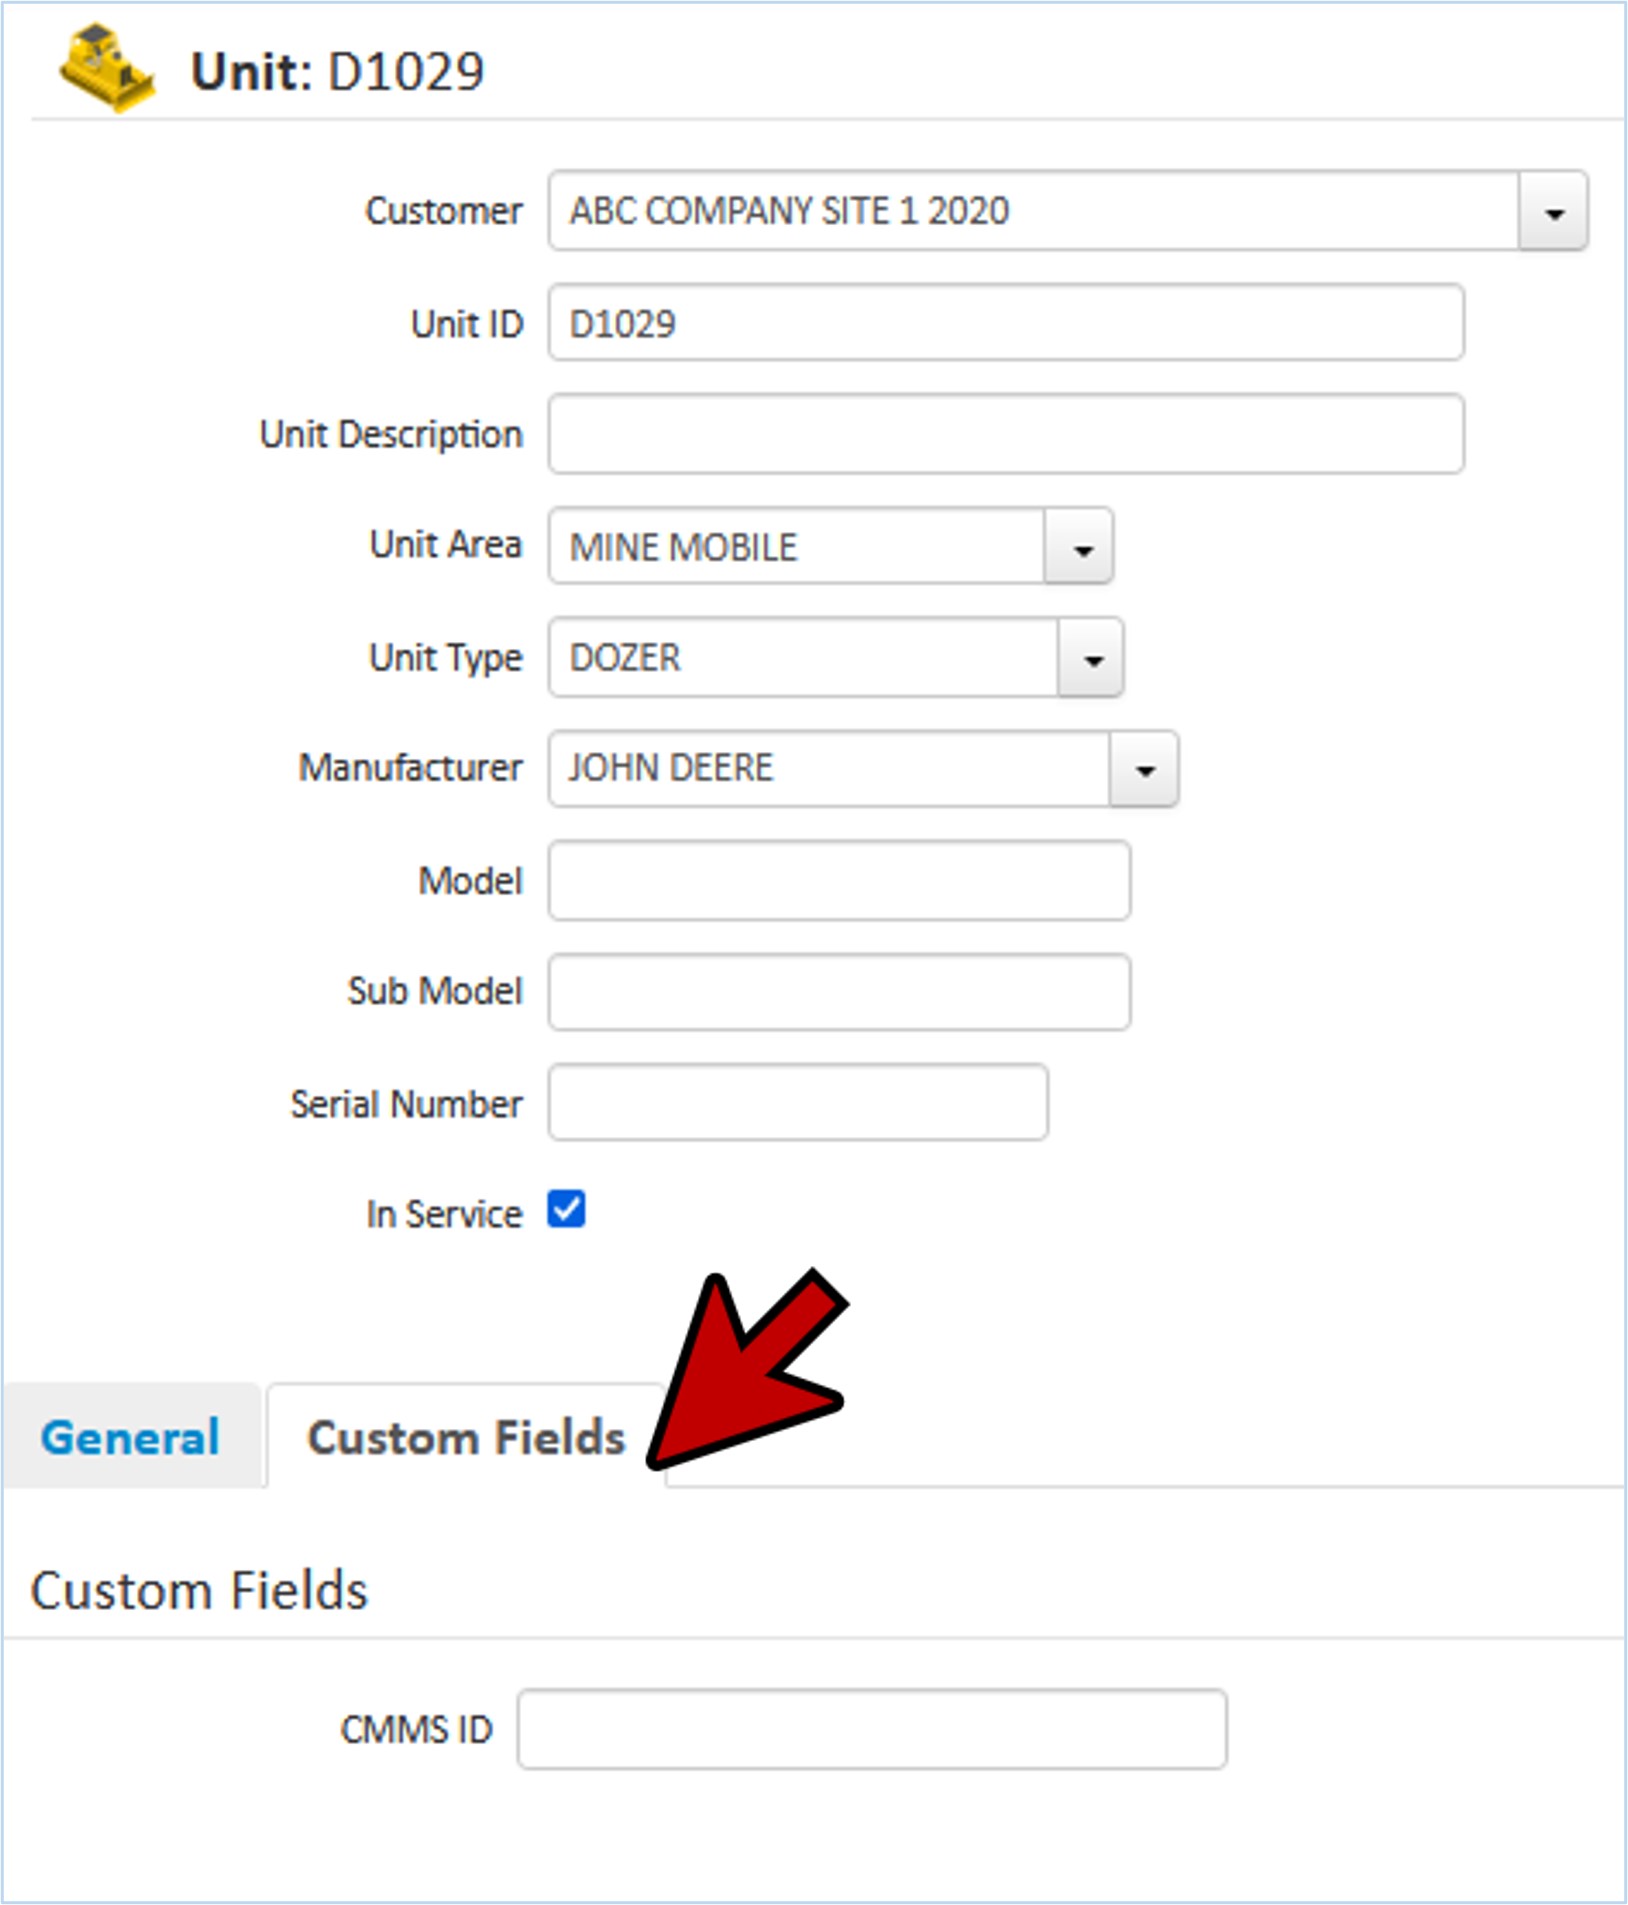
- In this example, the new custom field would be found under the Unit information for Equipment. The user would find the new field within the Unit information screen under the “Custom Fields” tab.
Deleting a Custom Field
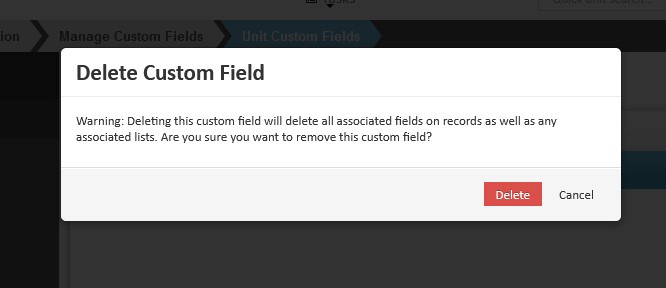
- To delete a custom field, select the field you want to remove (A) then click “Delete Custom Field”.

- A pop up will appear with a warning regarding the deletion of this field. Before deleting any field, make sure it will not adversely affect your database records.