Managing Users
In this article we will review how to add new users and set their permissions.If you do not have an Administration icon in your “Tasks” drop down or in your Account tab, you do not have permissions to access this element. For each myLab site there is one Master User that always has this permission, and they can assign it to additional users.
Accessing the User Manager
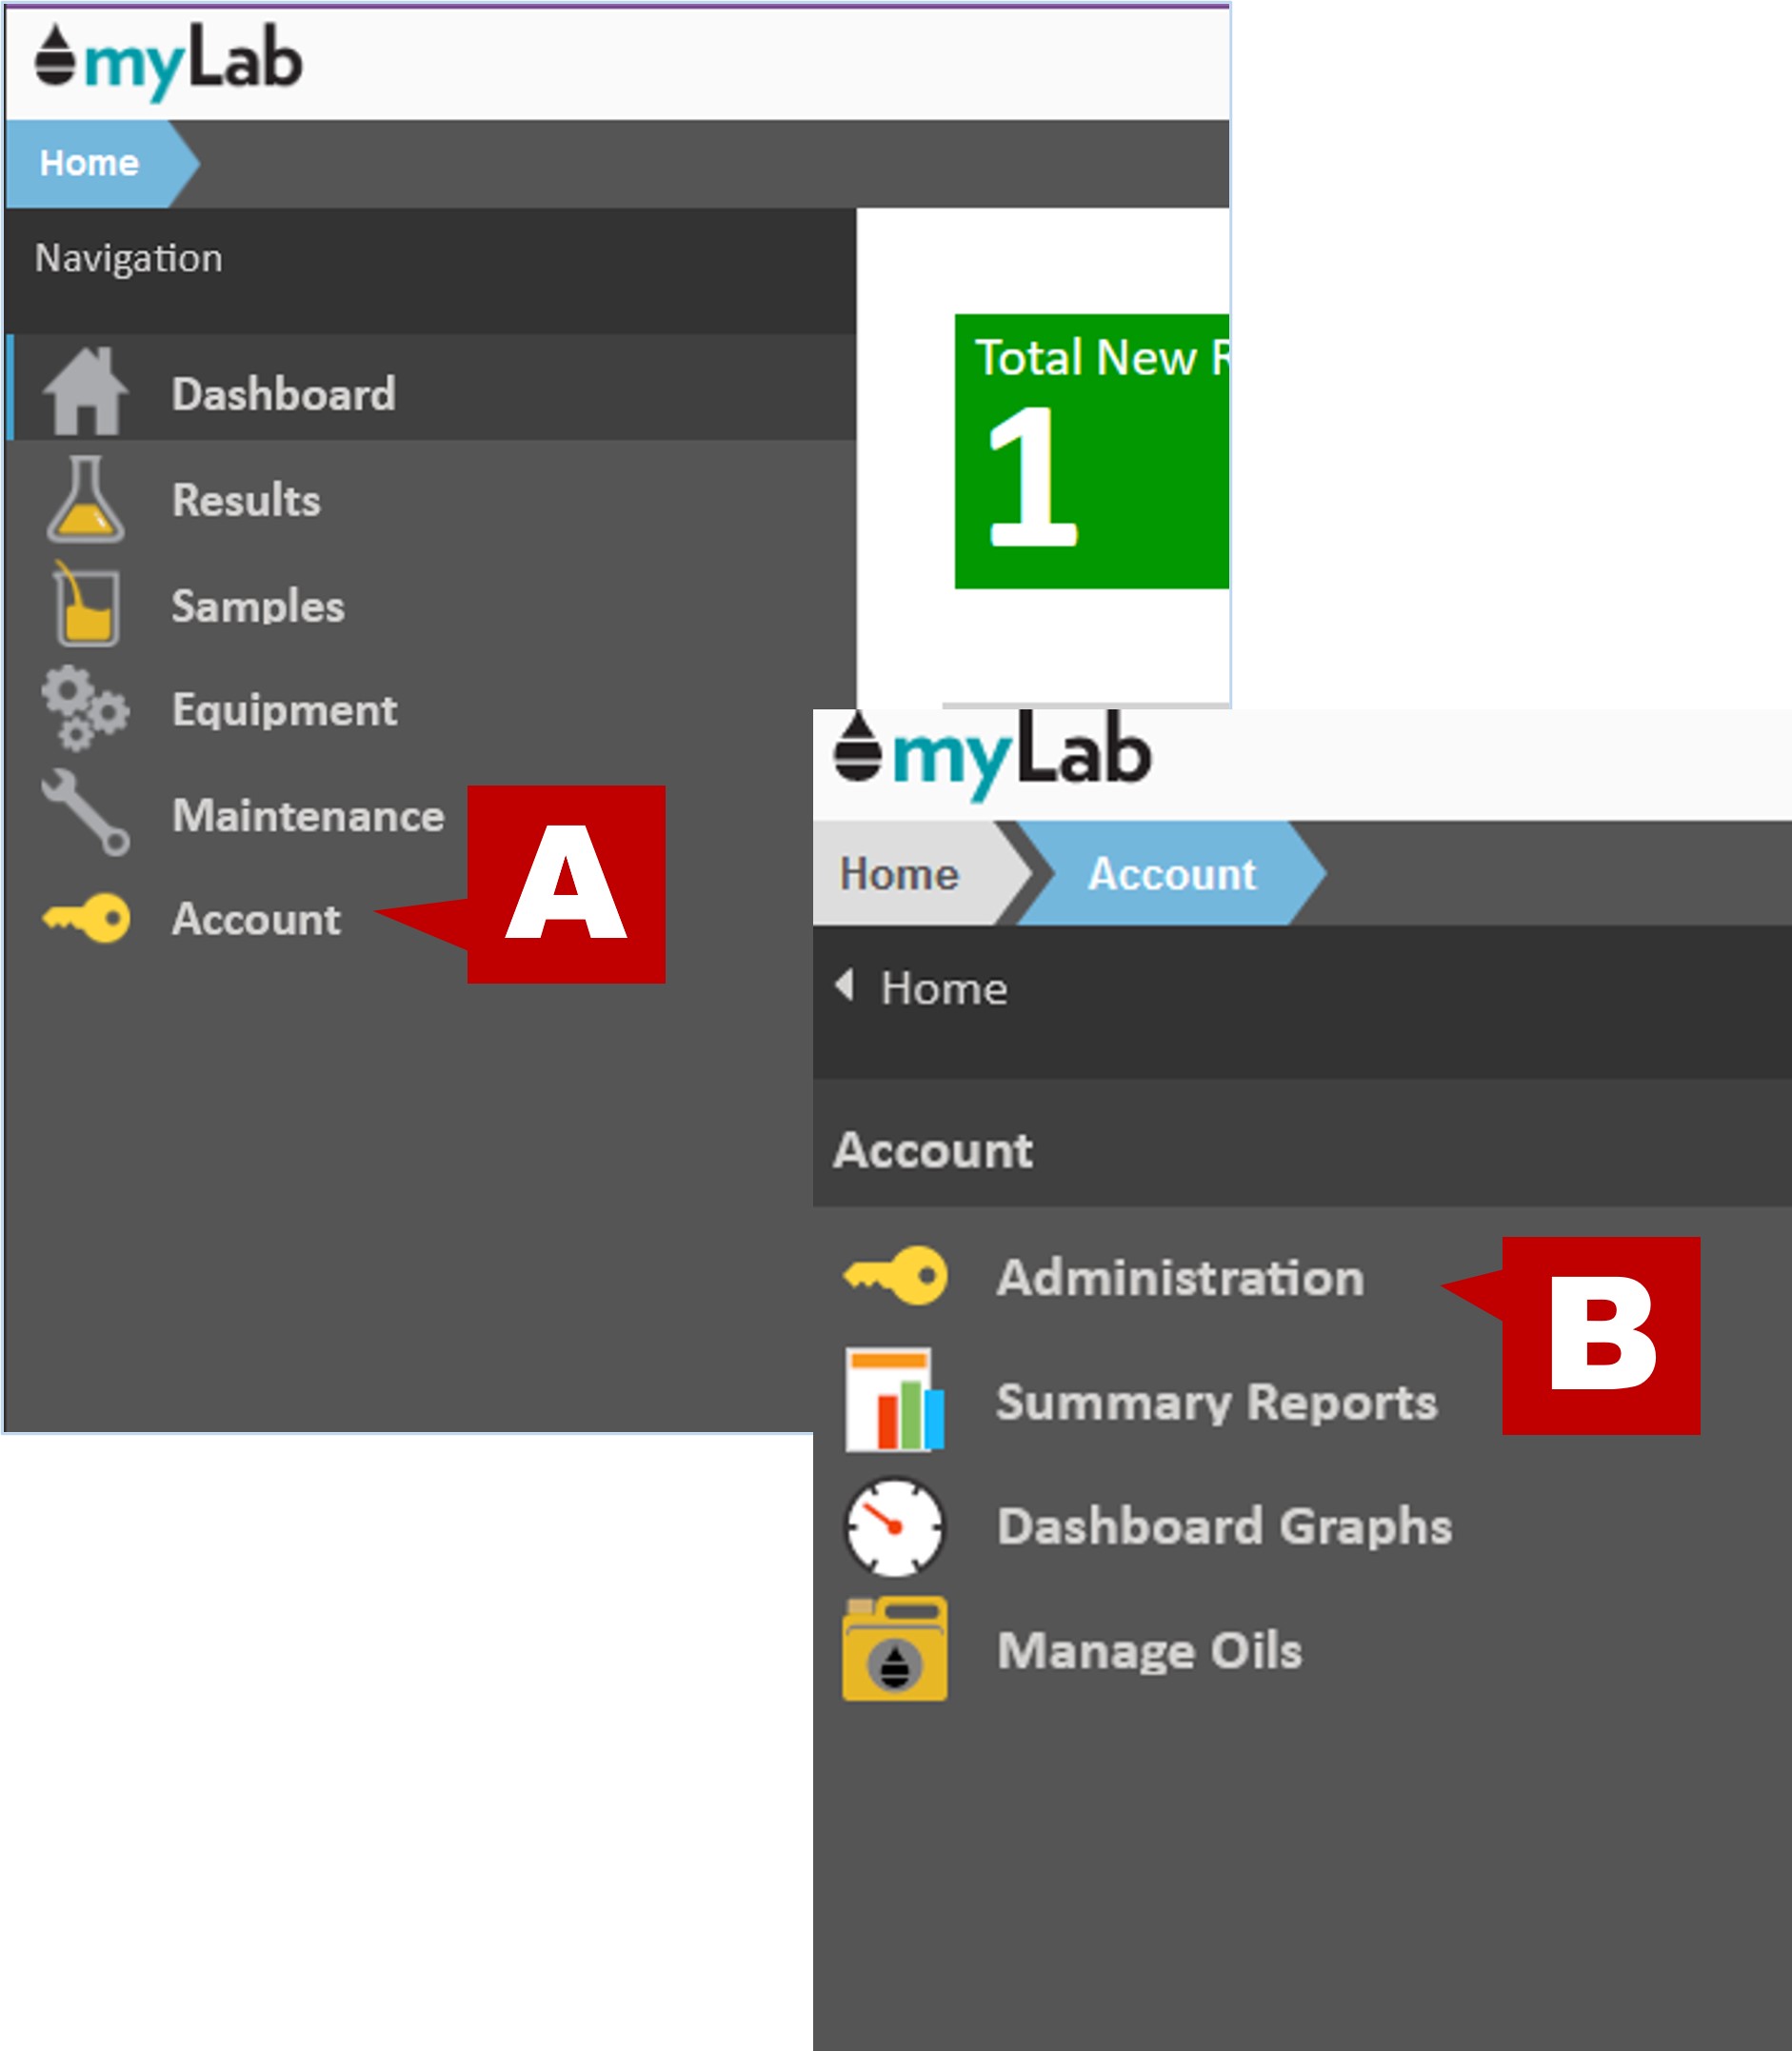
- On the myLab Home screen, click on the “Account” tab (A) or the “Administration” icon in the Tasks dropdown.
- Click on “Administration” (B) in the next menu.
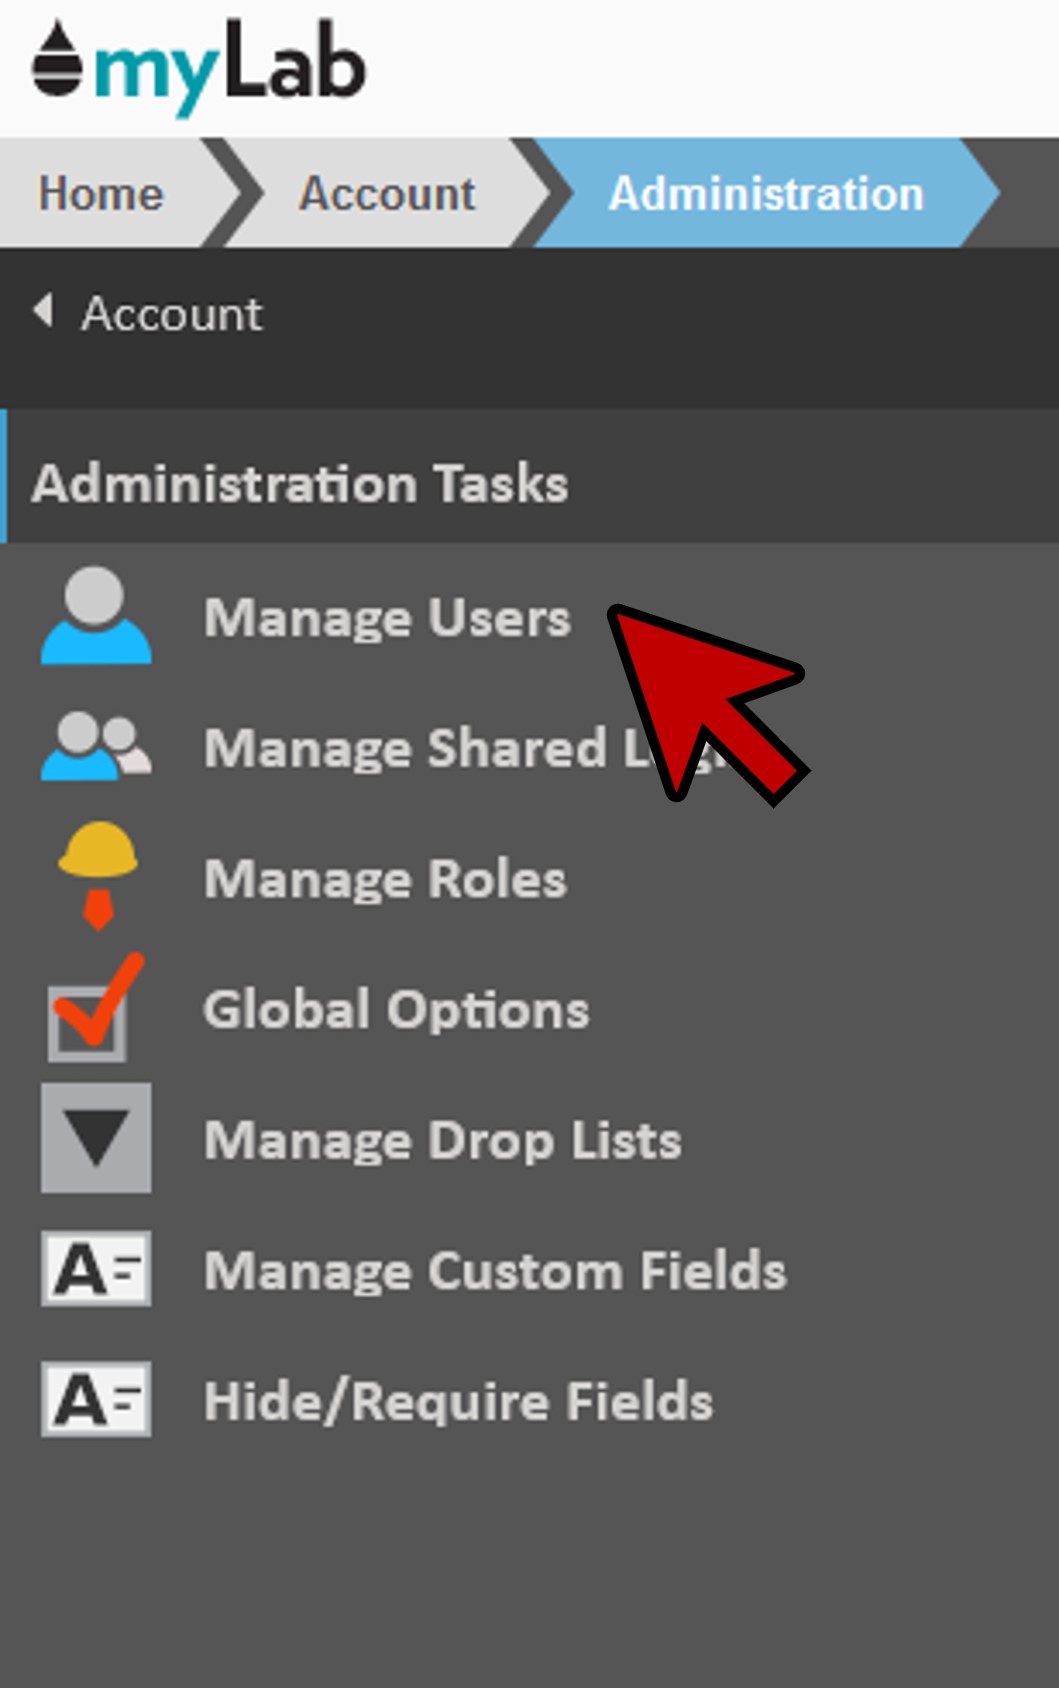
- Click “Manage Users” to open the Users window.
Add a User
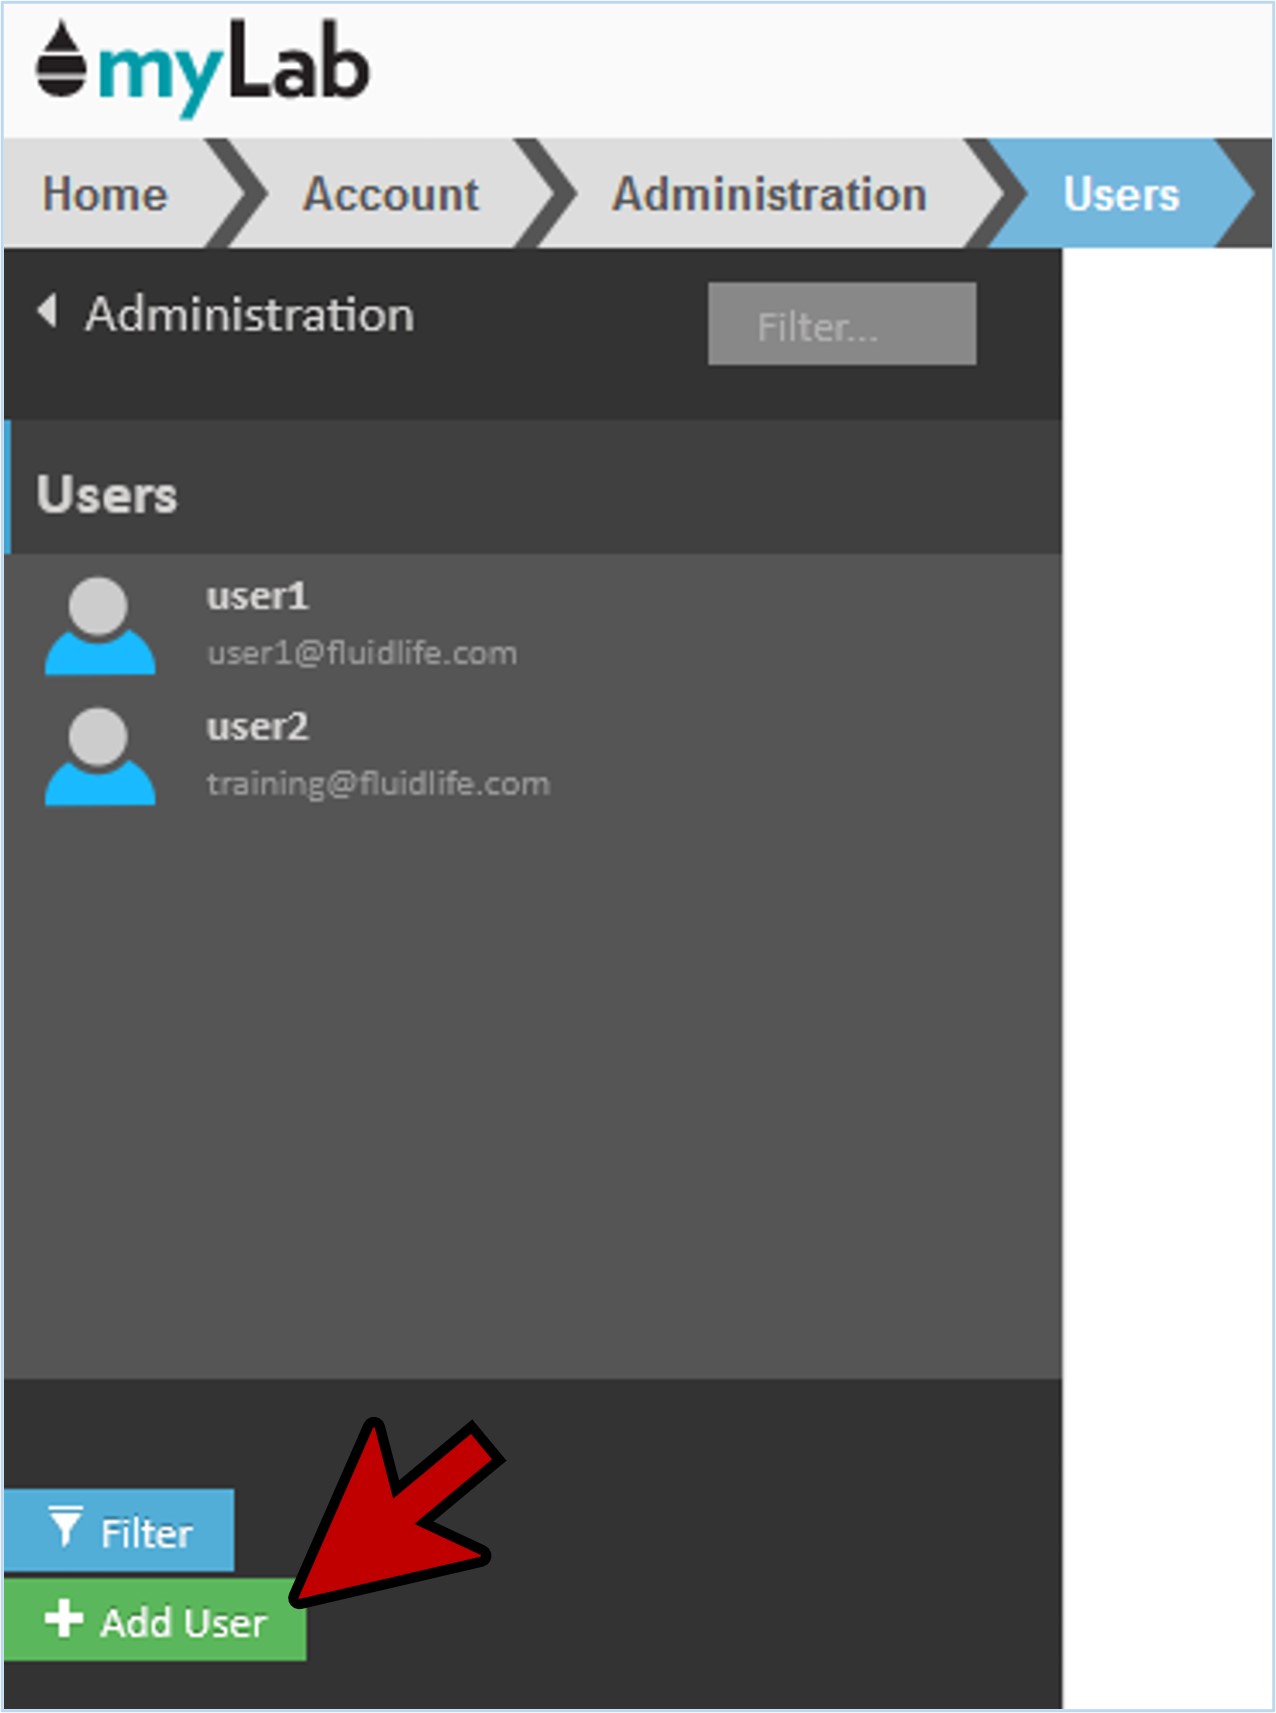
- Click the green “Add User” button located in the bottom left-hand corner of the window. A popup window will then display where you can enter the new user’s email address. Click the blue “Next” button after entering the email address.

If an existing user using that same email address is found in the system, a pop up will appear asking if you wish to invite the user to have access to your data. By clicking “Yes”, you will be able to pre-configure the user’s profile before sending an invitation to the user.
If there isn’t an existing user, a “New User” screen will display where you can configure their profile.
Info
- Begin by creating a unique username and password (A) for the user.
- On the “Info” tab, complete all of the contact information (B).

Preferences
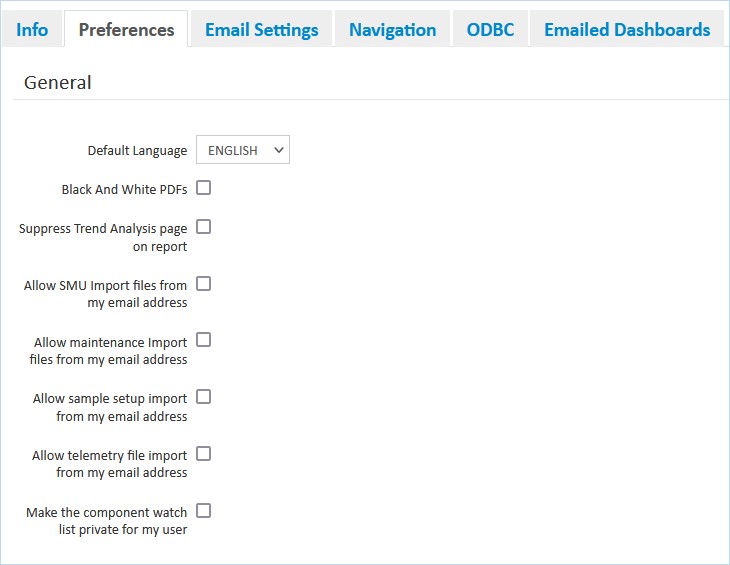
- On the “Preferences” tab, configure to what degree a new user will be notified regarding myLab activities. Also configure the language requirements (English/French).
Data Filters
- The “Data Filters” tab allows you to create the rules to restrict what equipment and samples a user is allowed to see (useful for lube suppliers, OEM and consultants).
- No rules will allow them to see everything you can see.
- A blank field will match anything and data allowed by any single rule will be available to the user.

Email Settings
- The “Email Settings” tab allows you to select the emails the new user should receive – from test results to product announcements and reliability alerts.
- This is also where you can trigger emails to be sent based on due samples, forwarded samples, and other rules.

Permissions
- The “Permissions” tab allows you to control the degree to which the new user can interact during certain activities.
- Settings include:
- View-Only
- Full Access – within this section you can provide the option for the new user to
- Manage users and roles (Note: You should exercise great caution in granting other users the ability to manage users and roles unless they are a full administrator on the account.)
- Moderate sample comments
- Acknowledge samples
- Discuss samples
- Custom – within this section you can customize the level of access a user has for each activity. The new user can: Inspect, Edit, Add, Delete, or receive No Access. Similar to the “Full Access” selection, the user can be set to fully manage a number of additional elements including Users and Roles.
- From Role – standard Roles have been included with myLab with specific permissions for each. You can set your new user to have the same permissions as the role noted. (You can also set up custom Roles for your organization).


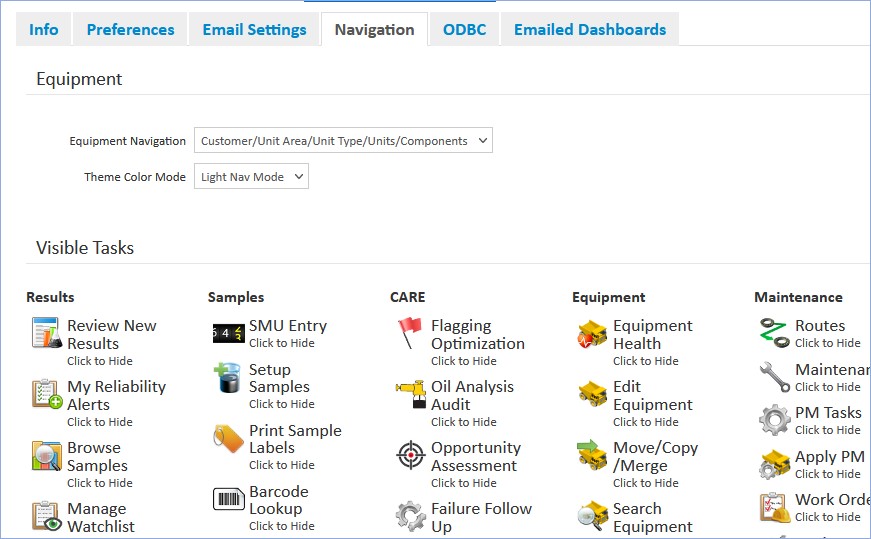
Home Tasks
- The “Navigation” tab allows you to hide tasks from the main menu or Tasks dropdown on the Home Page if they are not required for this user.
ODBC
- The “ODBC” tab (Open Database Connectivity) allows the new user to query the data and write custom reports in tools such as Excel, Crystal Reports or Business Objects.
- The user would need to download and install the myLab ODBC driver by generating a token for their use.

Activation Email
- Once all of the configuration is completed, click the blue “Send Activation Email”. This will also save all of the new user data in the system.

- The user will receive an activation email from [email protected]. Be sure to include this email address in the users safe sender list as all reports and other notifications are sent from this address. The user will have five days to complete activation of their account.
