Printing and Exporting Options
Printing an Oil Analysis Report
- Open your latest oil analysis results.
- To print a hard copy of the oil analysis, CLICK the View Sample Report button.
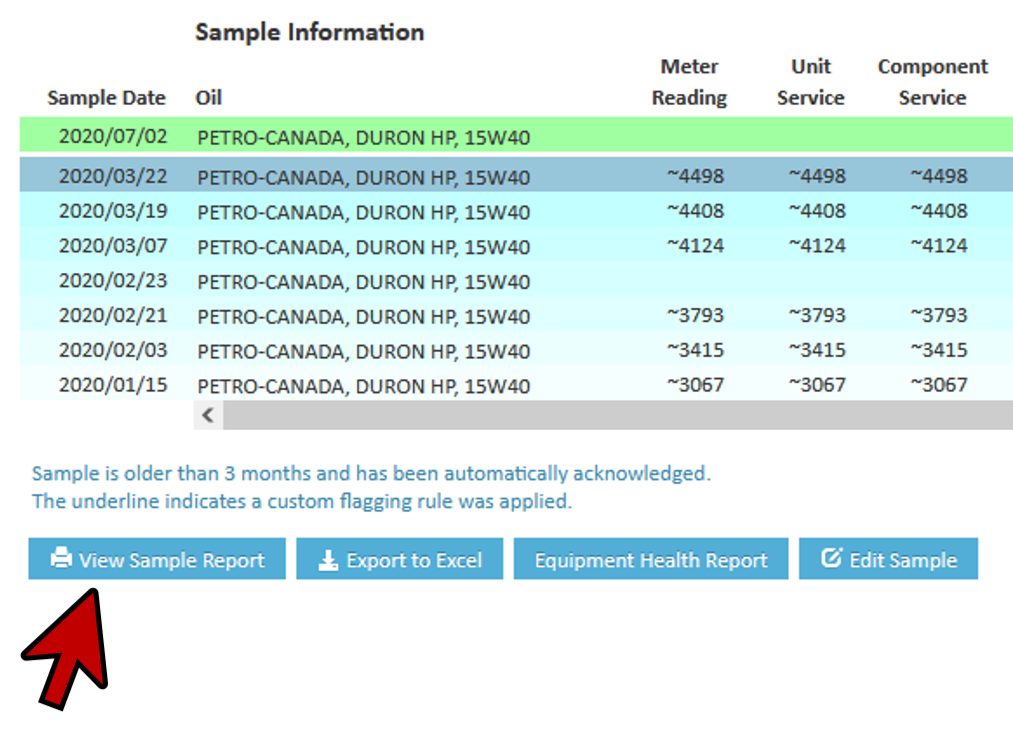
- The report will open in a new tab using the default PDF viewer of the browser. Follow the viewer’s or the browser’s printing steps to print directly to the Default Printer. The tab may be closed when finished.
- To print a report with older results, first select the row where the oil analysis data will appear at the top of the window then repeat Step #2.
Exporting Oil Analysis Results to PDF
- Open the latest oil analysis results.
- To print a hard copy of the oil analysis, CLICK the View Sample Report button.
- The report will open in a new tab using the default PDF viewer of the browser. Follow the viewer’s or the browser’s download/save steps to save a copy of the Oil Analysis report to the Desktop in Acrobat PDF format. The tab may be closed when finished.

Exporting Oil Analysis Results to Excel
- To export the oil analysis to Excel, CLICK the Export to Excel button.
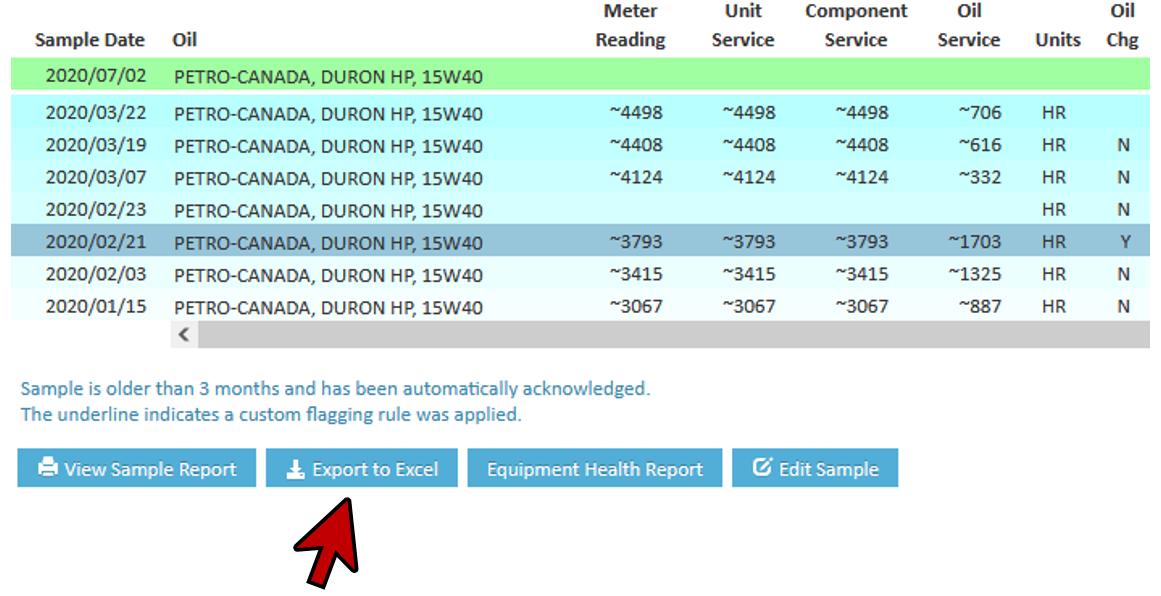
- All the associated data in history will be exported, and a prompt will appear to open the file. Once open you can save the results as well. CLICK Close to return.
- CLICK Home to return to the Home page.
Standard Summary Reports
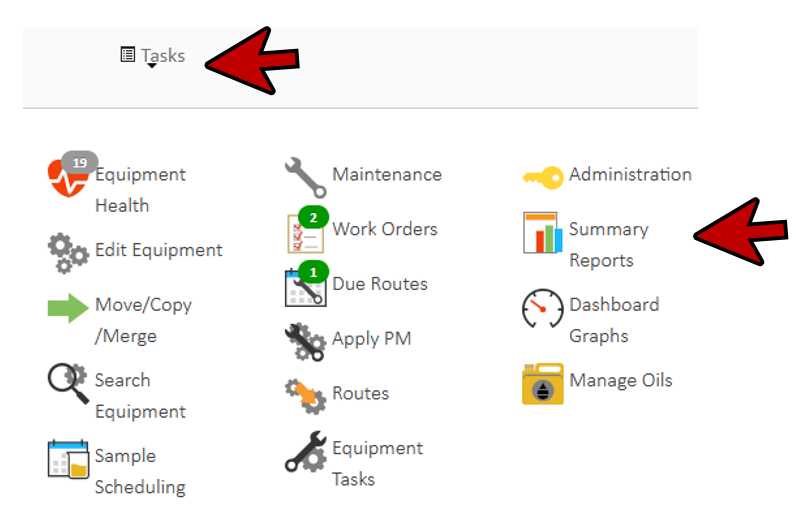
- CLICK the Summary Reports under Tasks to open the Oil Sample Results window. Alternatively, from the Home page, select Account>>Summary Reports.
- From the left navigation screen, you can select from a number of standard summary reports to view.
- Select a report and follow the instructions provided to create your report.
Example: Equipment List
- If you want to review your equipment list, select Equipment List from the Reports list.
- Select a company from the Customers list.

- CLICK the Generate Report button; this will display an alphabetically sorted list of all units.

- CLICK the Edit All Components button to access global editing features.
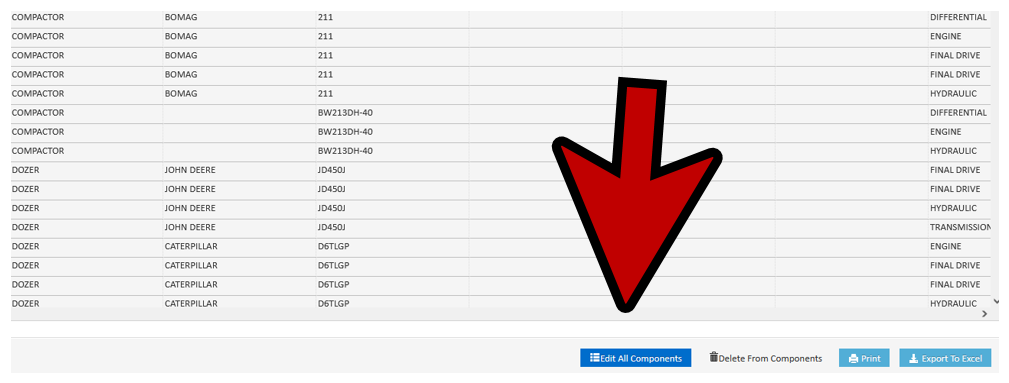
- This feature allows you to edit any and all cells that become white. You can scroll over and make bulk changes basically to all component information.
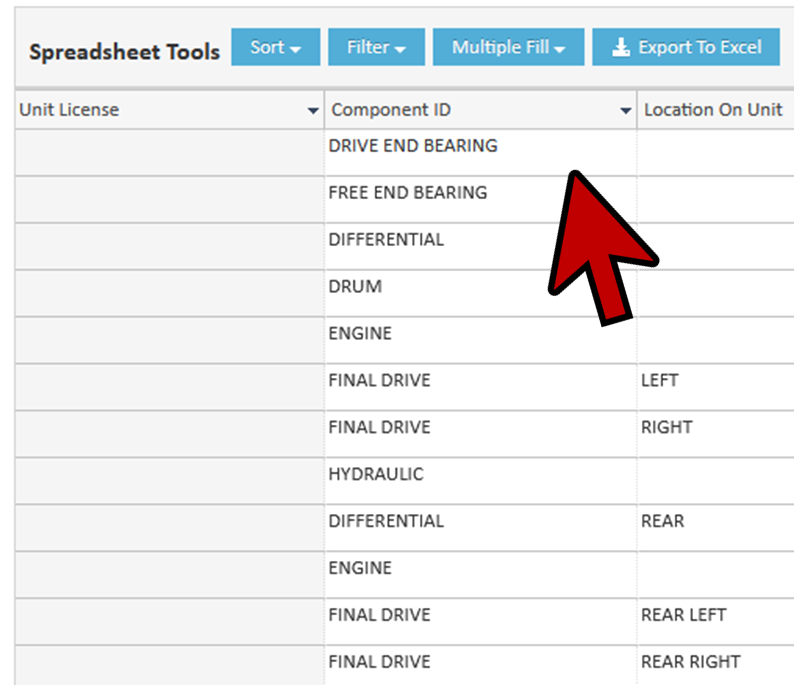
- Click on the Component ID Column.
- Select Filter.

- Click on the drop down box and the filter you’d like to use. Click FILTER.
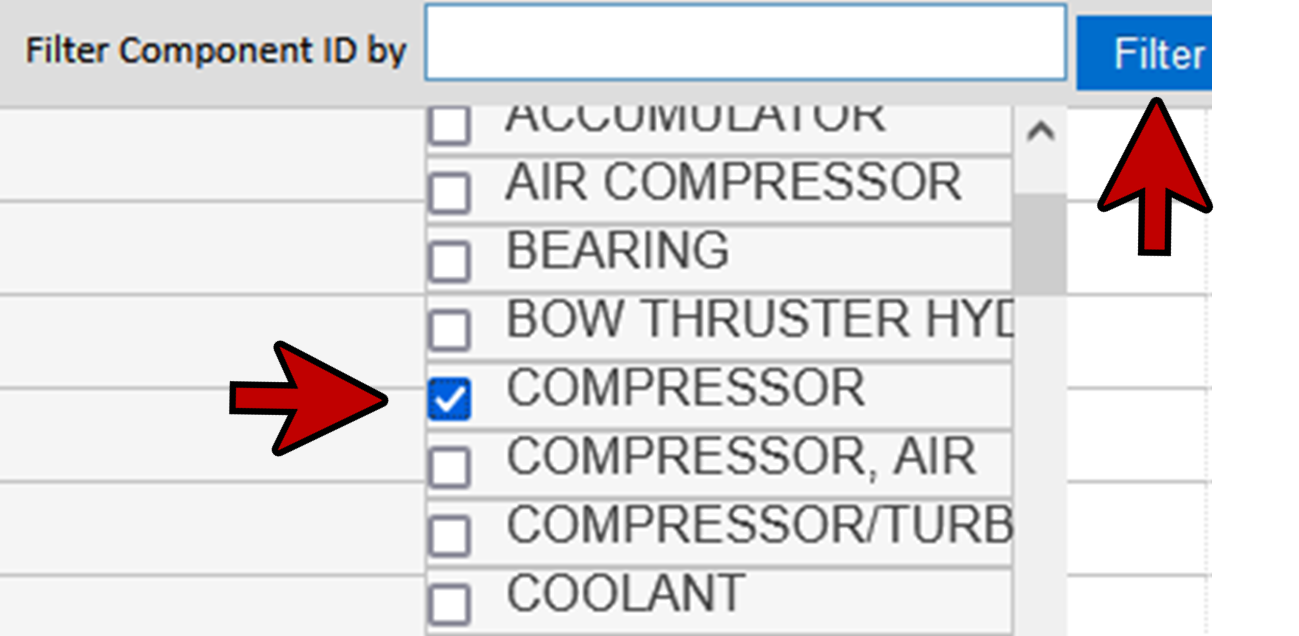
- You should have a list of equipment based upon the filter selected.

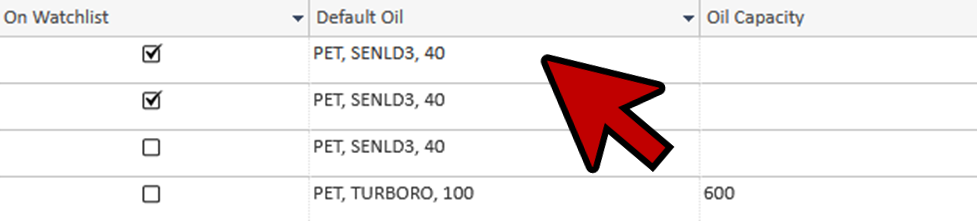
- While still in Edit All Components mode, scroll over to the Right until you can see the Default Oil column. If you want to change the default oil, click on the drop down list and select the new oil.
- You can also copy that oil to the one below. Click on the cell beside so that you remove the little black arrow and then Click and drag on top of the fields below.
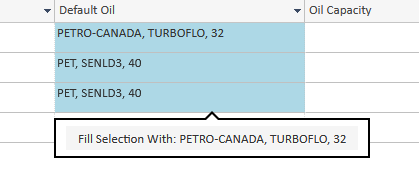
- Once you select what you want to fill you can Click the Fill Selection With. *You can do so much using this function as you can update mass units and components.
- Click Save.
- The report may be printed by Clicking on the Print button located in the lower right-hand corner of the window.

- CLICK Cancel and then Home to return to the Home page.