Managing Equipment: New Unit Records
The Equipment database is the foundation for all myLab data and identified by the UNIT, COMPONENT and LOCATION (optional) description.
UNIT ID + COMPONENT ID + LOCATION (Optional) = UNIQUELY IDENTIFIED OBJECT
In this article, you will learn how to create a new record using the Unit Template and Manual methods.
Creating New Unit Records: Template
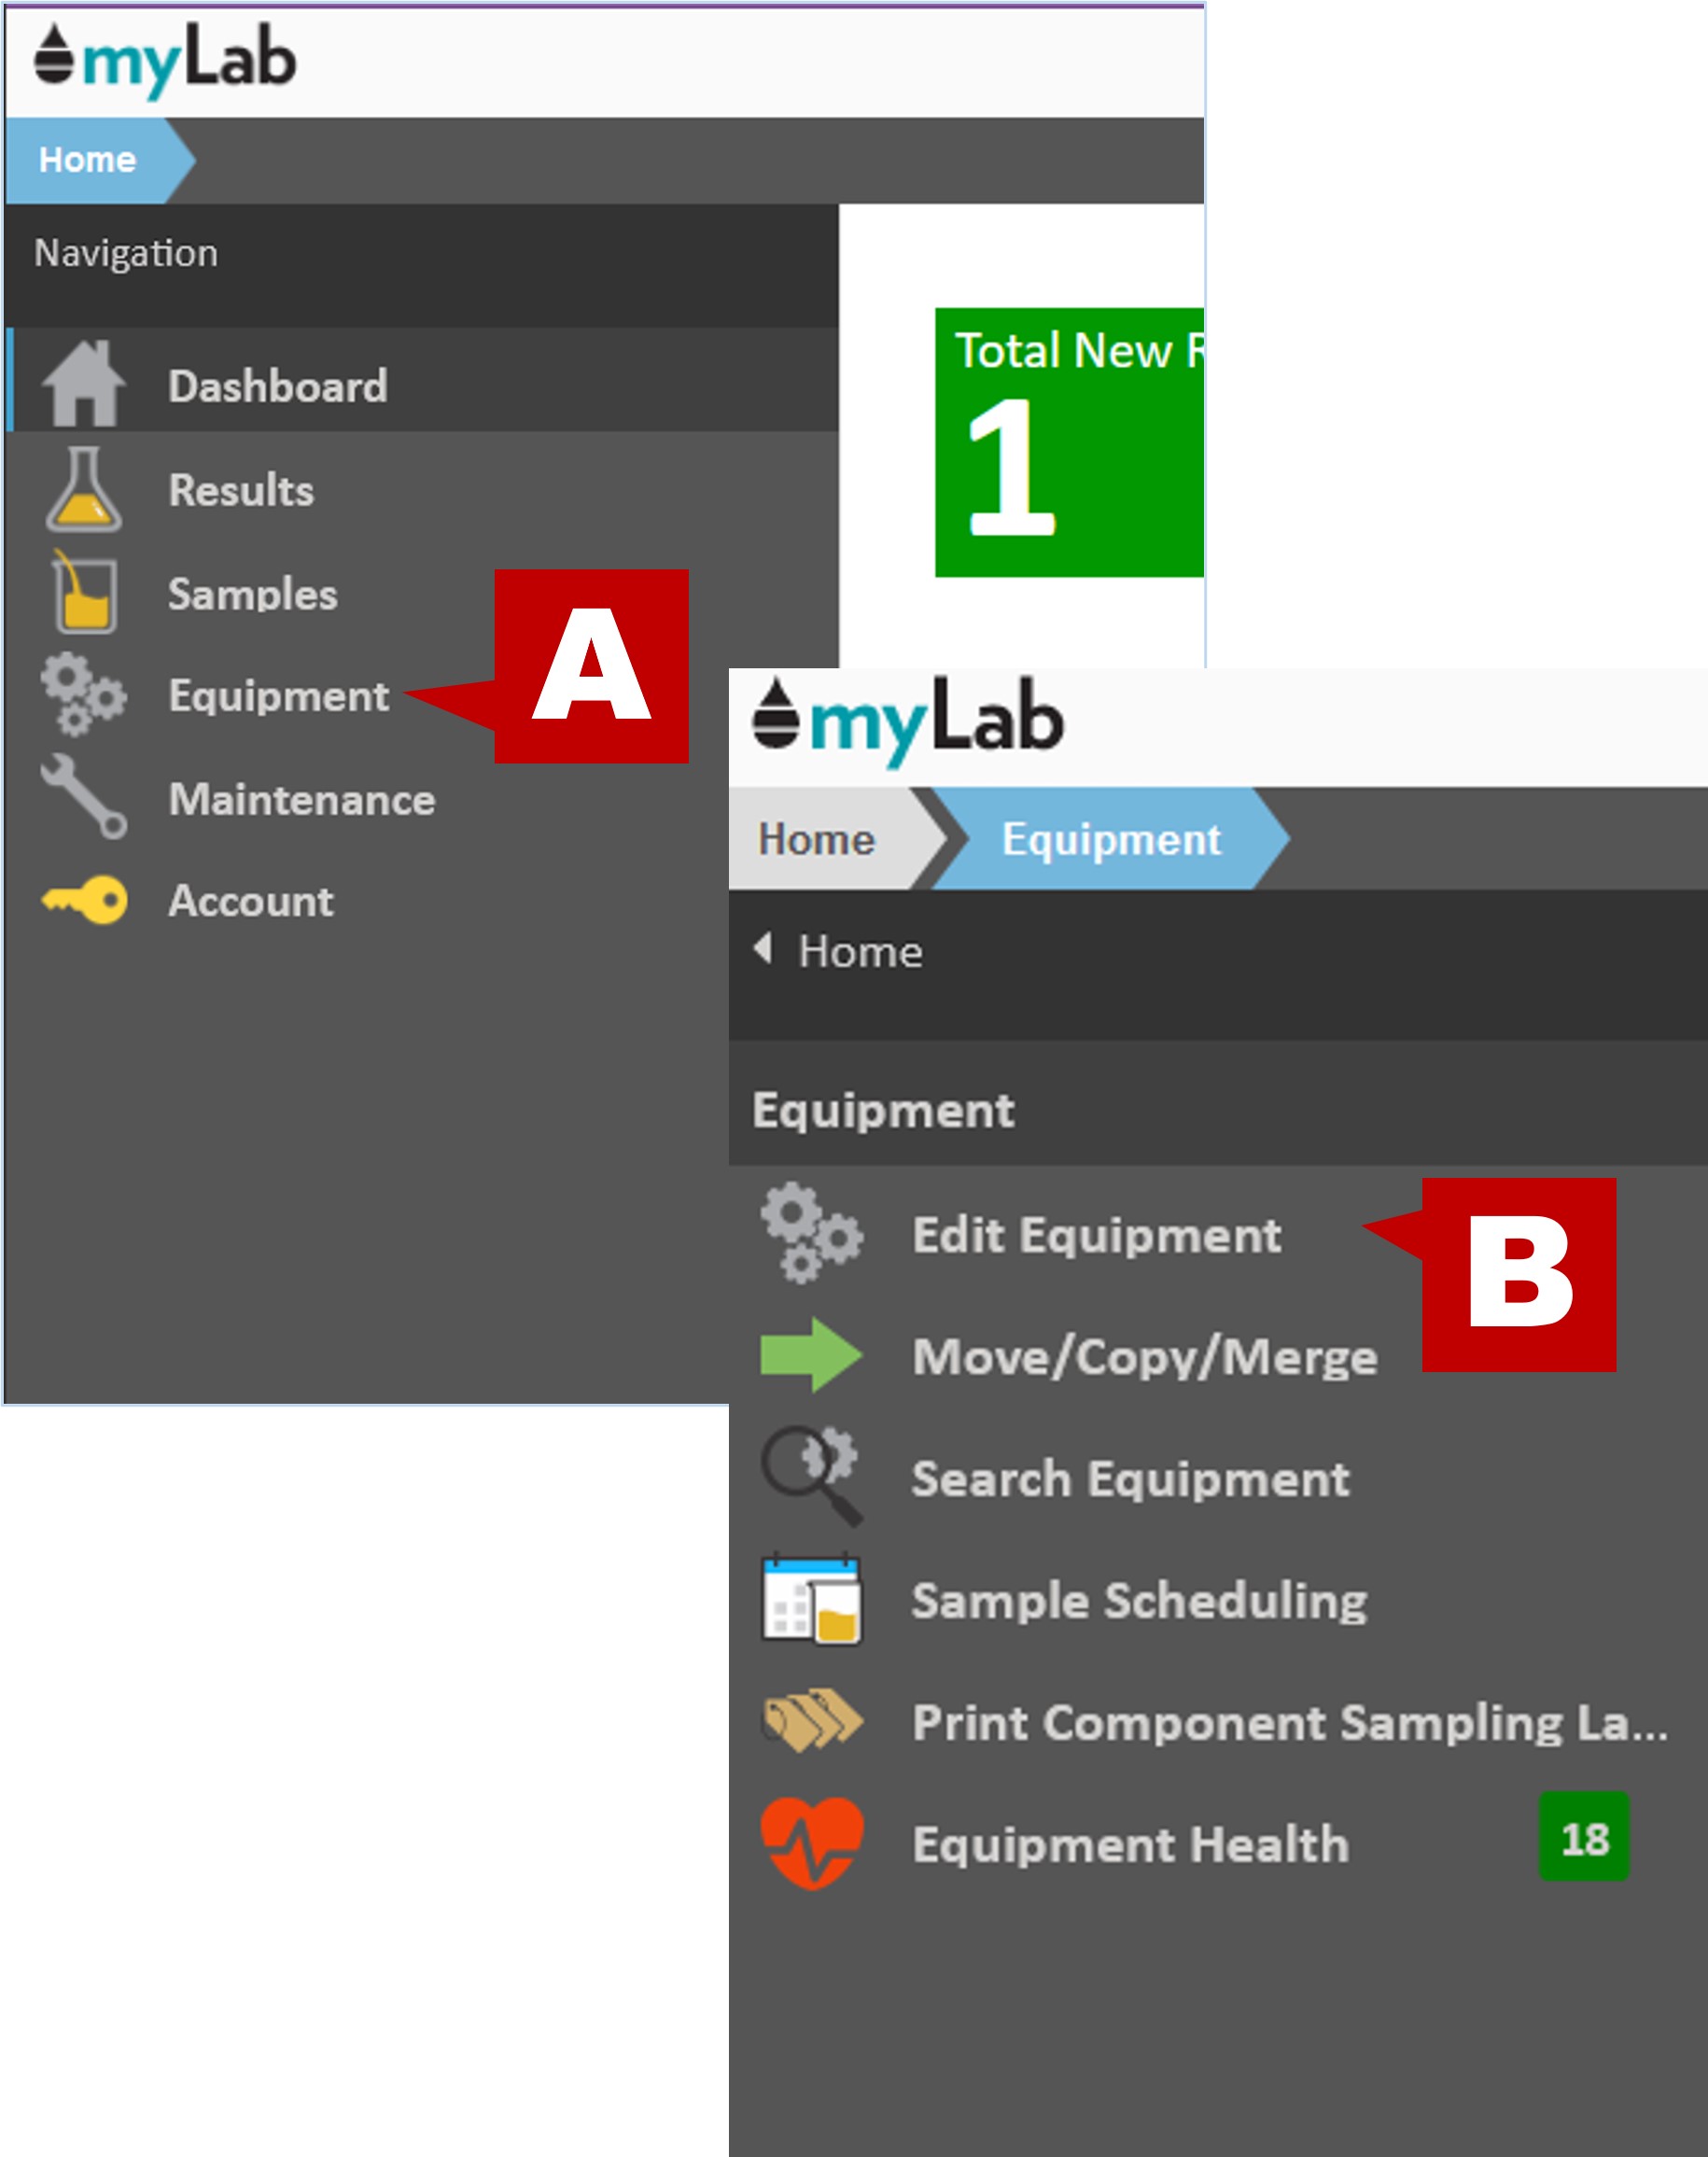
- From the Home Page, click “Equipment” (A) in the left menu bar, then select “Edit Equipment” (B).
- Select the location or customer from the list you wish to add the unit to.
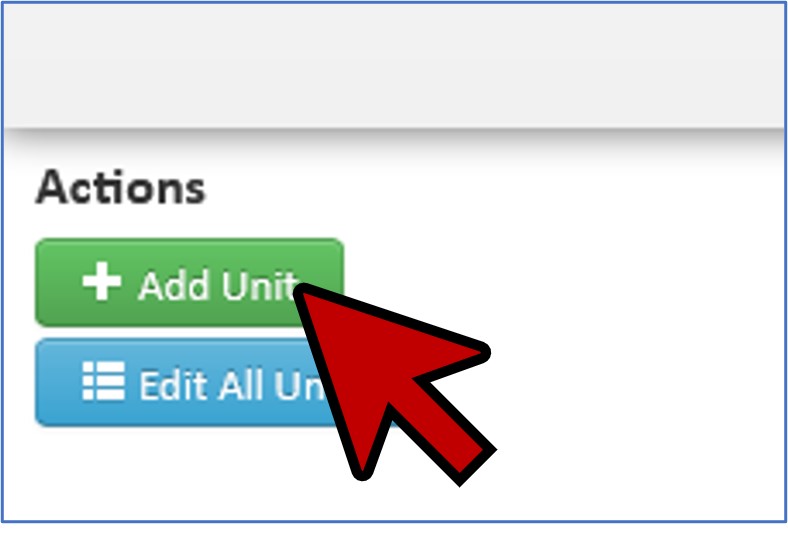
- Click the “Add Unit” button.
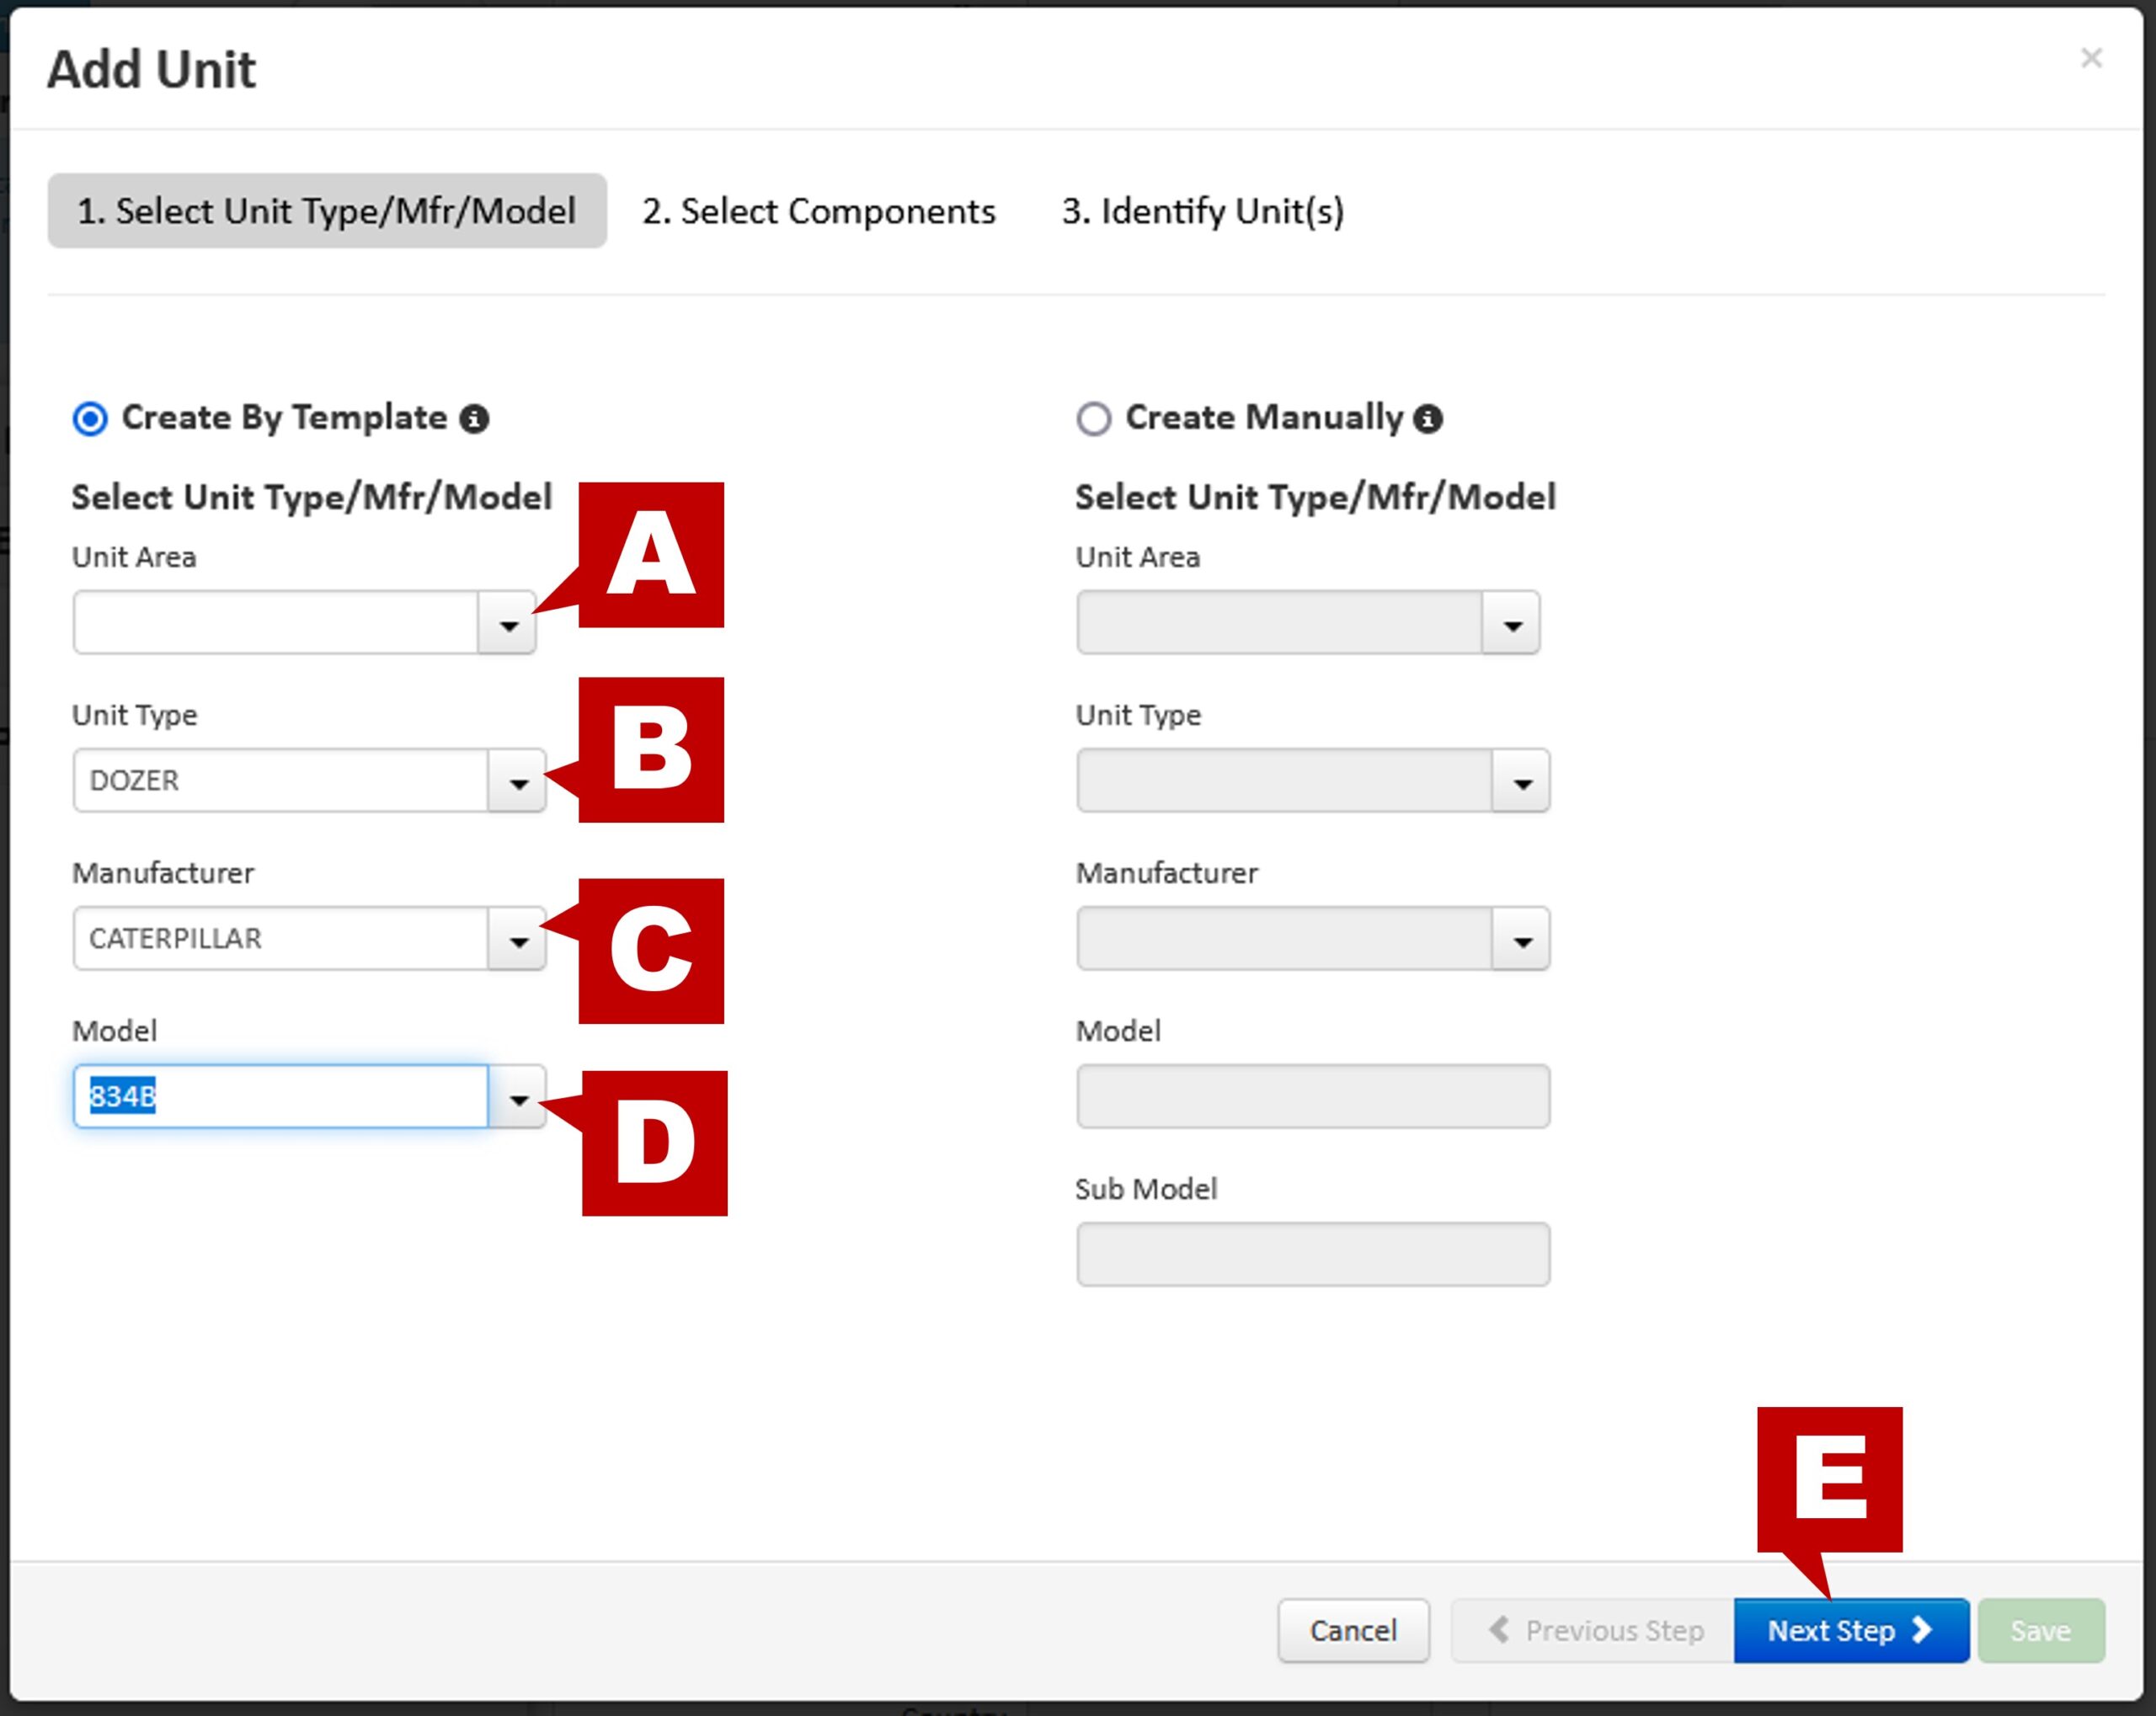
- Select “Create by Template”
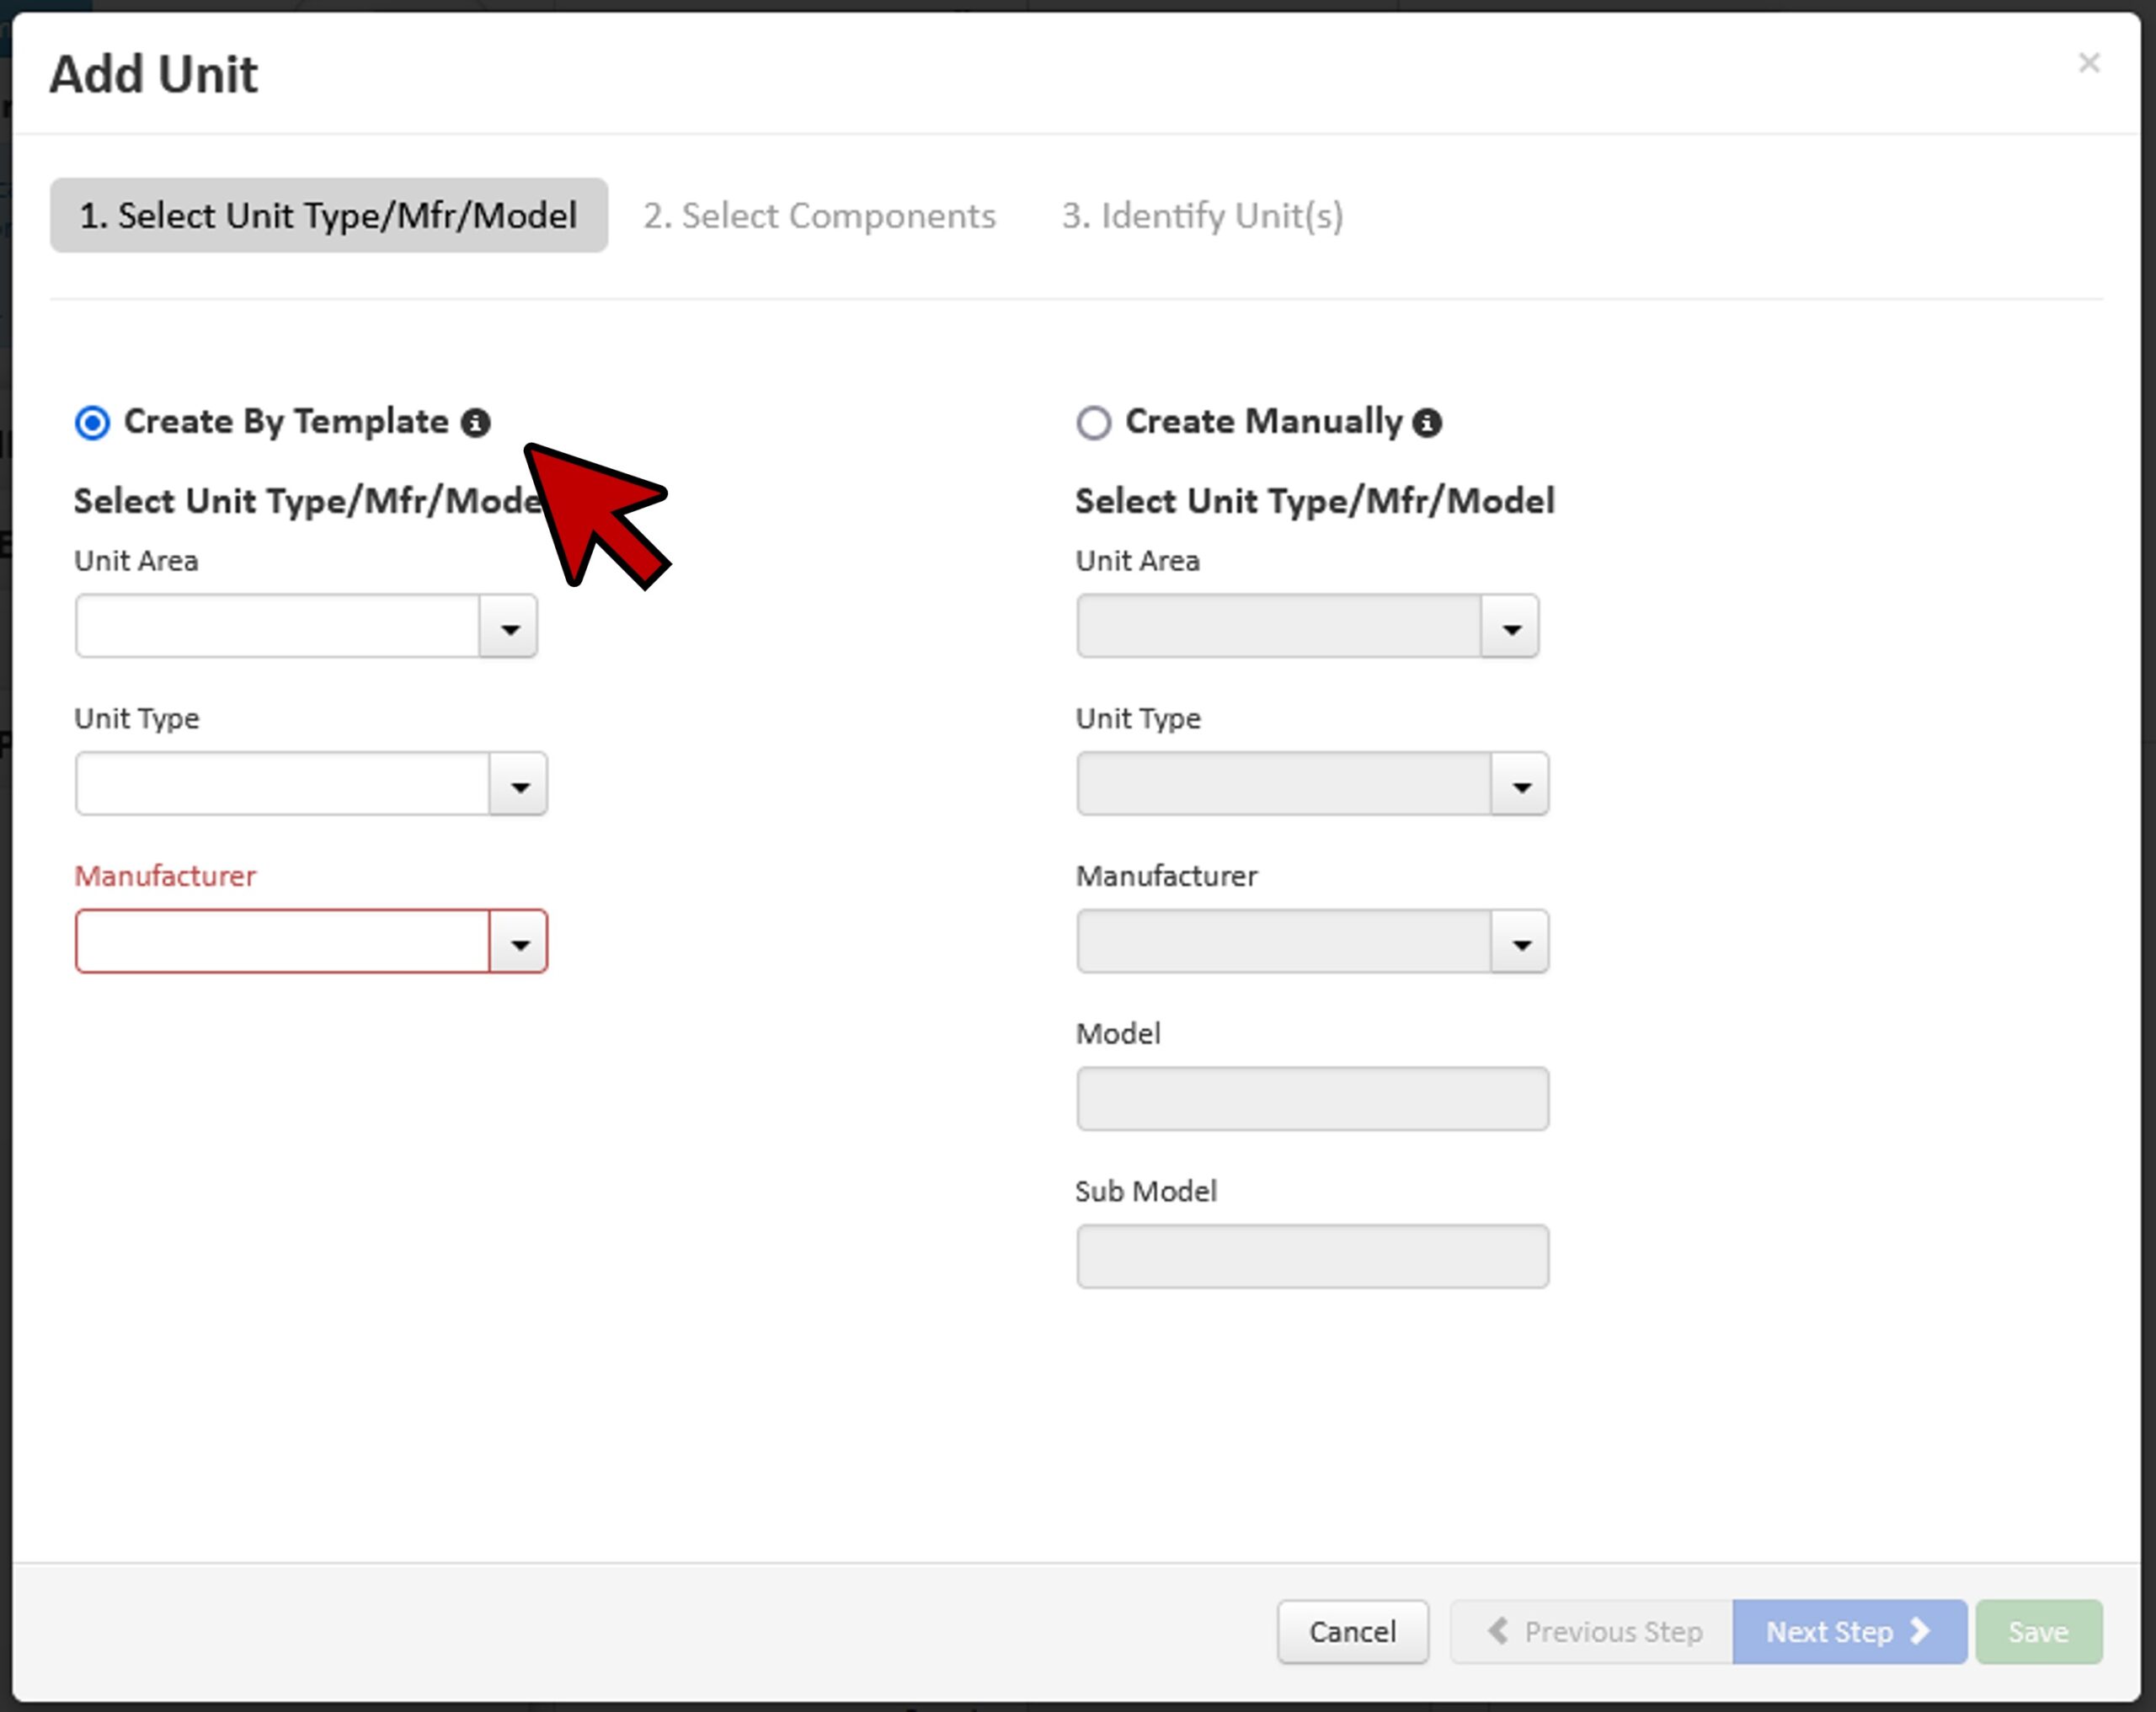
- There is an option for Unit Area (A) which you can us if needed in your database. For this example, we will start with Unit Type. We select the appropriate Unit Type (B), Manufacturer (C), and Model (D) from the drop down lists.
- Click “Next Step” (E).
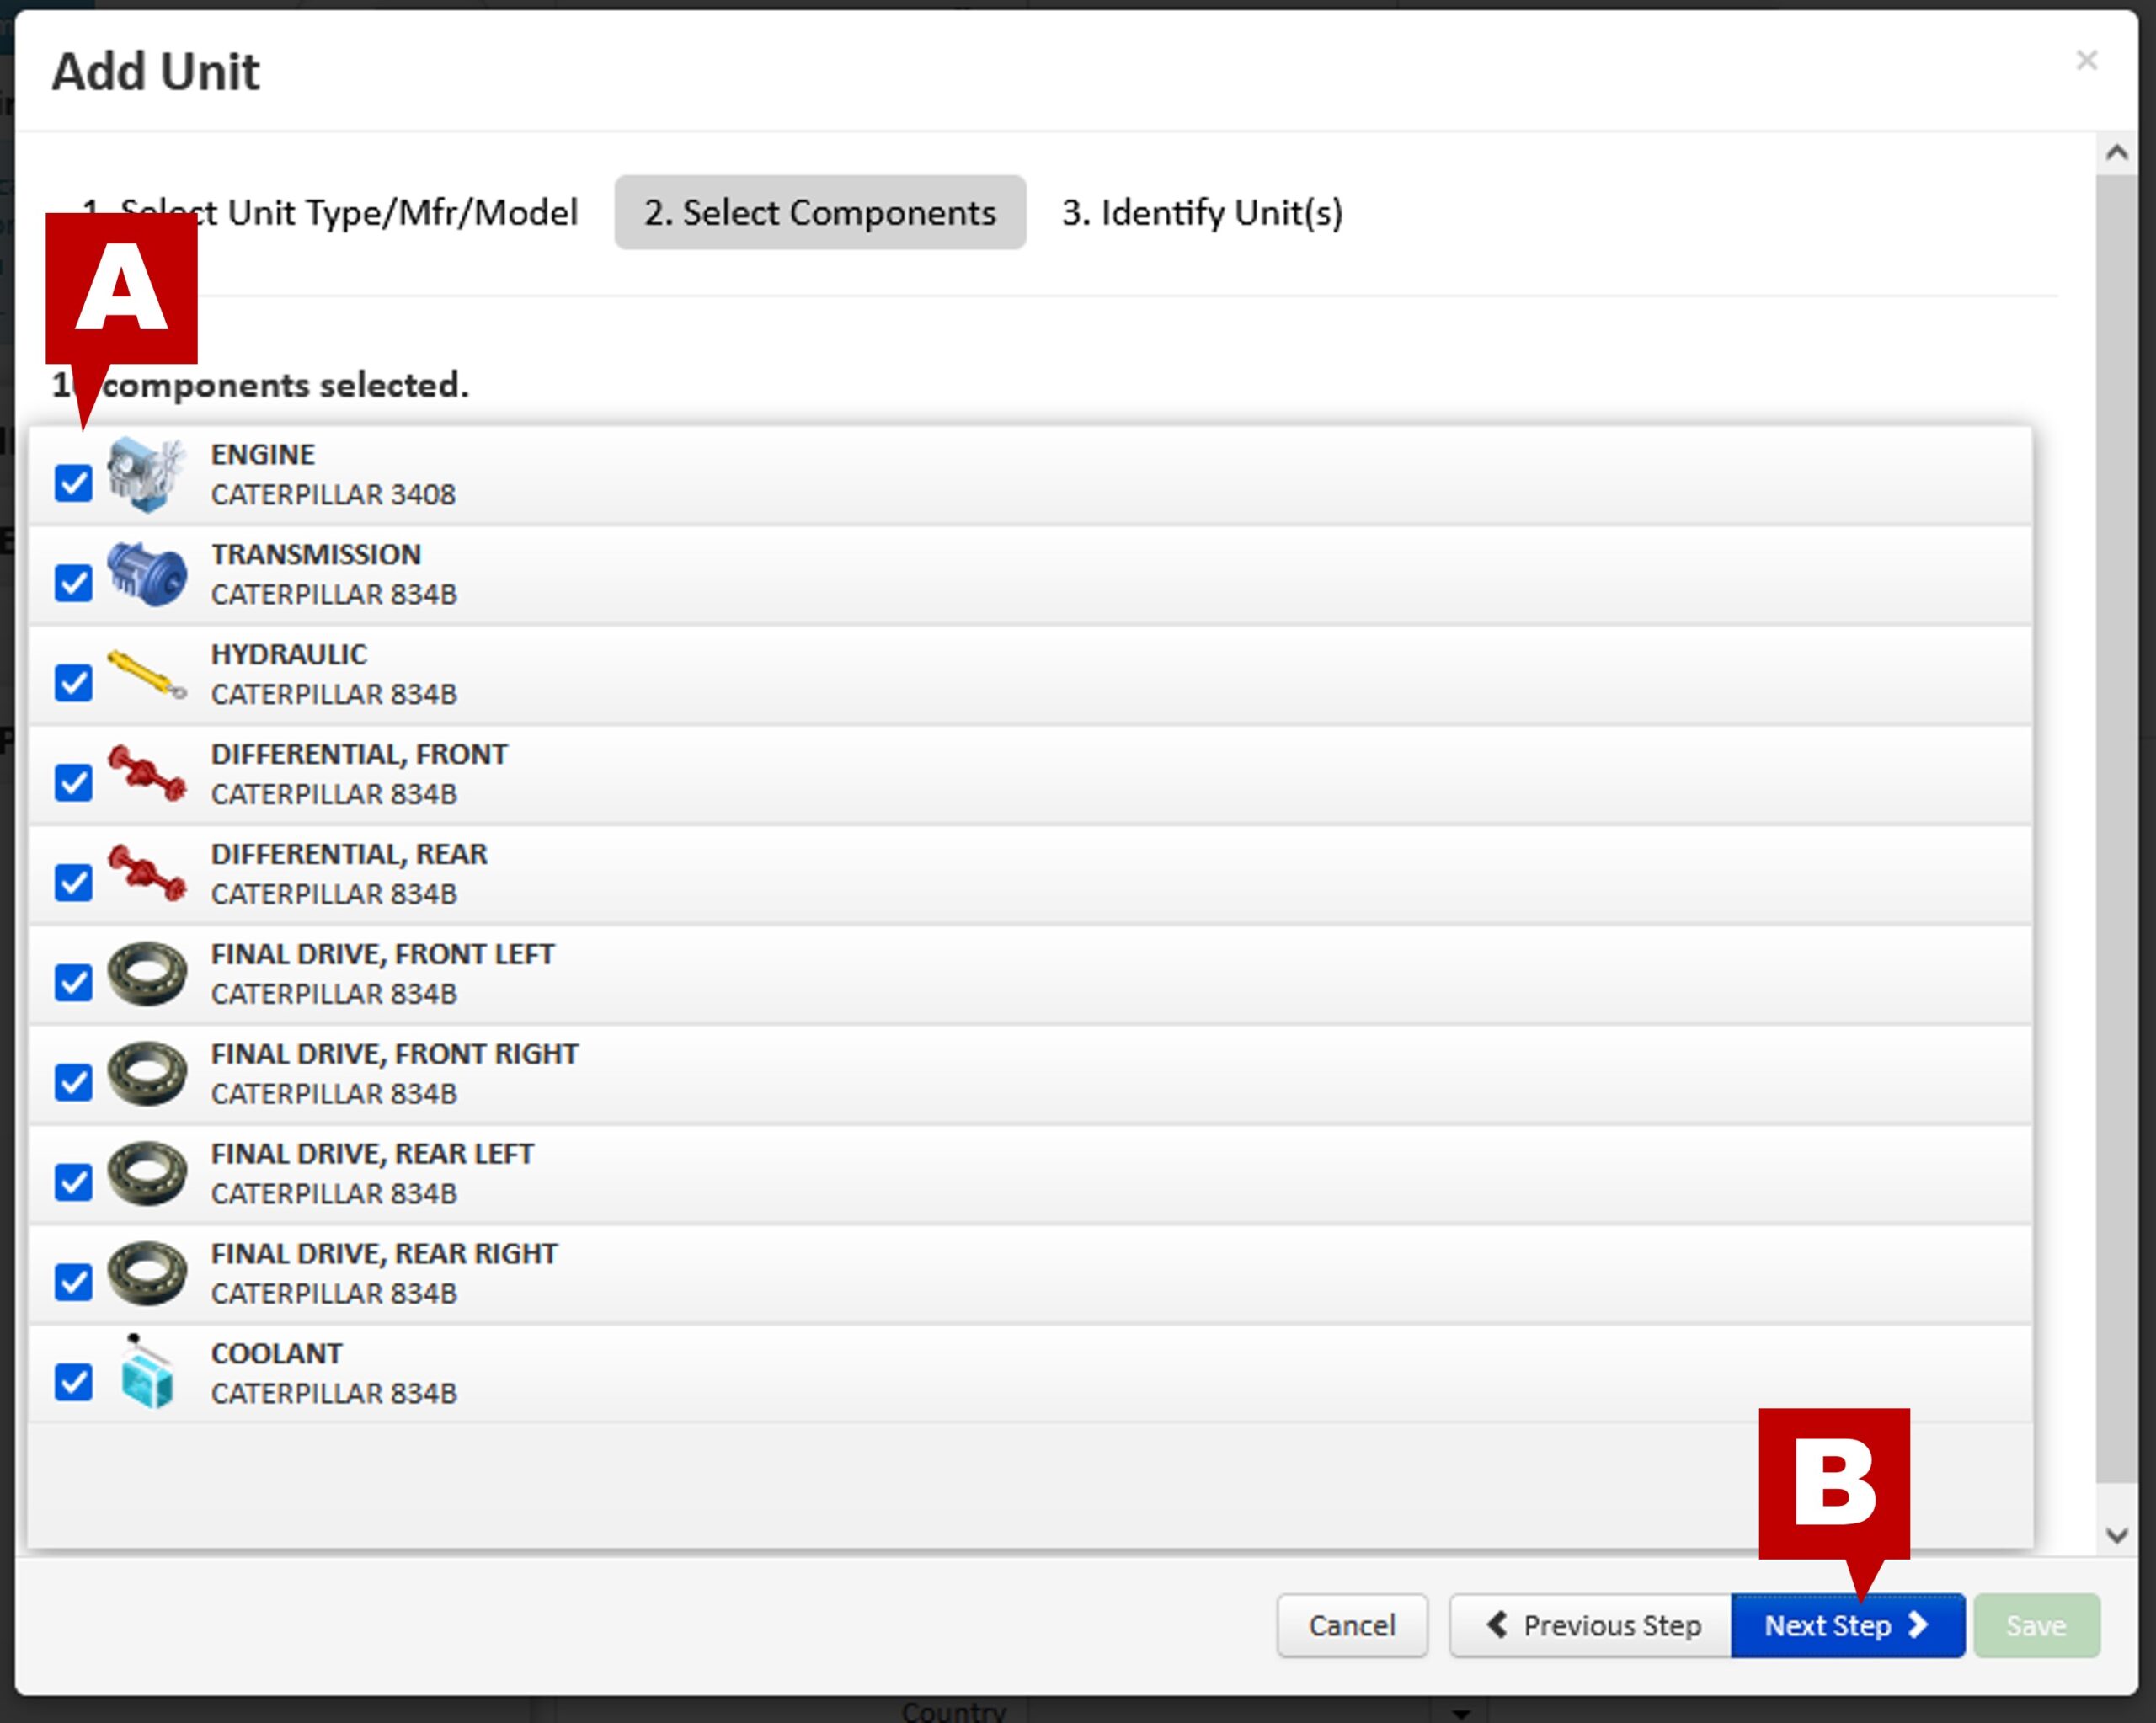
- Now you can see a list of components (A) that should be on this piece of equipment that you will select for sampling. You can un-check components that you will not be sampling.
- Click “Next Step” (B).
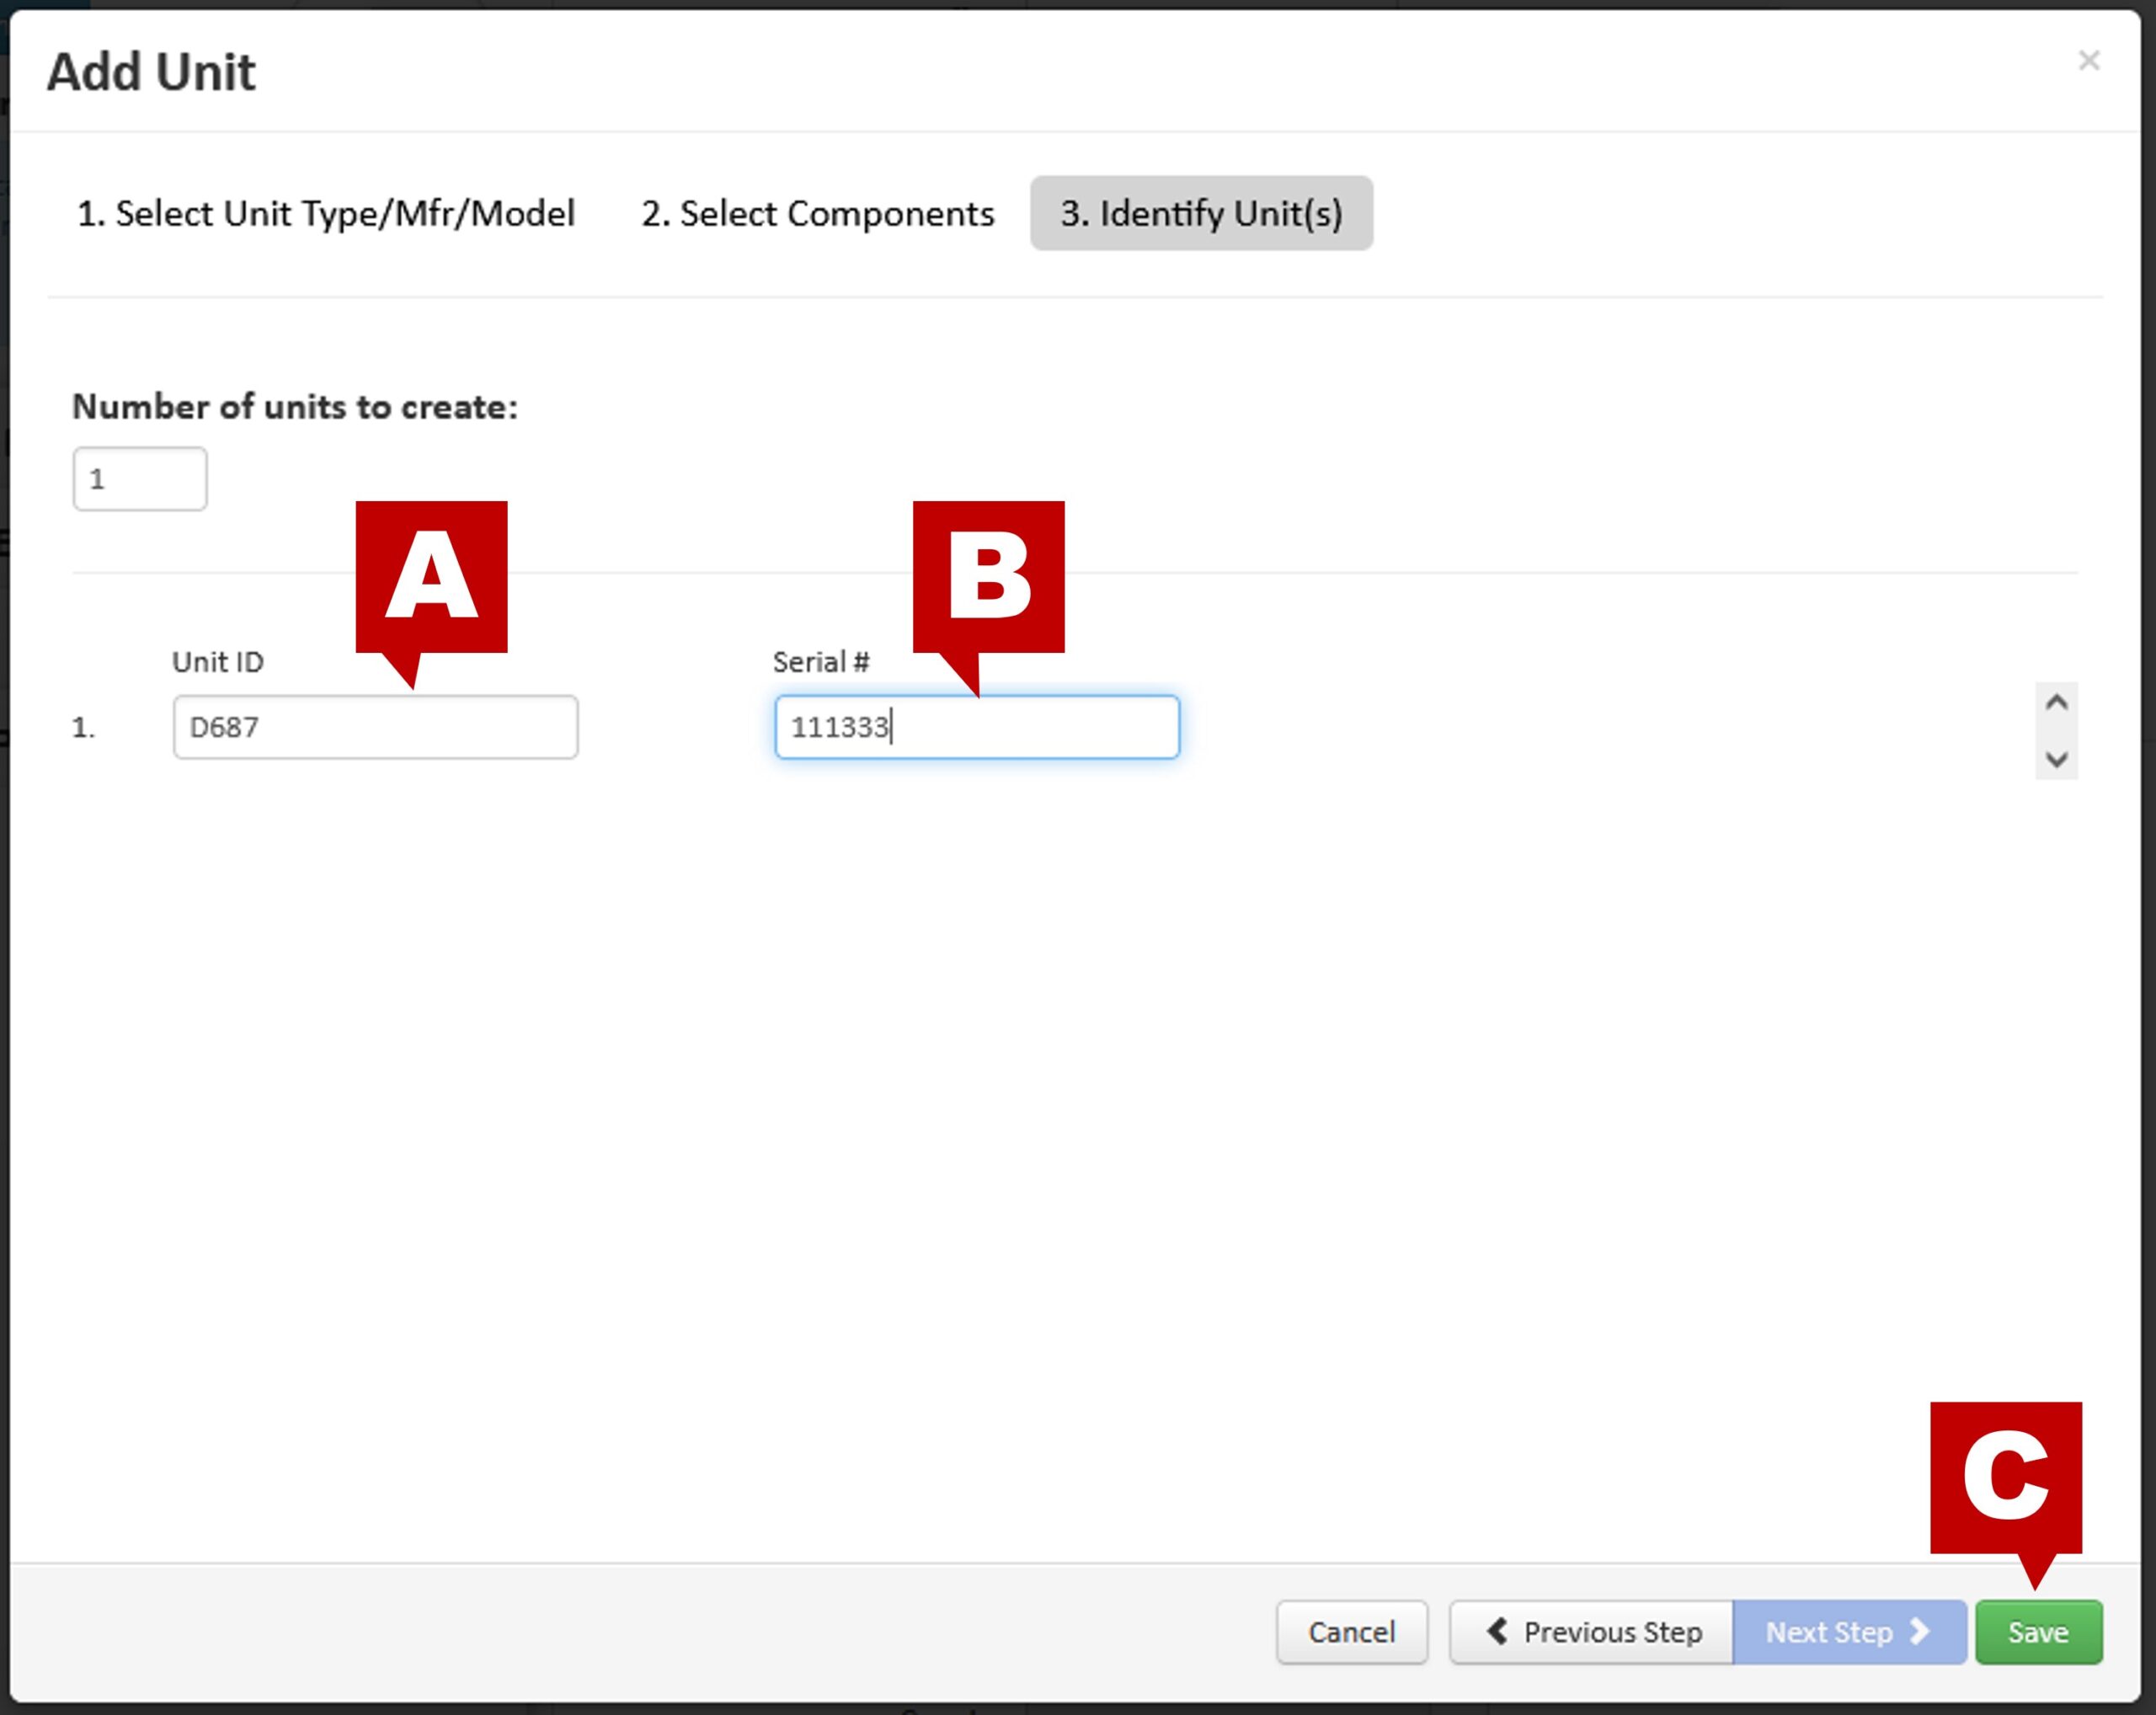
- Now you can name your unit using the Unit ID field (A) and add in the serial number (B).
- Click “Save” when done (C).
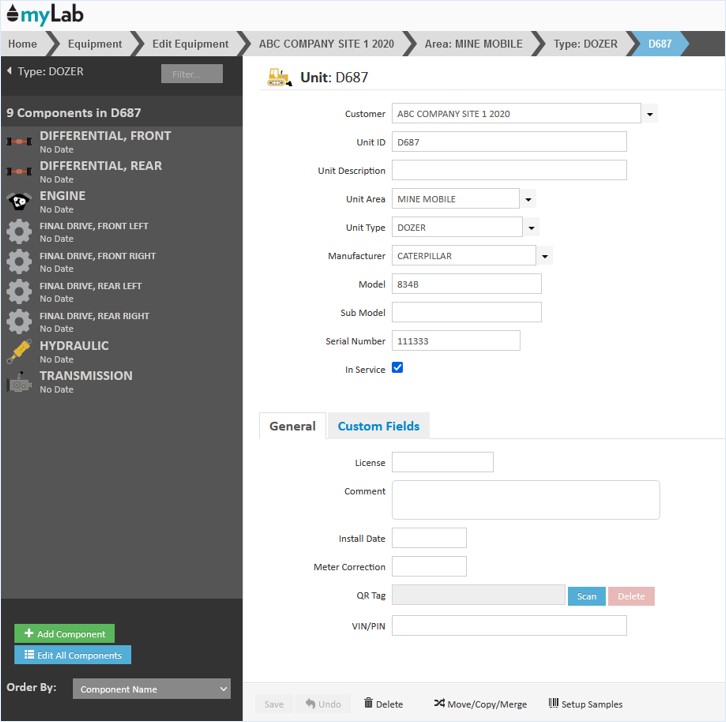
- You’ll now see all the components available for the unit entered. Click “Home” when done.
Creating New Unit Records: Manually
- Follow the same steps to access the Edit Equipment section of myLab and arrive at the “Add Unit” pop up screen.
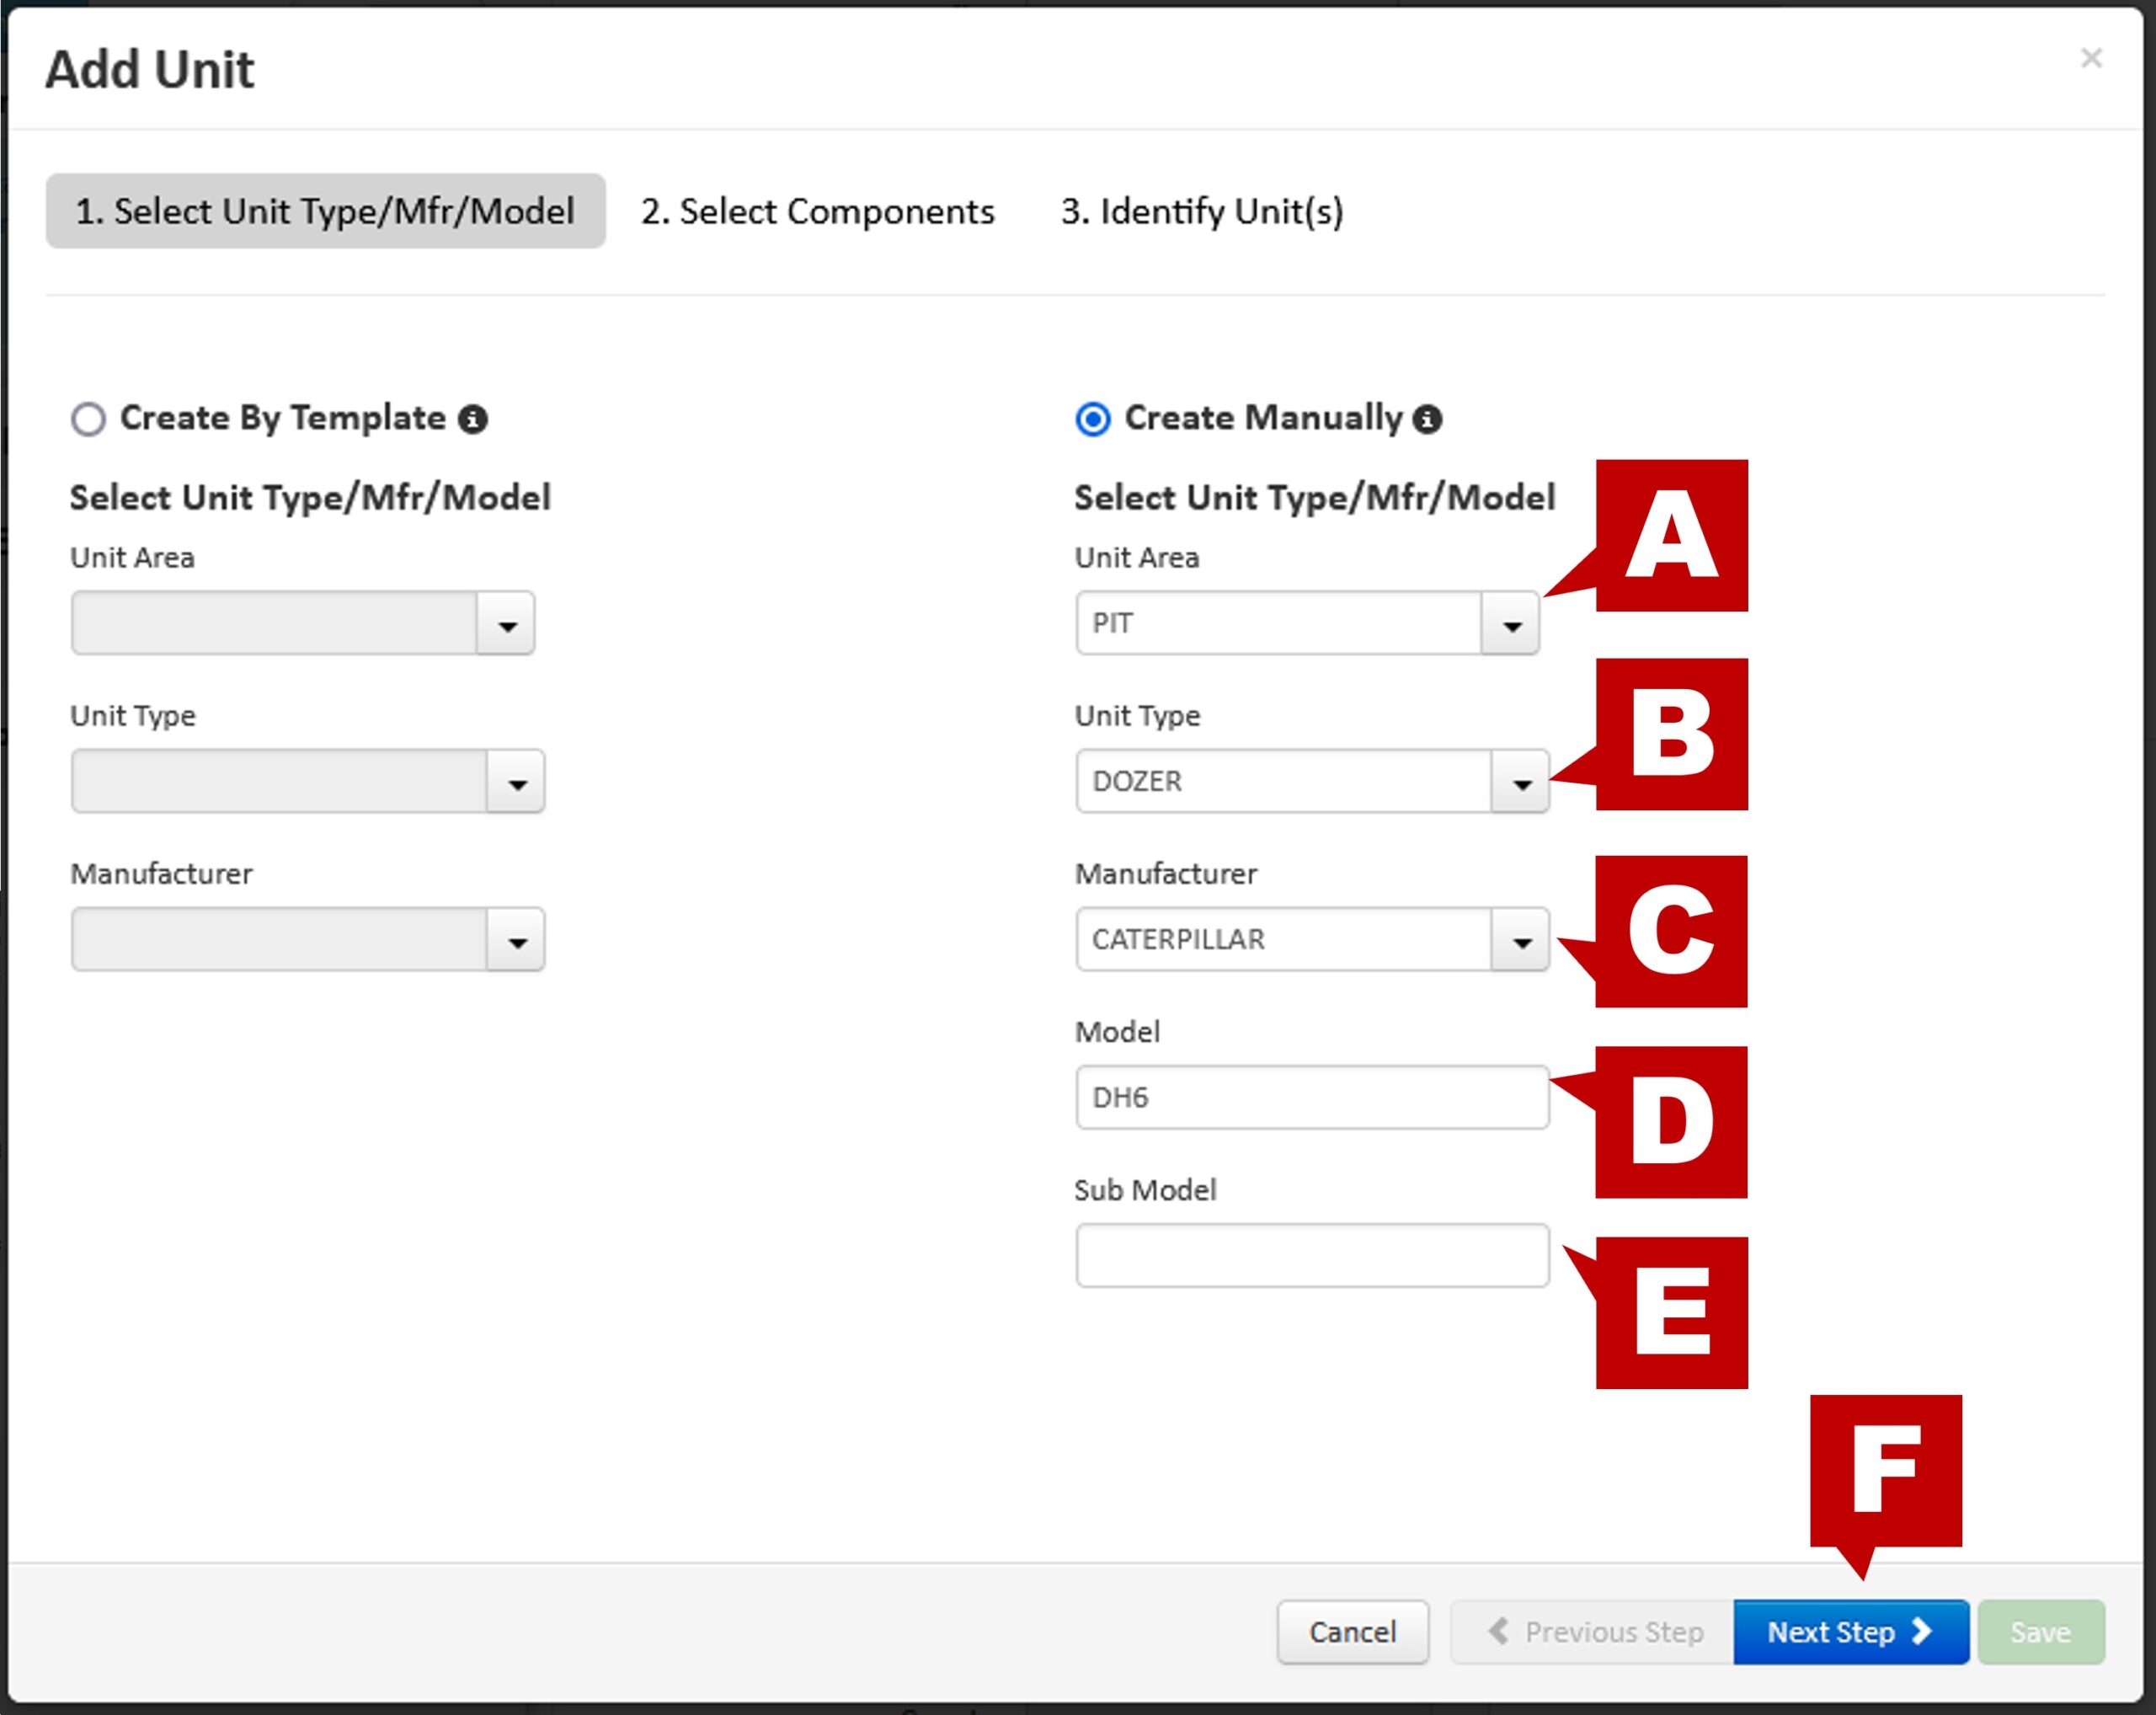
- Select “Create Manually”.
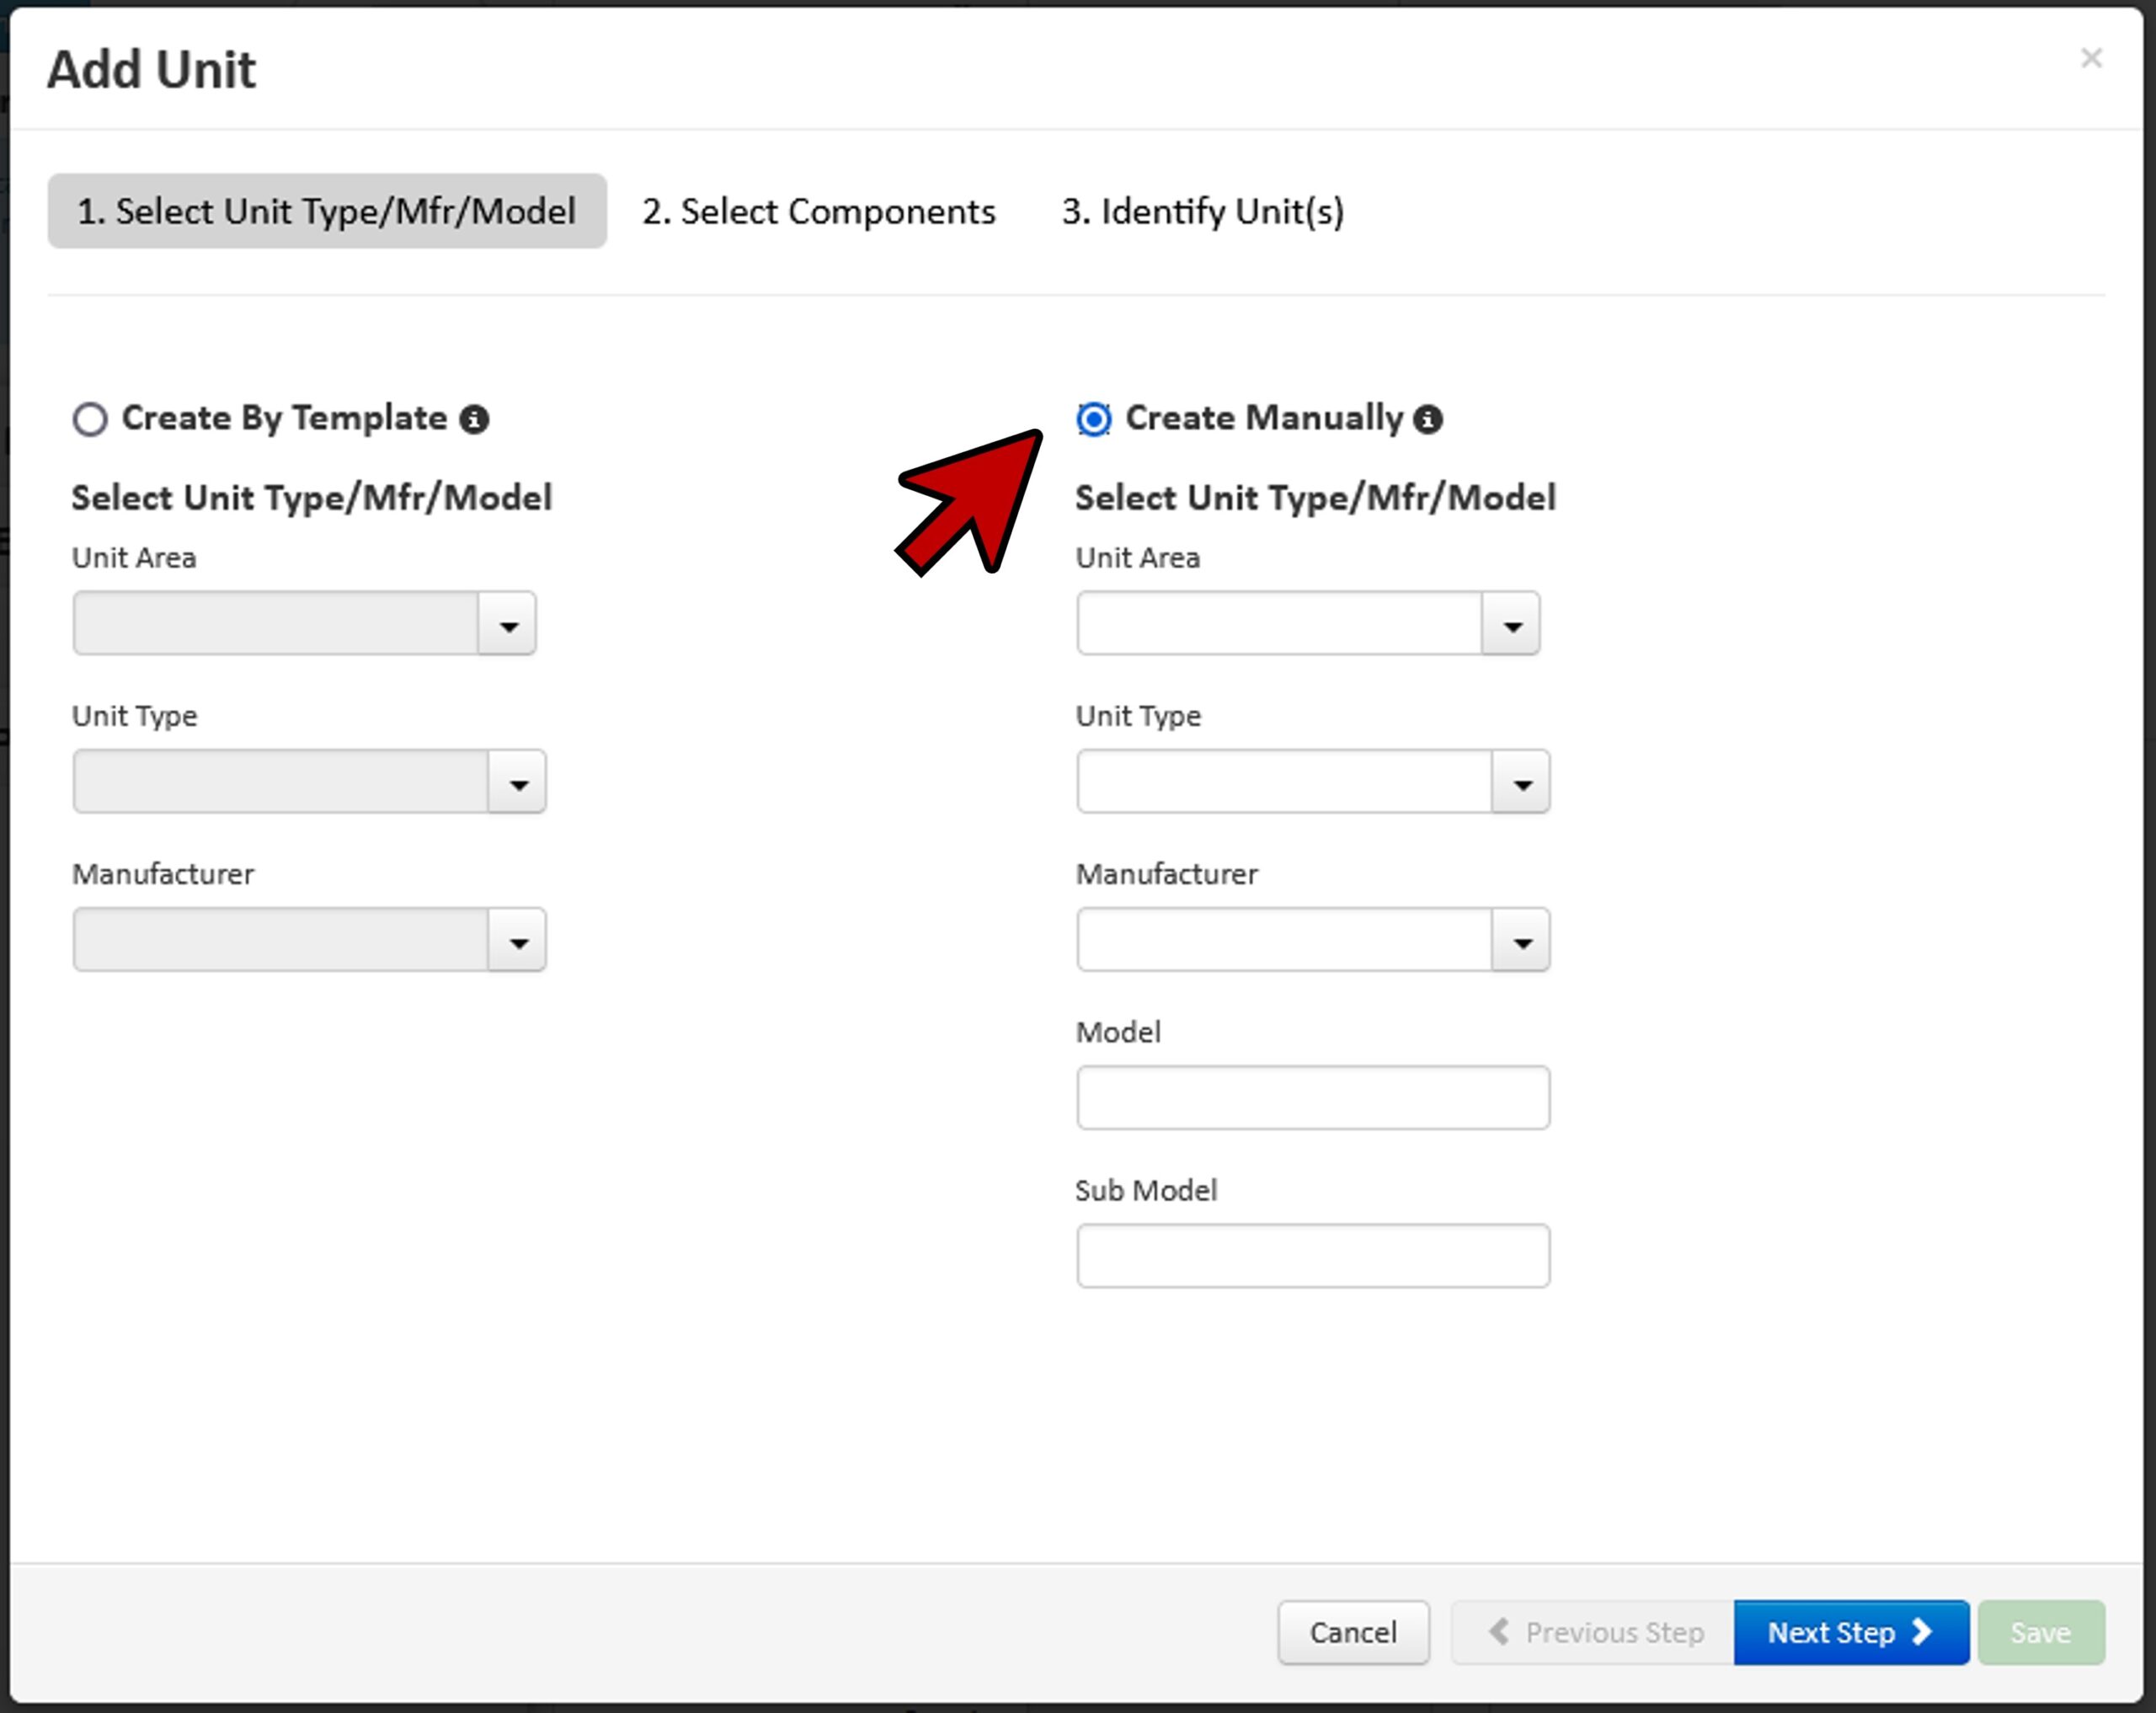
- In the New Unit window, enter the Unit Area (A) (if applicable), Unit Type (B), Manufacturer (C), Model (D) and Sub Model (E) (if applicable).
- Click “Next Step” (F).
Creating New Components
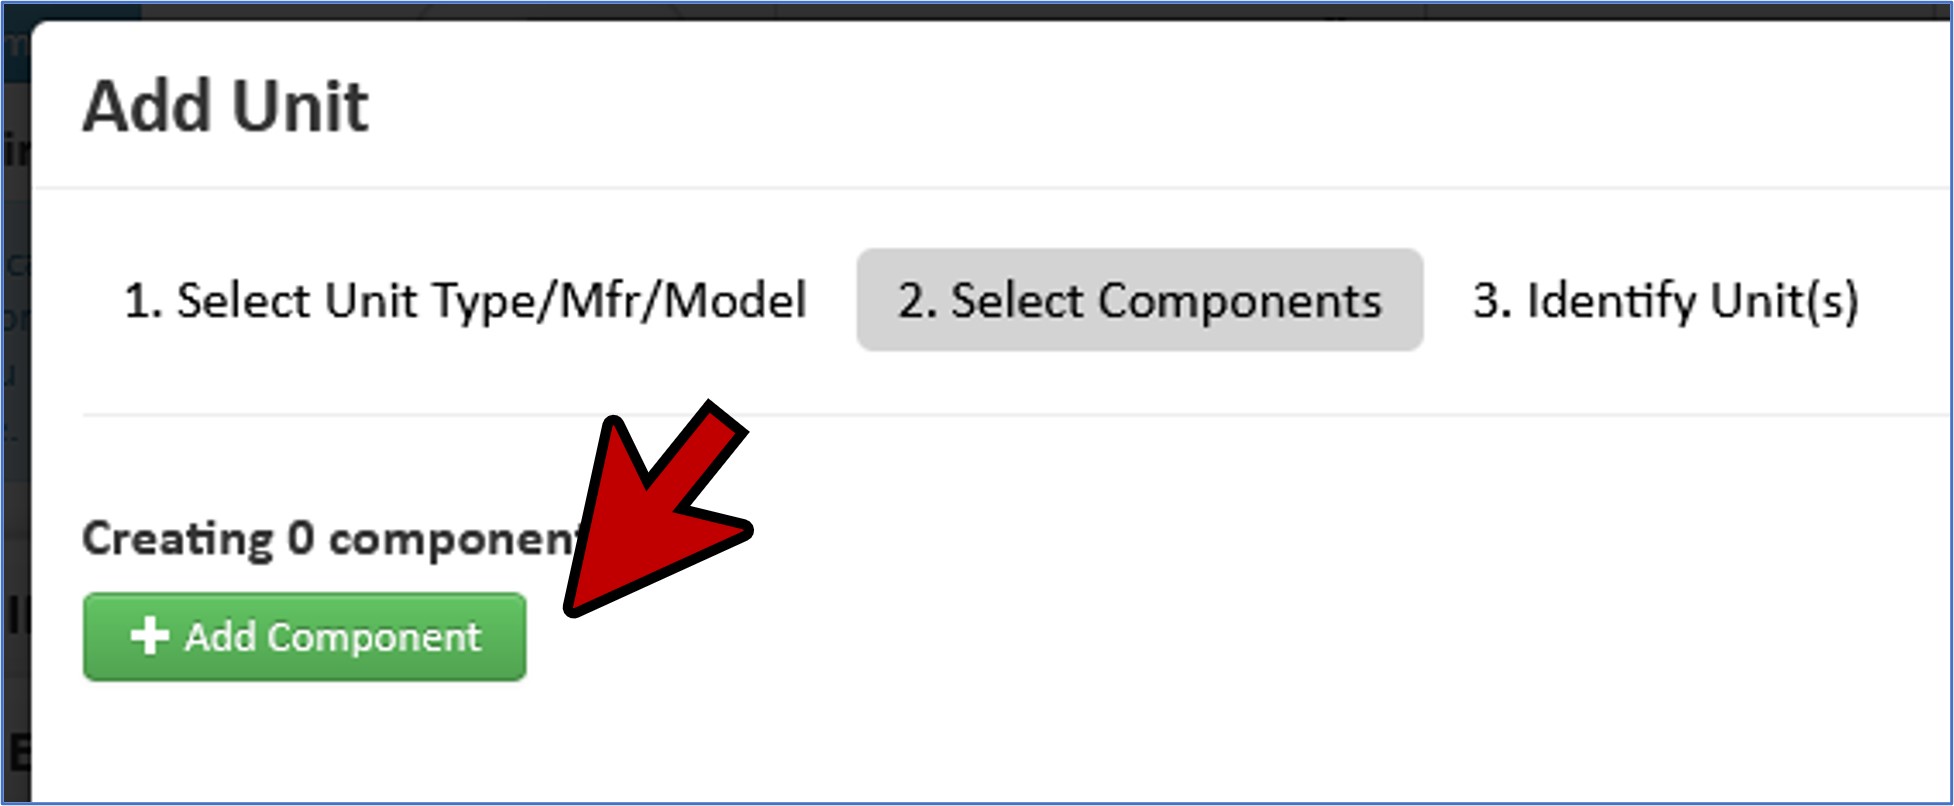
- Click the “Add Component” button.
- This opens the “New Component” window. In this window (A), enter all of the information required to identify the component related to this unit. Add additional components as required.
- Click “Next Step” (B) when done.

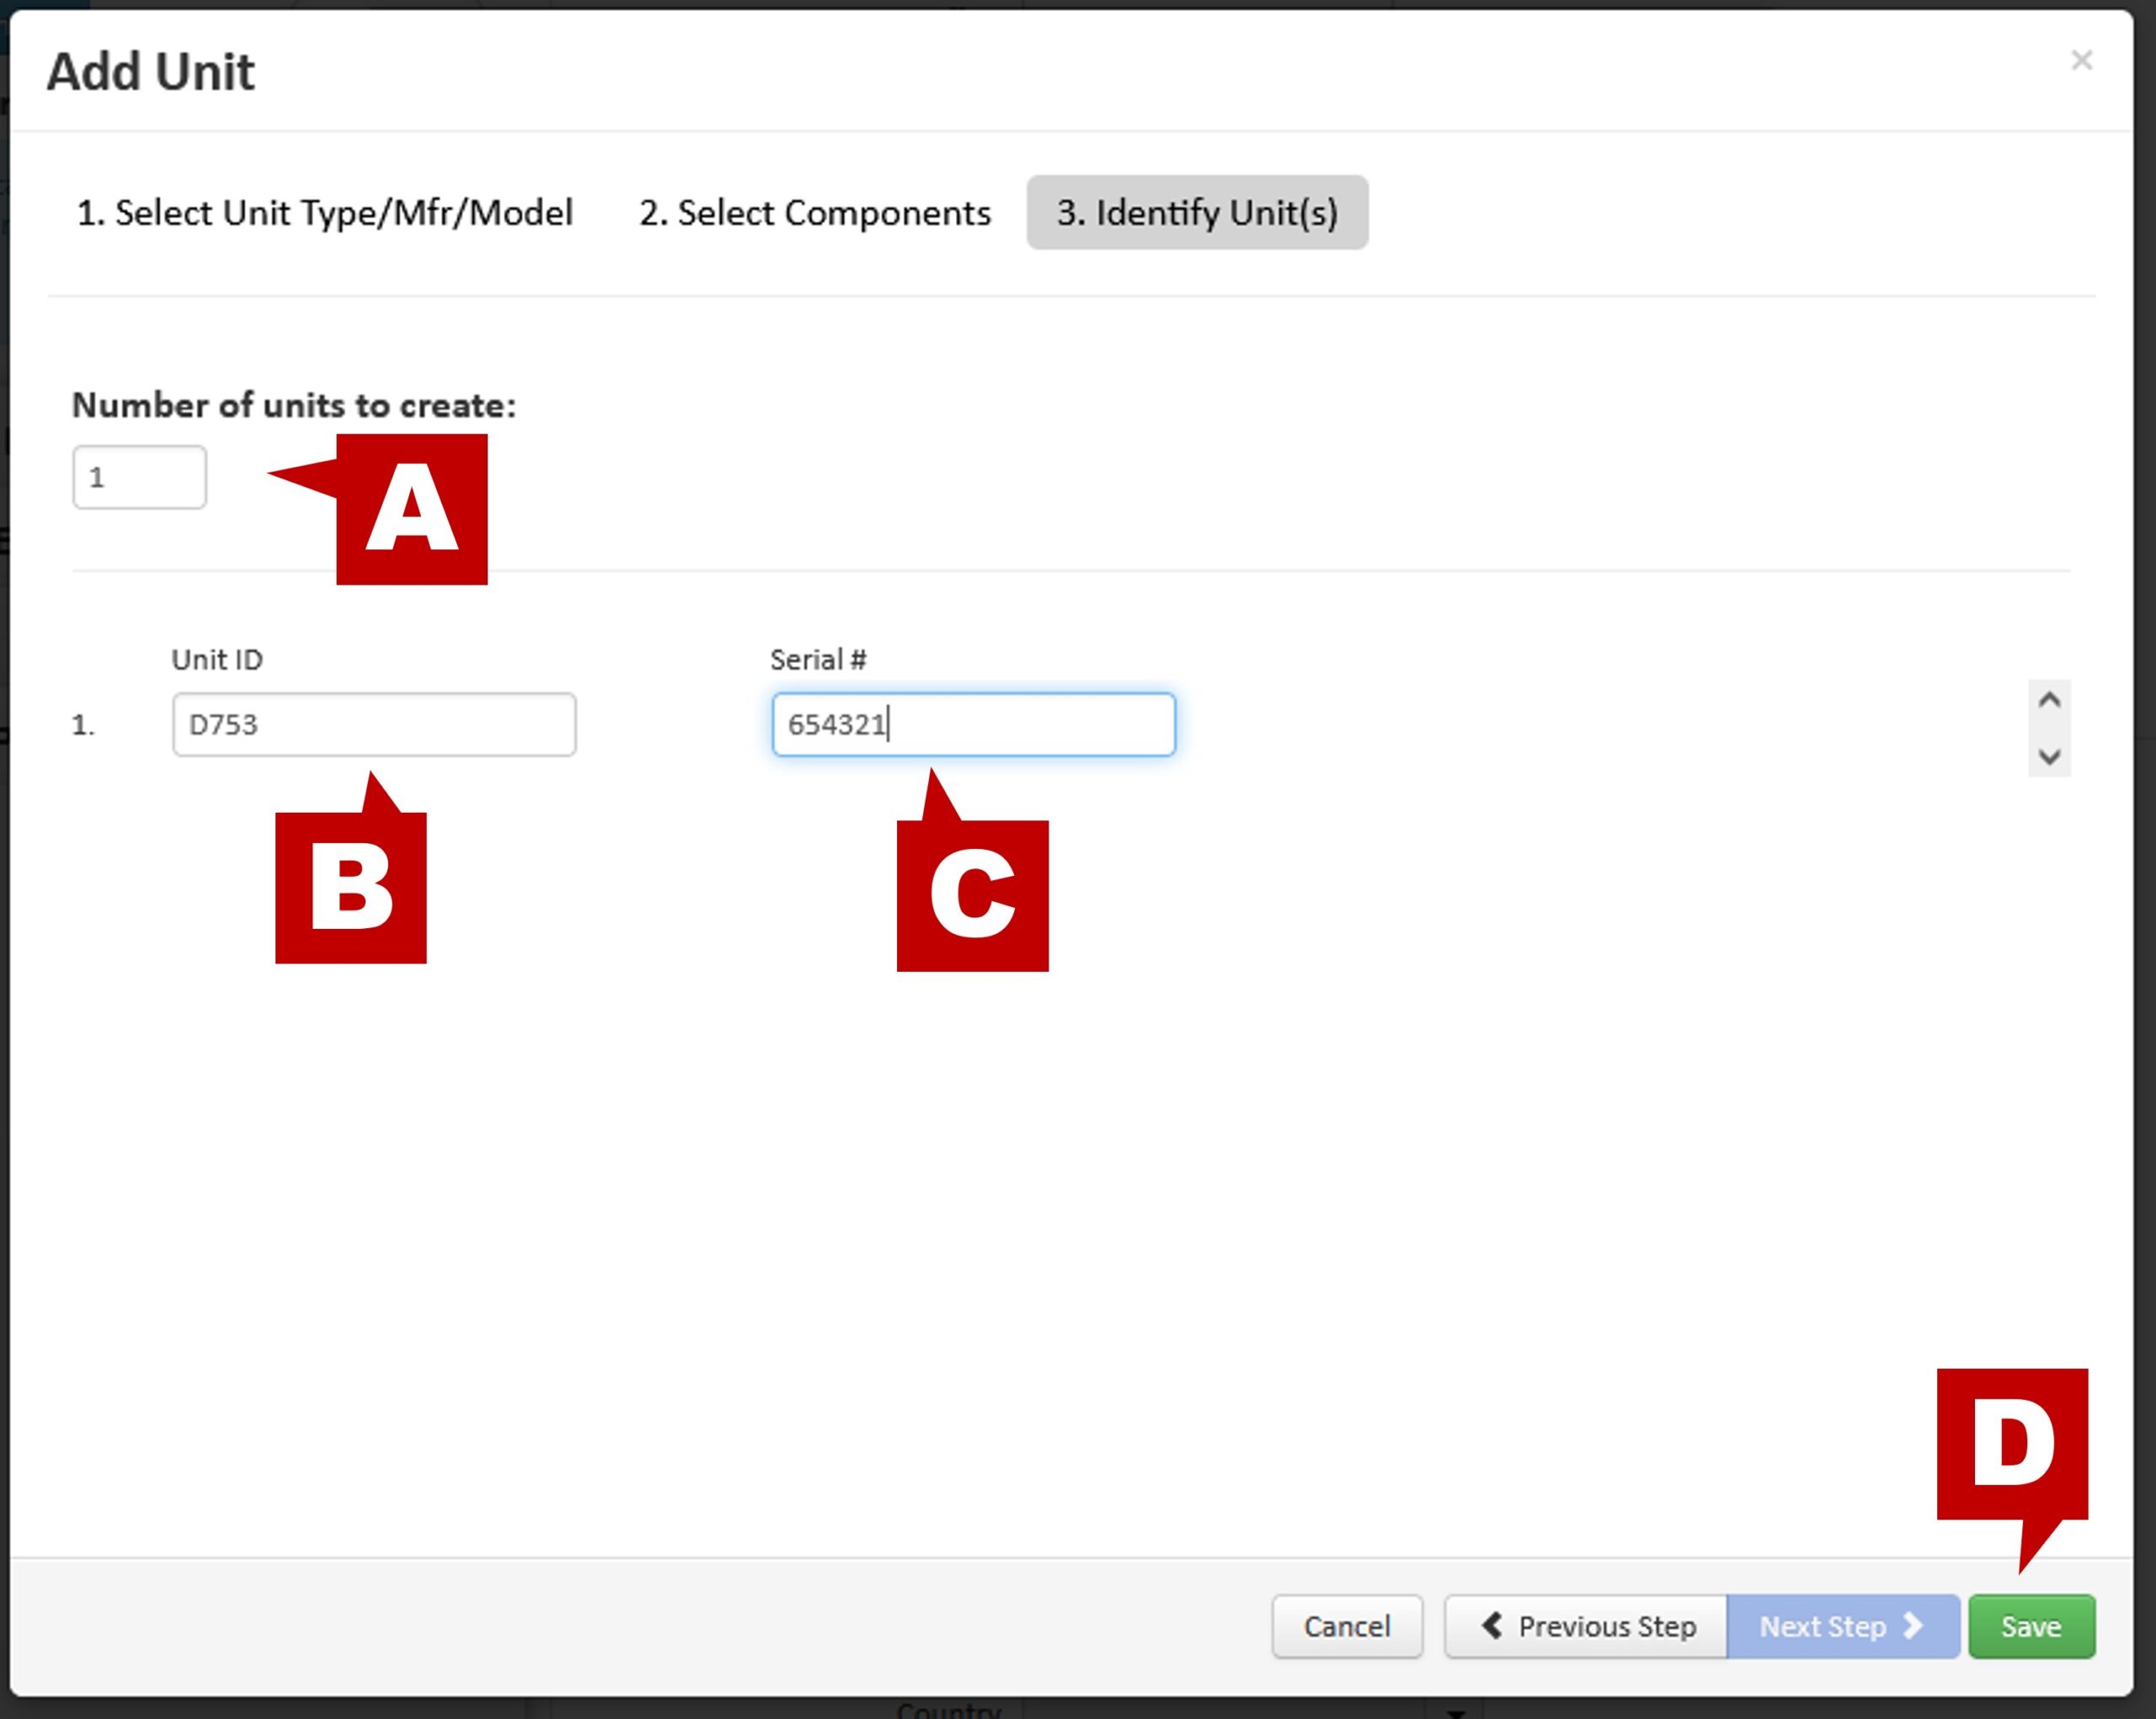
- If you purchased or acquired multiple units of the same type, you can select more than one unit to create (A).
- Enter the unit information: Unit ID (B) and Serial # (C).
- Click “Save” (D)
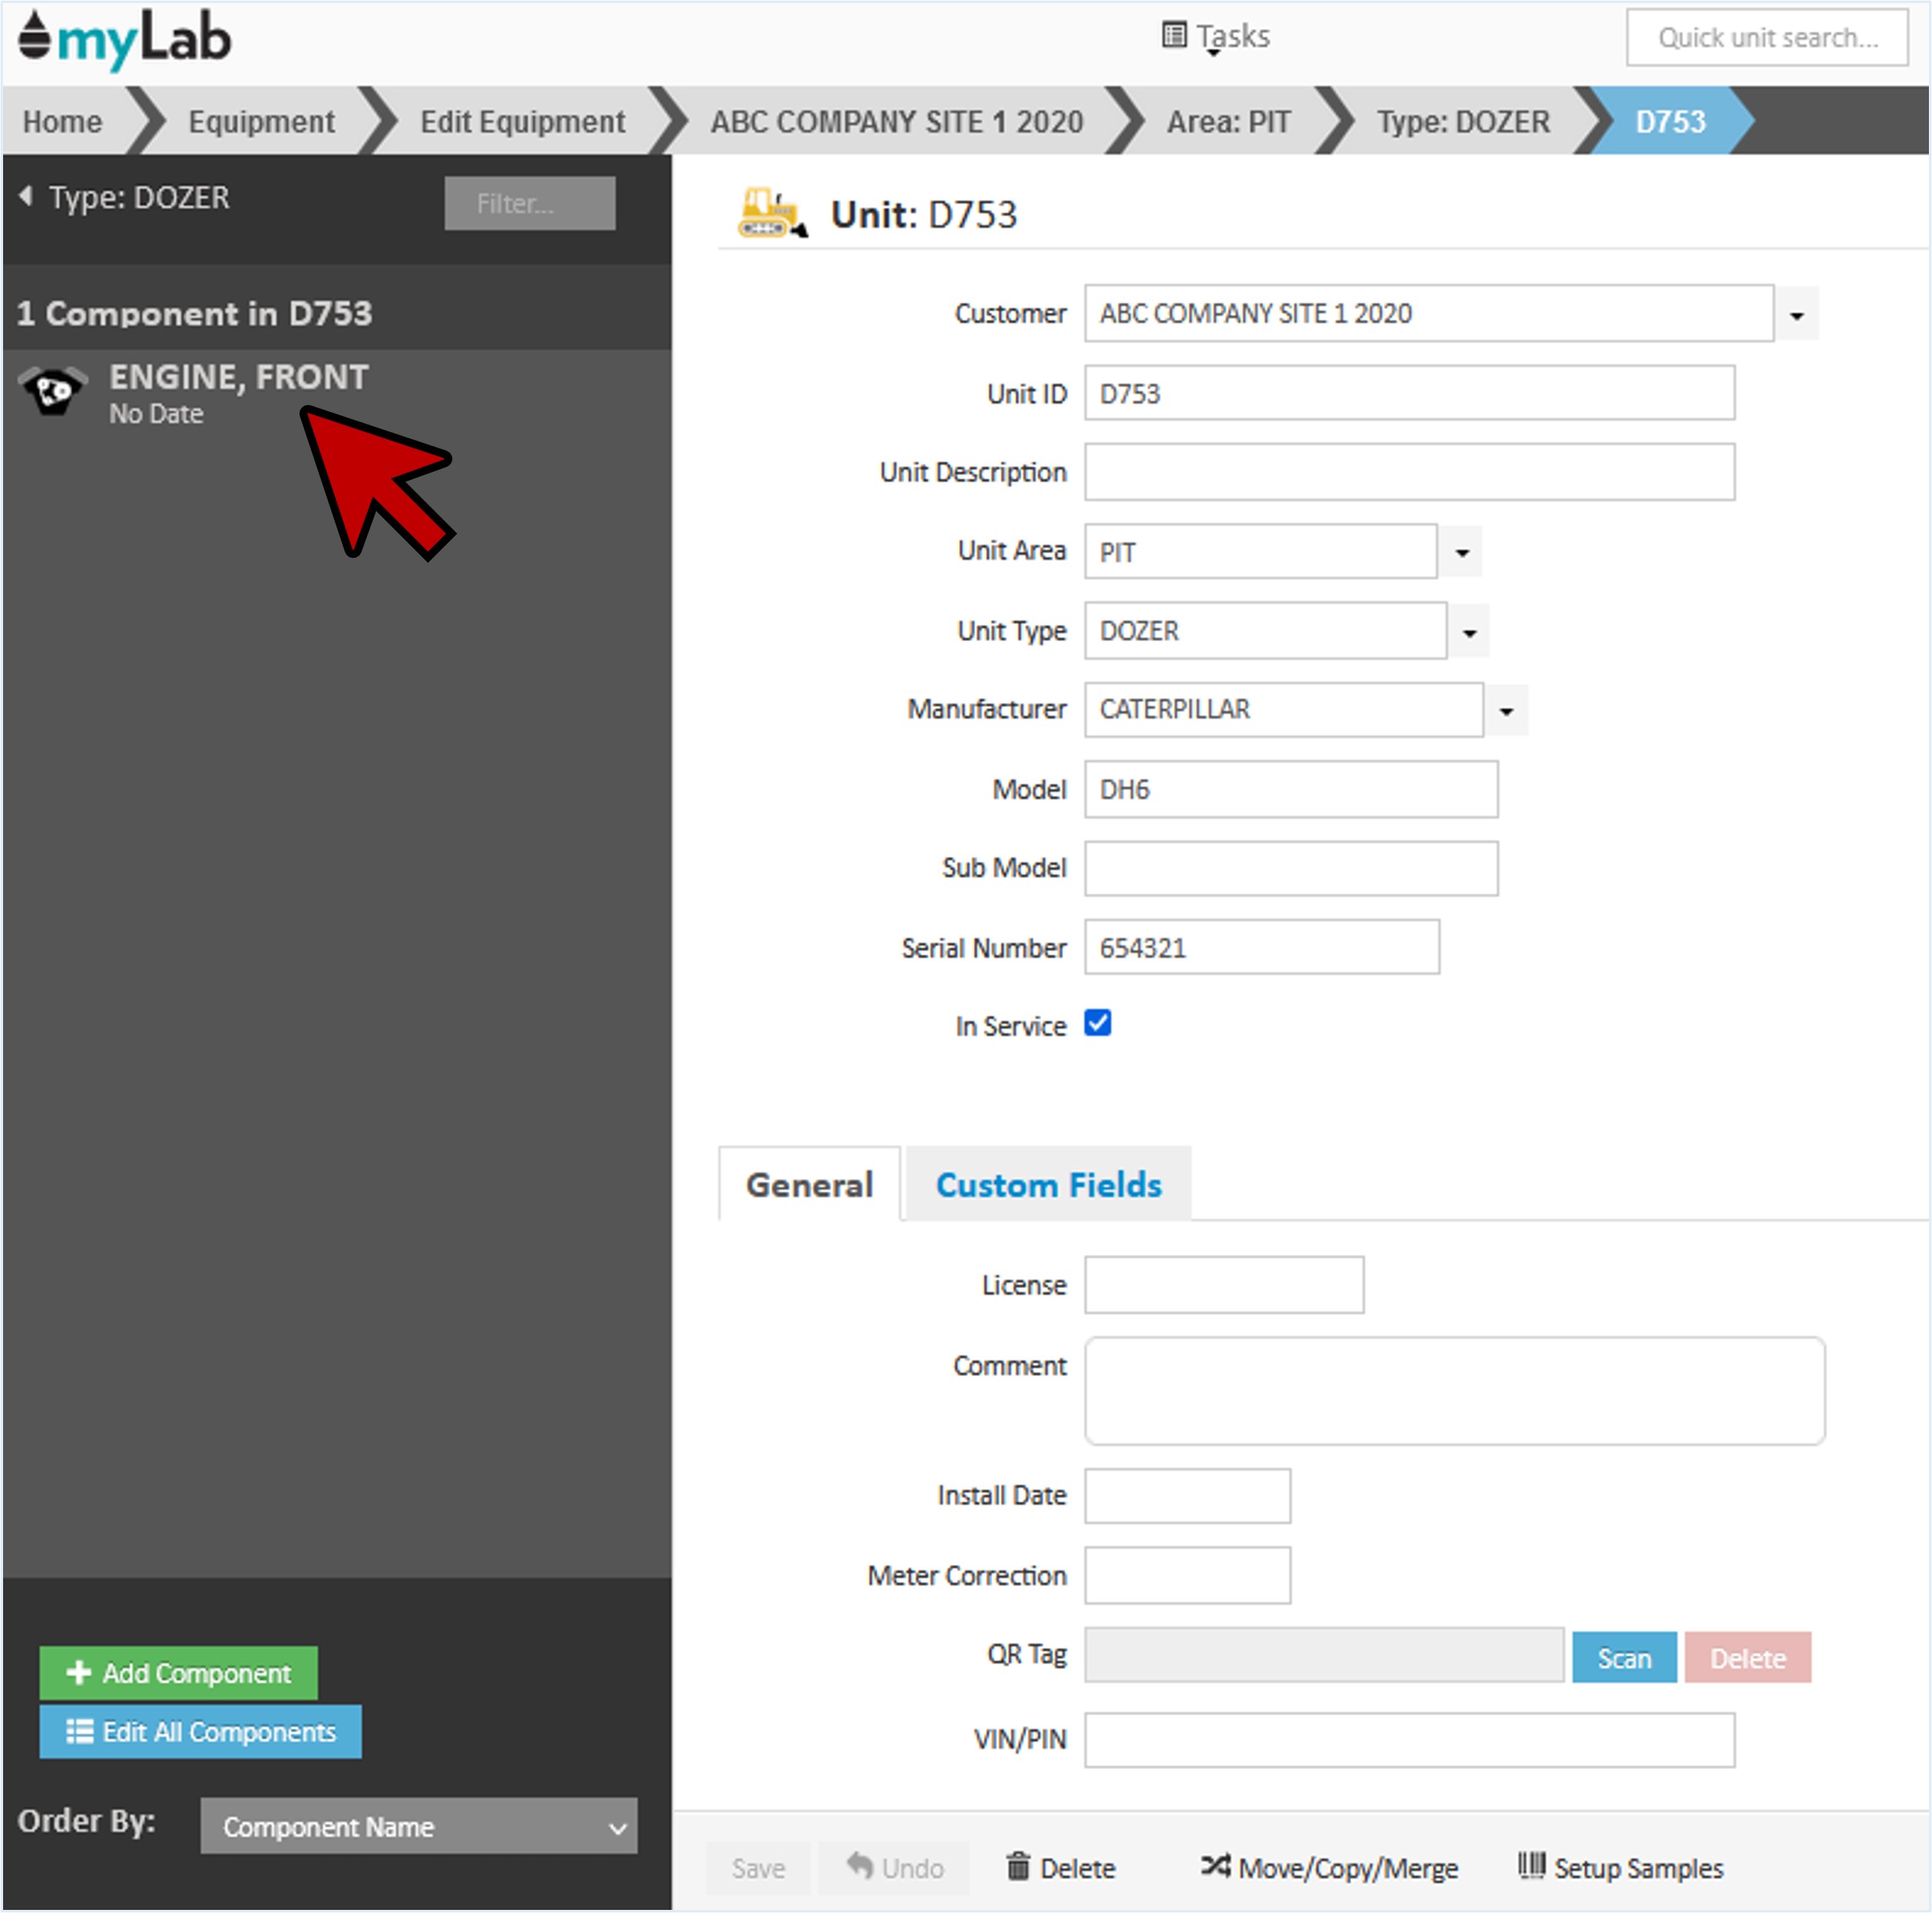
- You will now see your new unit and the component(s) created.
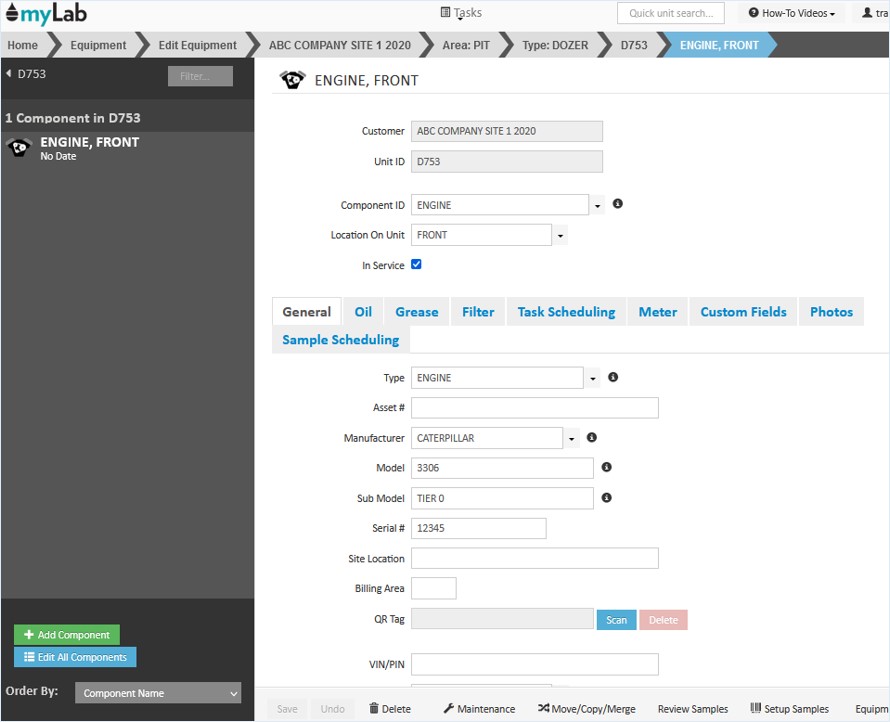
- On the right side, you will see the Unit information with tabs to add in more information related to the unit.
- To add more information for the component, click on the component in the left column.
- Under the “General” tab, you can modify the information you just added or include more information such as RPM, Power, ISO Code Recommendations, and comments.
- Under the “Oil” tab, you can add information about the oil filter and sampling.
- The “Grease” allows you to enter in grease points and type as well as greased component attributes.
- The “Filter” tab allows you to enter data regarding the primary and secondary filters. Additional filter locations can be added along with comments.
- The “Task Scheduling” tab allows you to provide information about the hour meter used on the component. It also provides current usage information that will help with scheduling.
- Under “Custom Fields”, you can update any user created fields.
- Upload relevant photos associated with this component under “Photos”.
- “Sample Scheduling” allows you to manage the sample scheduling rules for the individual component or enable Global Scheduling Rules to be applied. The “Last Sample Taken On” and “Next Sample” fields are updated automatically by the system.
- Once all component information has been completed, click “Save”.