Completing Work Orders
View Work Orders
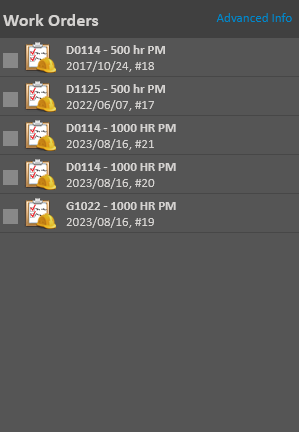
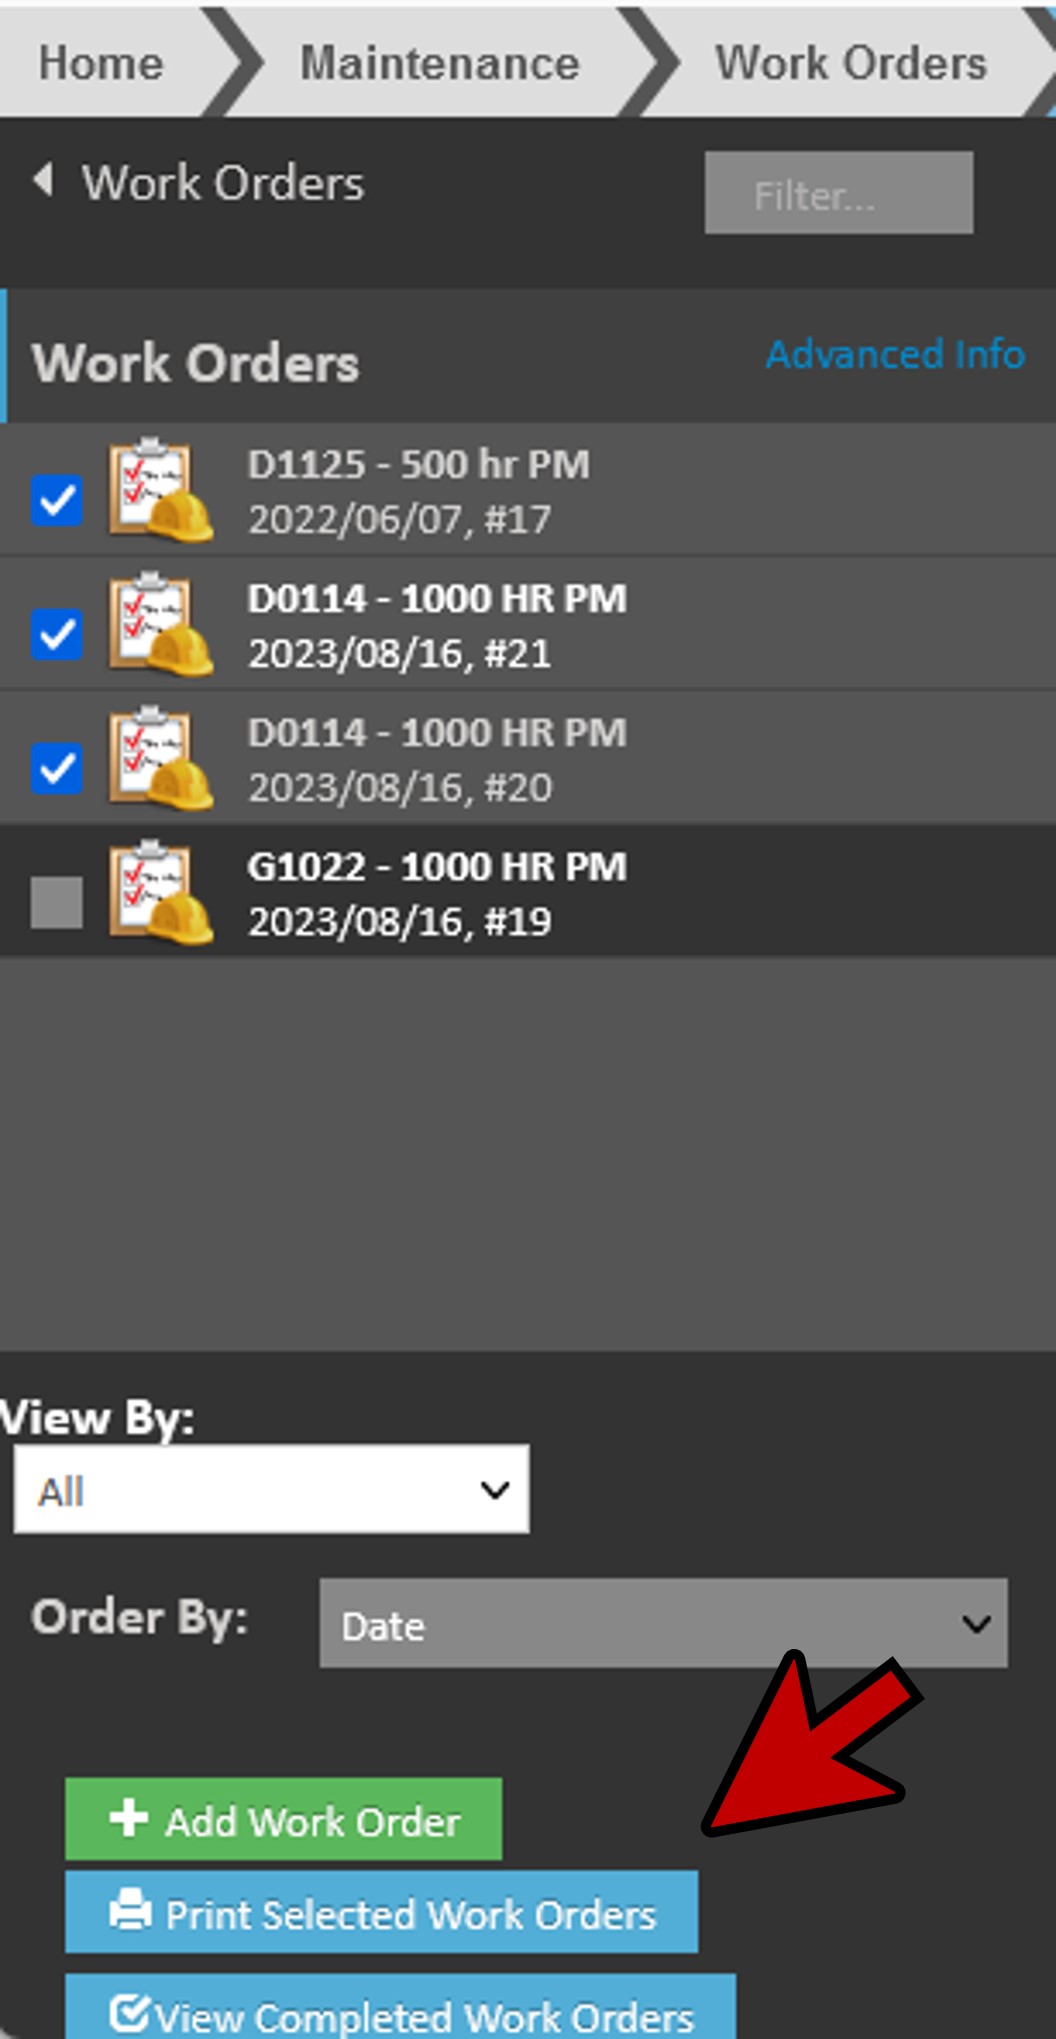
- From the Home page, you can SELECT Work Orders from the Tasks dropdown menu or from the left navigation, select Maintenance then Work Orders.

- Outstanding work orders are displayed in a list on the left.
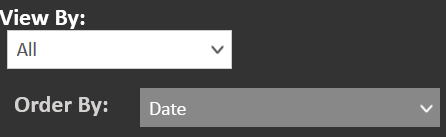
*If for some reason you don’t see any Work Orders, change the View By to ALL.
- You can choose to view all work orders or just those that are assigned to you by changing the “view by” option below the list here.
- Viewing all work orders is the only way to see work orders that haven’t been assigned to anyone specific.
- Select a WO by clicking on it.
- The work order details are now listed on the right. You can see all the tasks for the work order.
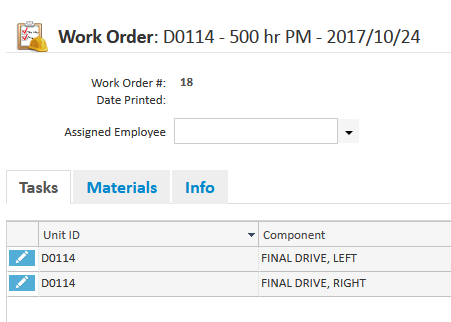
Edit Work Orders
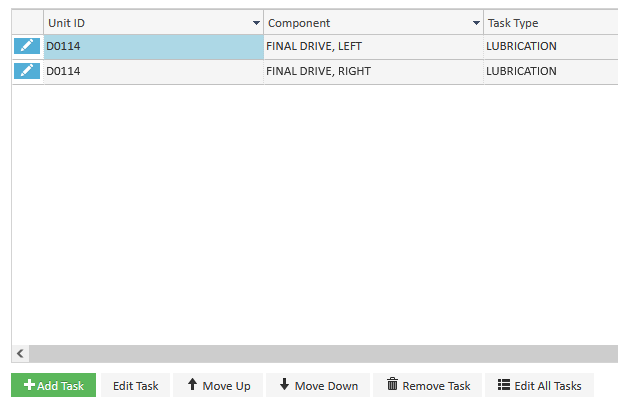
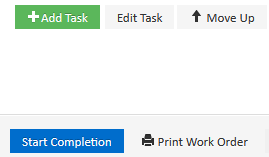
- You can also edit tasks by clicking on the pencil icon, add additional tasks by clicking on the the Add Task green button, remove tasks by selecting the task and clicking Remove Task, or edit all tasks by selecting the Edit All Tasks button.
Print Work Orders
- You can print out the work order by clicking the Print Work Order button at the bottom of the screen (below the work order detail section).
- Or you can print out multiple work orders by using the check boxes to select them in the list and then clicking the Print Selected Work Orders button at the bottom of the left navigation menu.
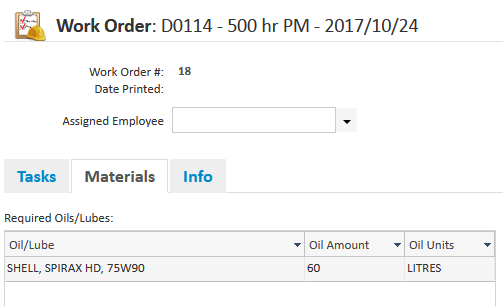
Materials
- When in a Work Order, if you click on the Materials tab, you can see all the materials needed to complete the tasks and you can print this information out prior to the work being done by clicking the blue Print button at the bottom of the list.
- There is also a global option that can be set to have the materials list print automatically when the work order is printed.
Work ORders Requiring Samples
- If the work order has tasks that involve taking a sample, you could setup the samples beforehand.
- This allows you to print blank sample labels to take with you by clicking the Setup/Print Samples button.
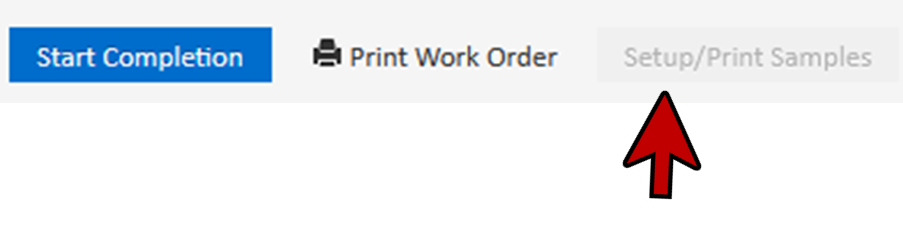
- It’s not necessary to print the labels, you can go do the work and when you complete the work order the samples will be created.
- You can choose a method that suits your current workflow.
Completing Work Orders
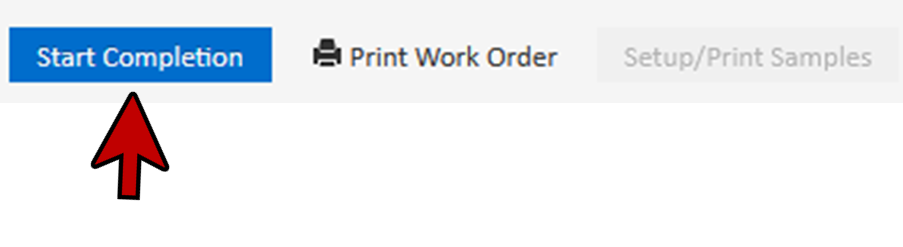
To complete the work order without printing labels, CLICK on the Start Completion button.
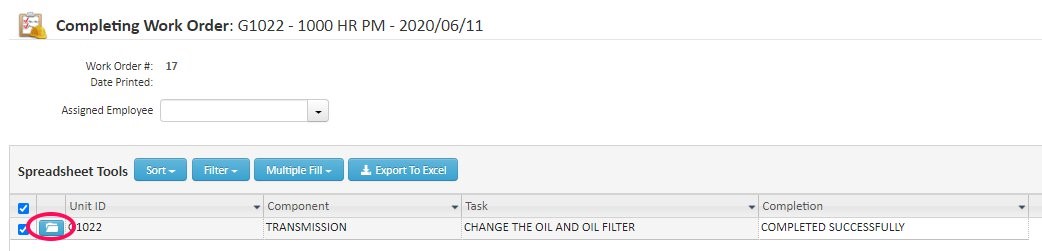
- You can quickly mark tasks as completed by using the check boxes.
- This automatically sets the task as being completed successfully.
- If this is not the case, you can change it.

- If there is additional information to be recorded for the task you can edit the task by clicking on the blue file folder icon in the listing. This opens the task in a separate popup.
- You can also select a task and click the Edit Task button below.

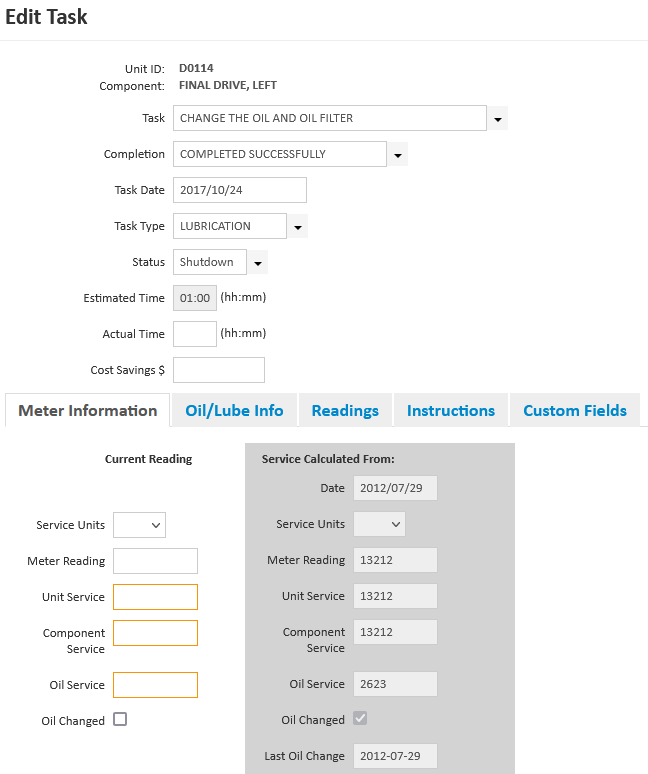
- On the Meter Information tab, you can enter the meter reading, equipment/oil service, and whether the oil was changed.
- Your meter reading and service values may have already been filled in for you if meter readings are being recorded daily.
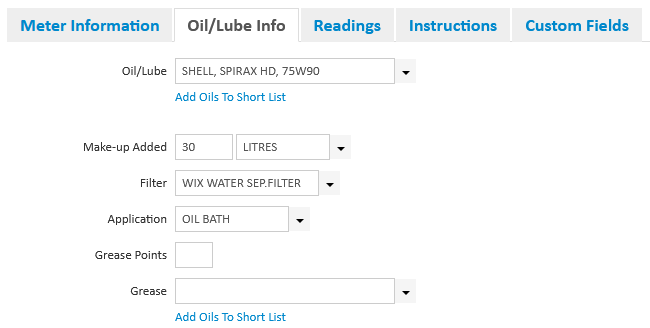
- The Oil/Lube Info tab has information for oil and filters needed for this task.
- On the Readings tab you can enter any readings that were defined for this task.
- Component temperature and pressure are standard, but you can add your own custom ones.

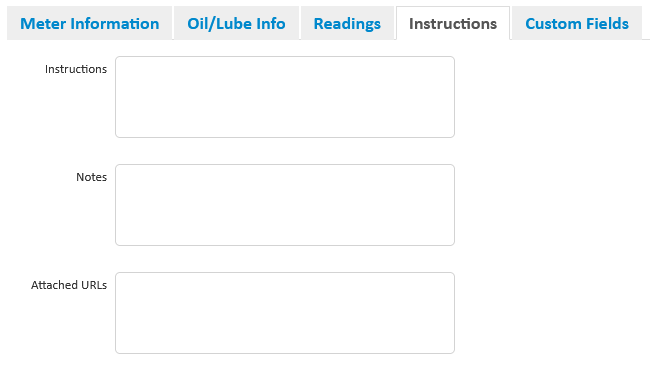
- The Instructions tab allows you to enter some additional notes about the task as well as links to resources that may have information pertaining to the task.
- On the Custom Fields tab you can enter values for any custom fields you’ve created.
- If you haven’t created any custom fields, then this tab will be blank.
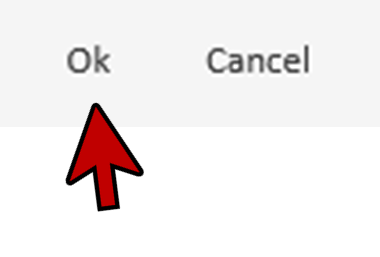
- Click ok to save any changes.
- If there are still tasks remaining to be completed, then you can save and leave the work order open by clicking Save and Leave Work Order Open.
- If all the tasks have been completed, either successfully or not, then you can save and complete the work order by clicking Save and Complete Work Order at the bottom of the screen.

- If the work order had tasks where a sample was taken, then you are given the opportunity to edit the sample information and print sample labels.
- Here you can enter any other sample information you need. All of the basic information is already filled in for you because it was entered on the tasks.

- Once you are done making changes, continue completing the work order by clicking the blue Save and Complete Work Order button at the bottom.
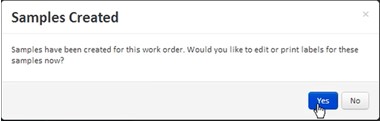
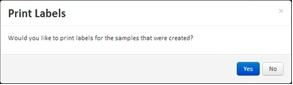
- The work order is now completed, and the tasks become maintenance records. Now you can choose to print the sample labels by clicking Yes on the popup.
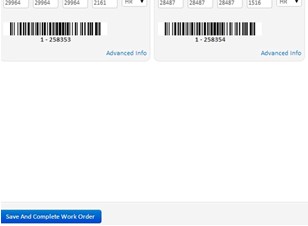
- This gives you a print window showing the samples that were created. Verify the label type, and then print by clicking the Print Labels button.

- This opens the labels in a new tab of your browser ready to print.