Creating Sample Schedules
With myLab, you can schedule each component, or make schedule rules that apply to all of your equipment.
Scheduling a Single Component
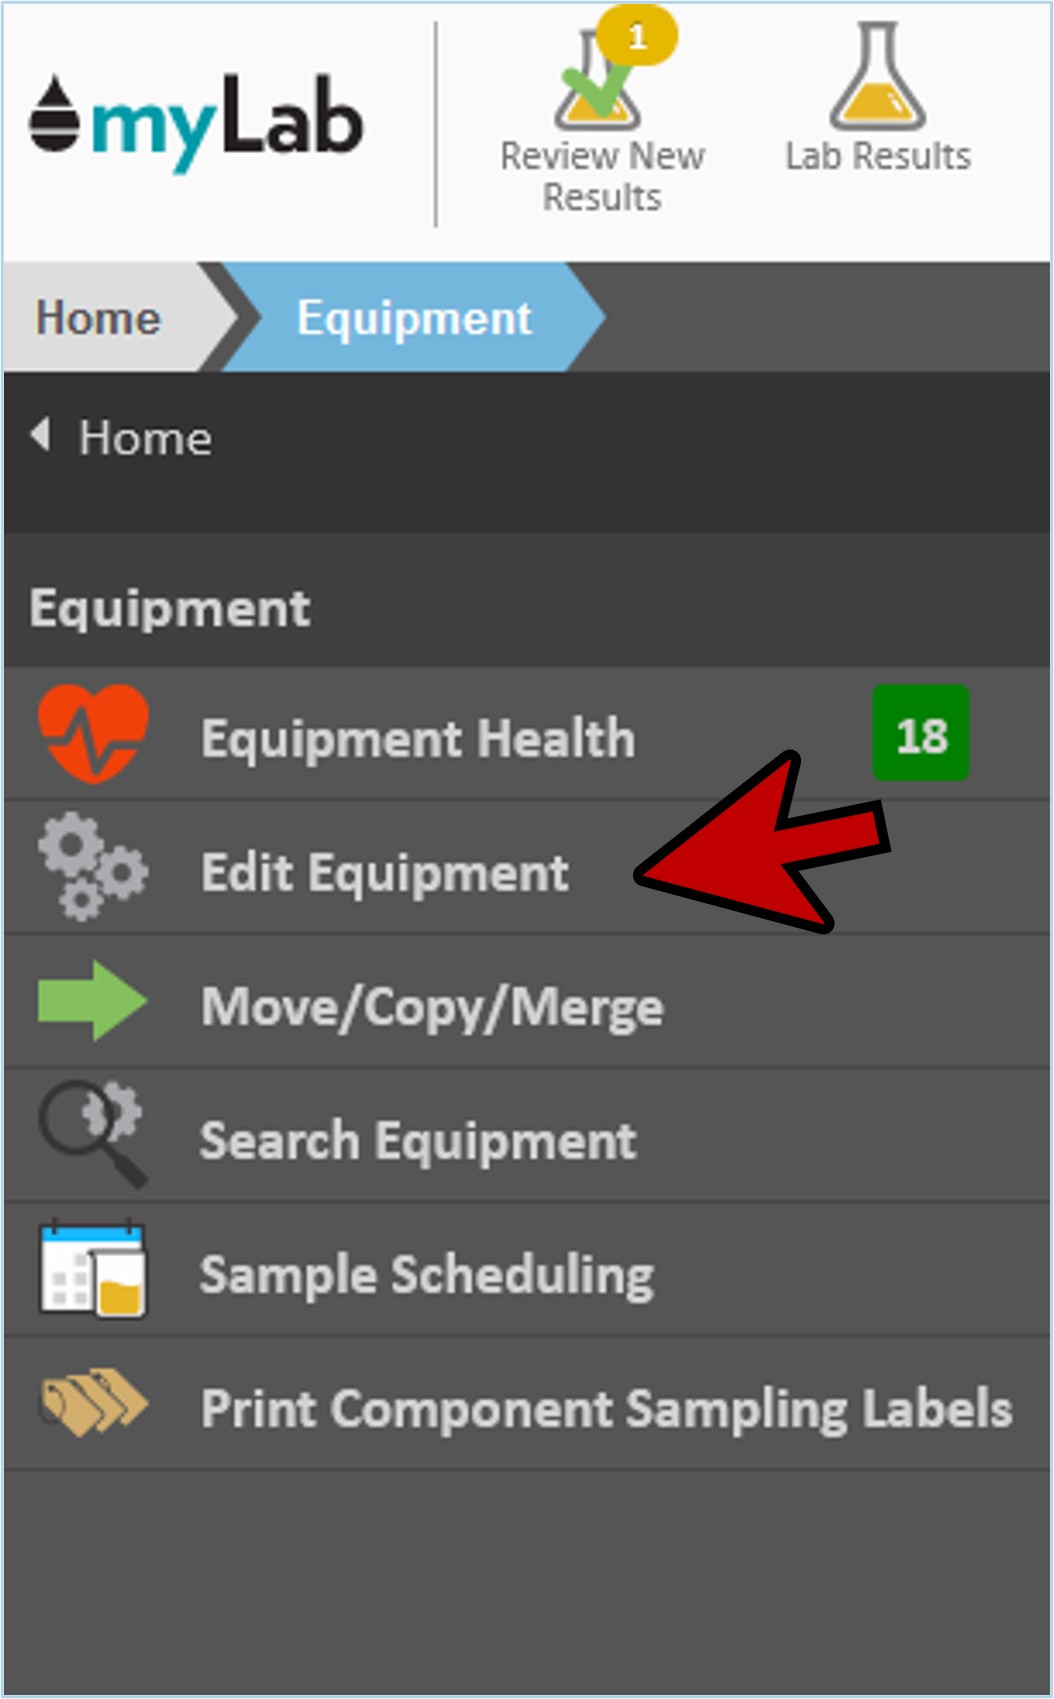
- From the myLab Home Page, click on “Equipment” in the left navigation. Select “Edit Equipment” from the next menu.
- From the following menus, select the “Customer” > “Unit Area” > “Unit Type” > “Unit” > “Component”.
- Select the “Sample Scheduling” tab.

- Click on the “Use Component Rule” to switch from “Use Global Rule” (A).
- Enter your “Component Scheduling Rule”. For example, Sample Every 1 Weeks (B).
- View when a sample was last taken and when the next one is due (C).
- Click “Save” (D).

Scheduling Multiple Components Using Rules
The following instructions will explain how you can include multiple rules that apply to filtered sets of your equipment.
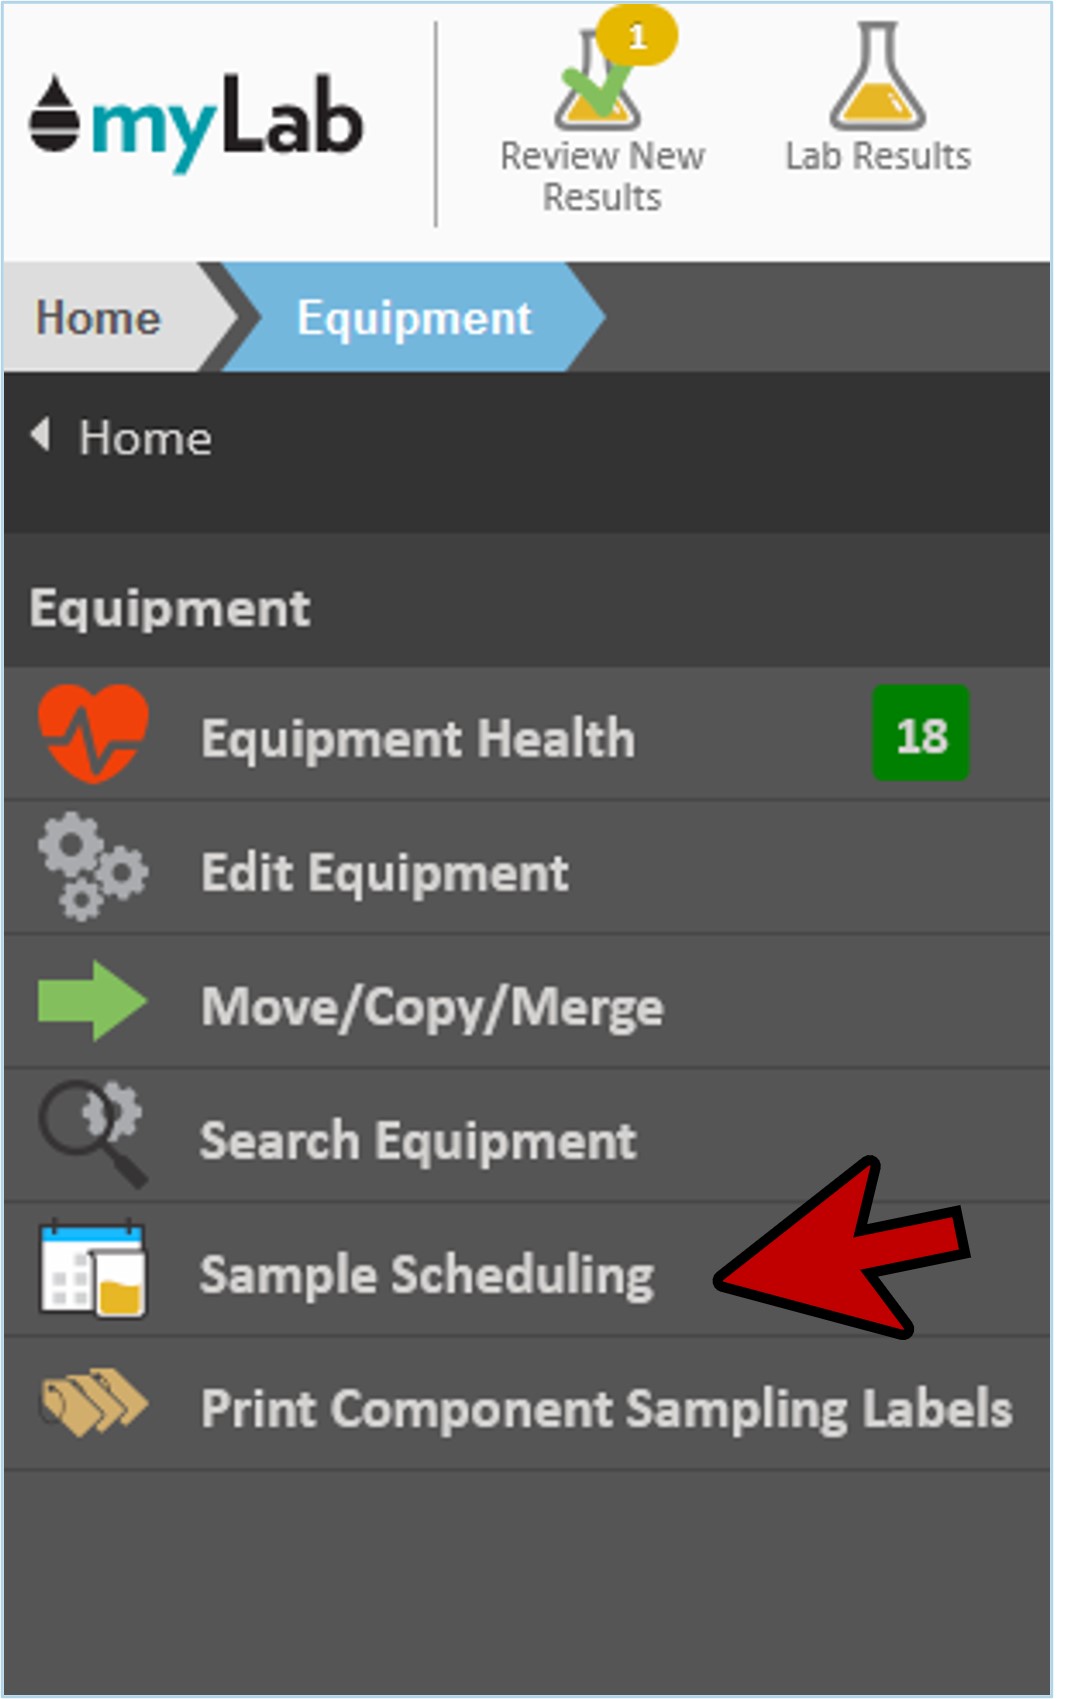
- From the Home page, select “Equipment” in the left menu and then click “Sample Scheduling”
- At the bottom of the screen, click the green “Add Scheduling Rule” button.

- Start to apply your filter rules under each of the headings – Sample Entry, Unit Type, Component ID, Manufacturer, Model.
- For example, set the new rule for every 500 Entered Service (ex.hours) and then add Component ID ENGINE and Manufacturer CATERPILLAR (A).
- myLab uses the rules in the order you arrange them. It’s important to arrange the rules so the most specific rule is on the top and the least on the bottom.
- You can move a rule up or down, by clicking on the rule in any column to select it, and then pressing up or down here (B).
- Once set, click the blue “Save” button in the bottom right corner (C)
- Now all the rules you’ve added will apply to the components noted.

Due Samples
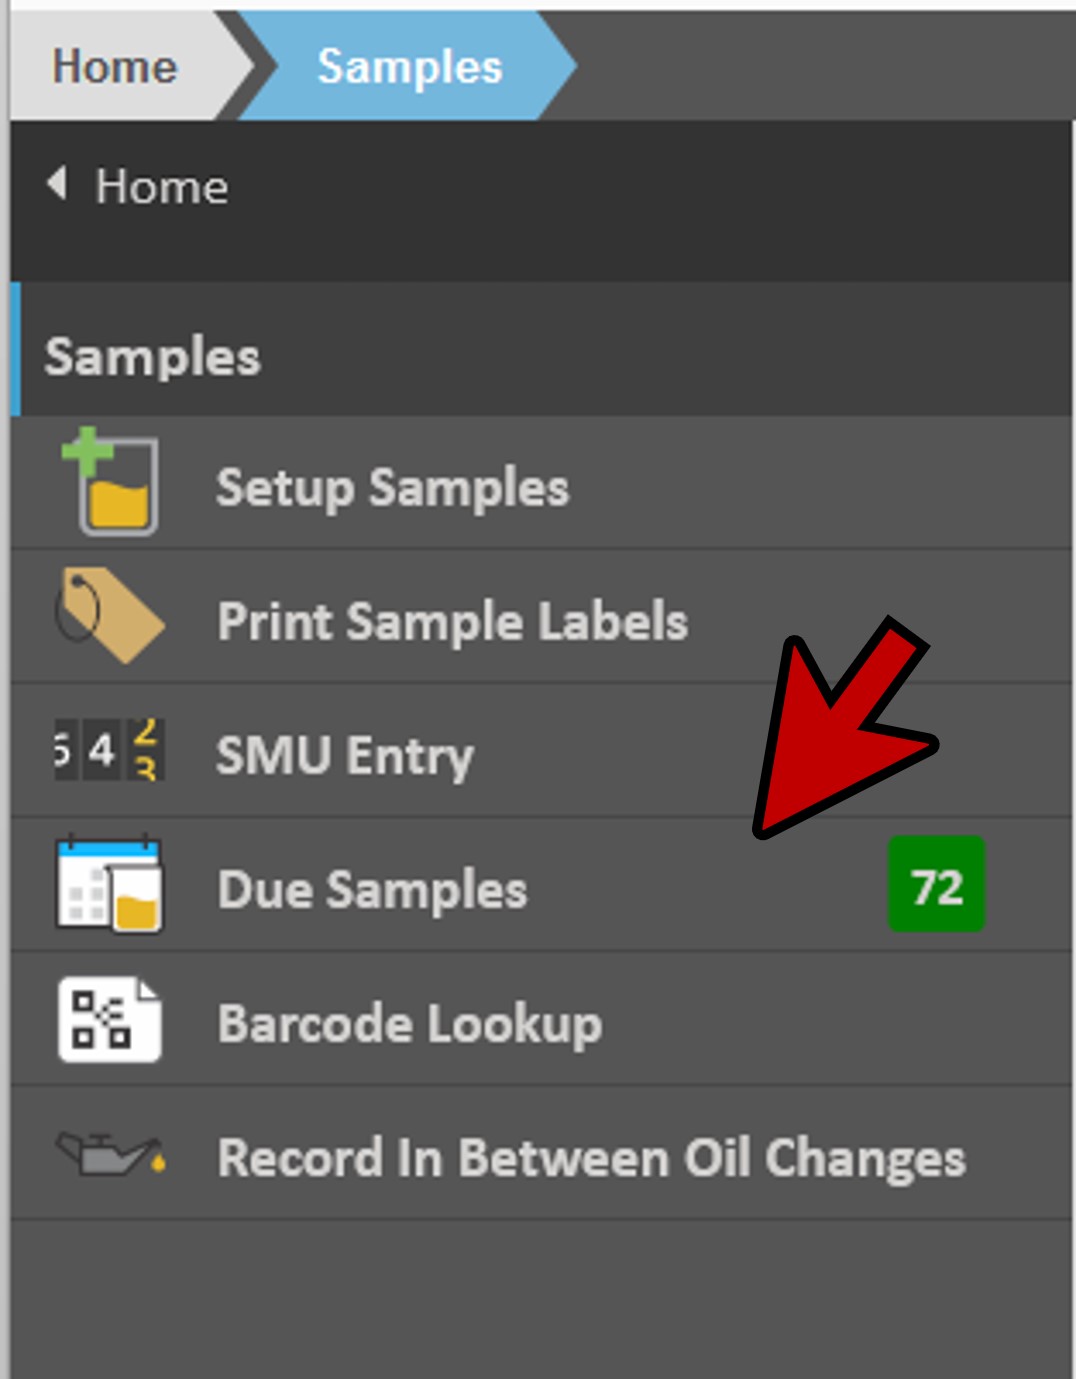
- To view any upcoming samples (those that are due), from the Home page, select “Samples” from the left menu.
- In the next menu, you will see a green indicator with the number of samples currently due.
- Click “Due Samples”.
- This will open up the “Find Due Samples” screen.
- Enter the cut off date in the “Due Date” box.
- myLab does all of the calculations for you and gives you a list of all of the due components in a spreadsheet.
- You can export this file to Excel or Print for reference.
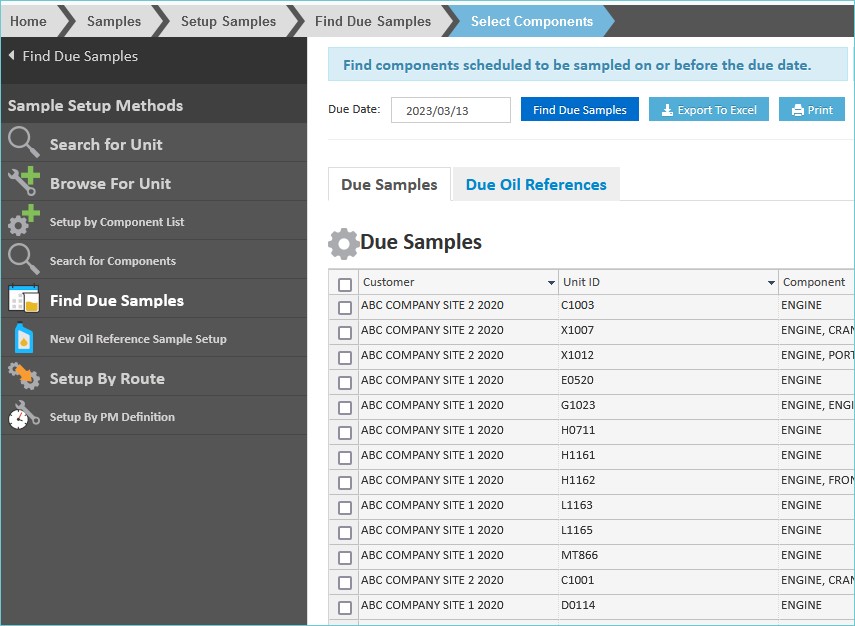
- Use the checkboxes beside each line item to select which ones you’d like to sample.
- Click “Setup Samples”.
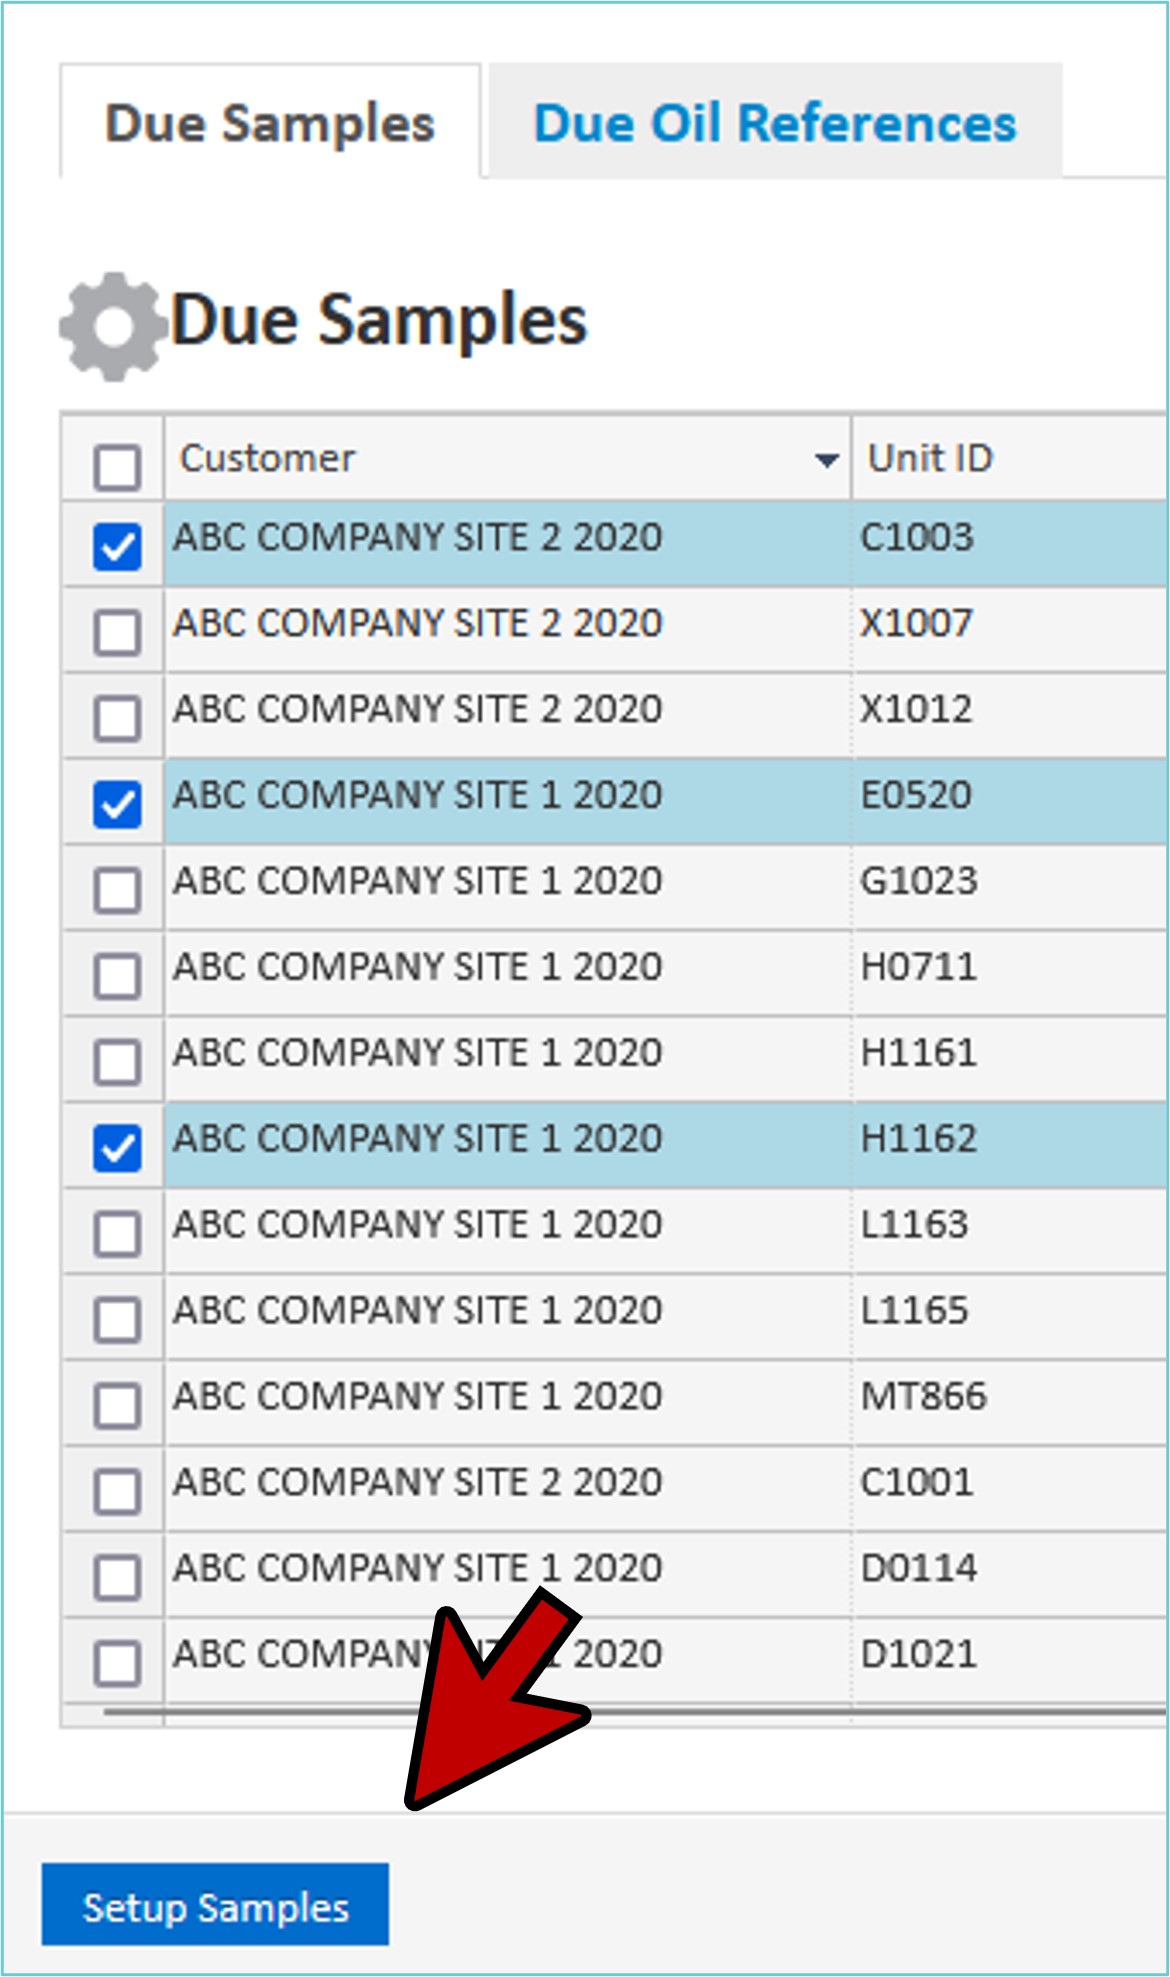
- This will open the “Create Samples” screen.

- The rest of the registration process is the same as normal.
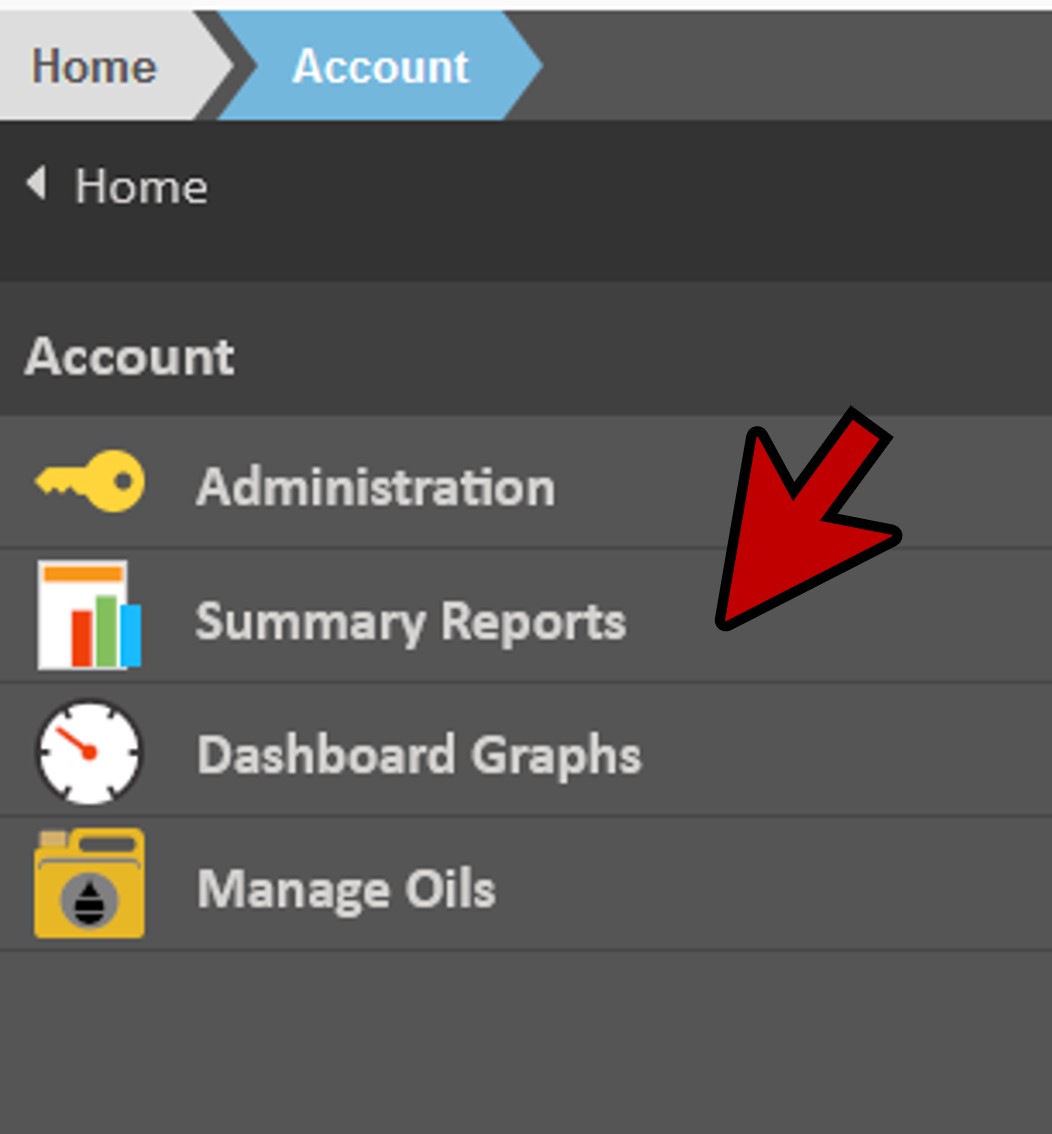
Scheduled Equipment on a Summary Report
- From the Home page, select “Account”.
- On the next menu, select “Summary Reports”.
Scheduled Components
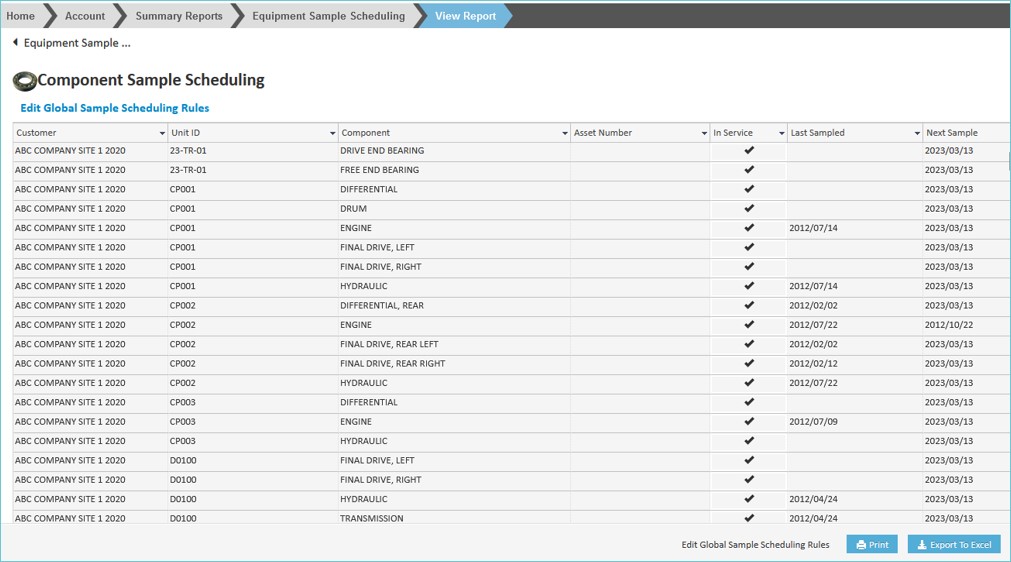
- On the next menu, select “Equipment Sample Scheduling”.
- From this screen, select the customers you’d like to report on using the check boxes to the left of the customer (A).
- Click “Generate Report” (B).
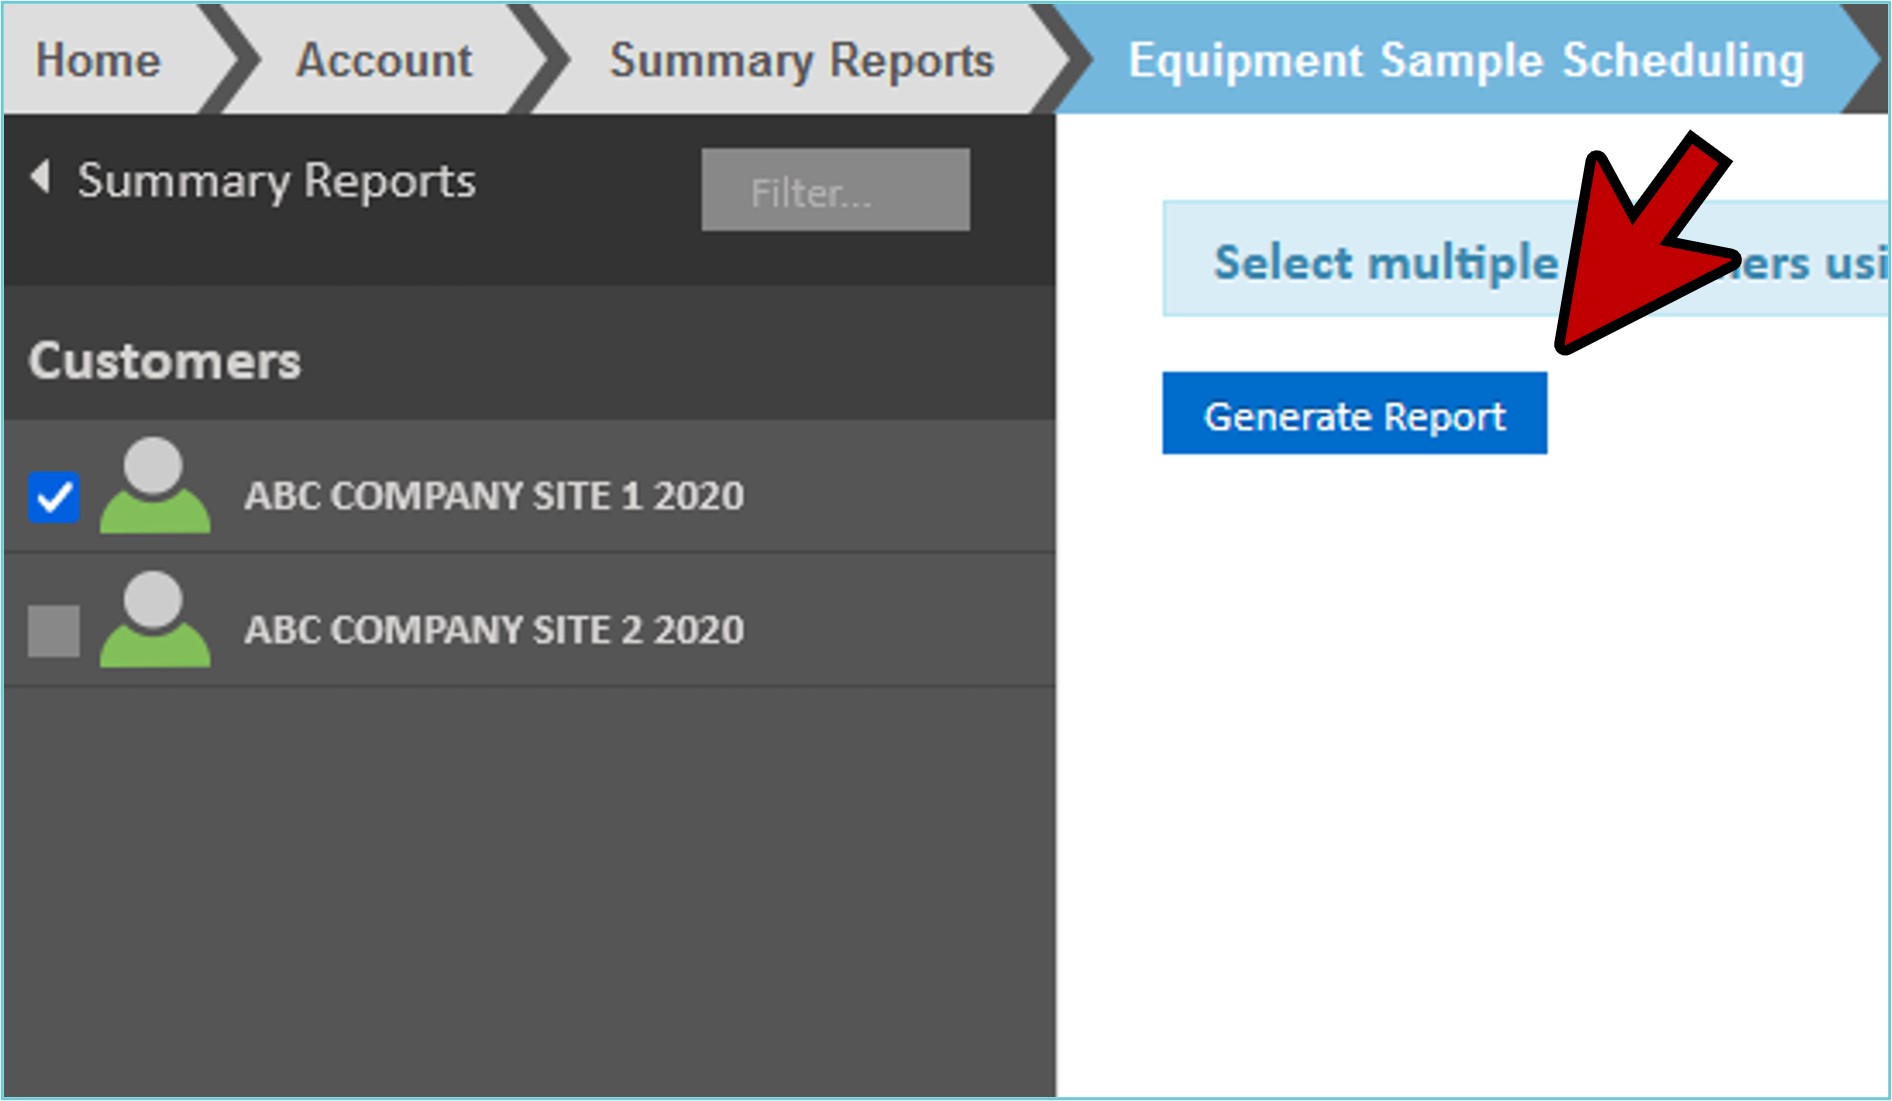
- This creates a spreadsheet of all components for that customer and how they are scheduled.
- You can Print this report or Export to Excel.
- You can also click the “Edit Global Scheduling Rules” link and edit your scheduling rules accordingly.
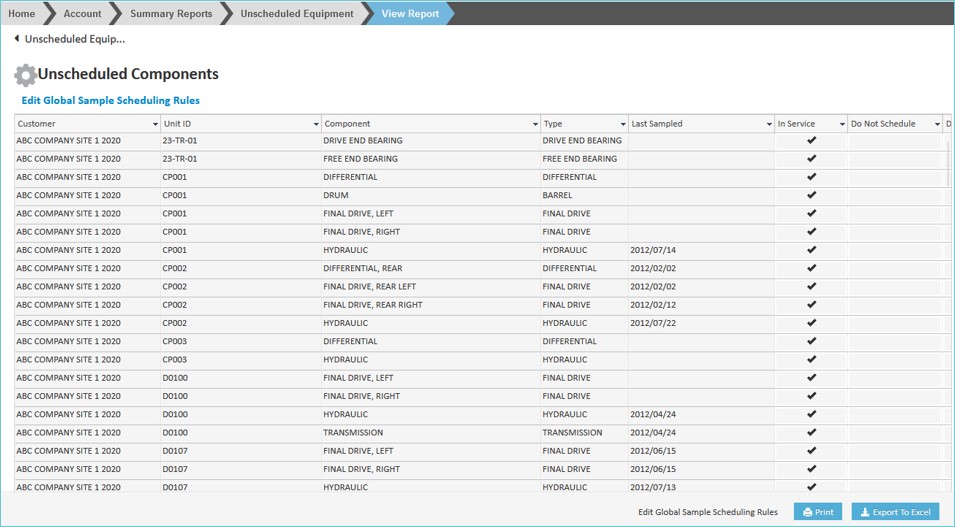
Unscheduled Components
- From here you can also view if you have any components without a schedule on the Unscheduled Equipment Report.
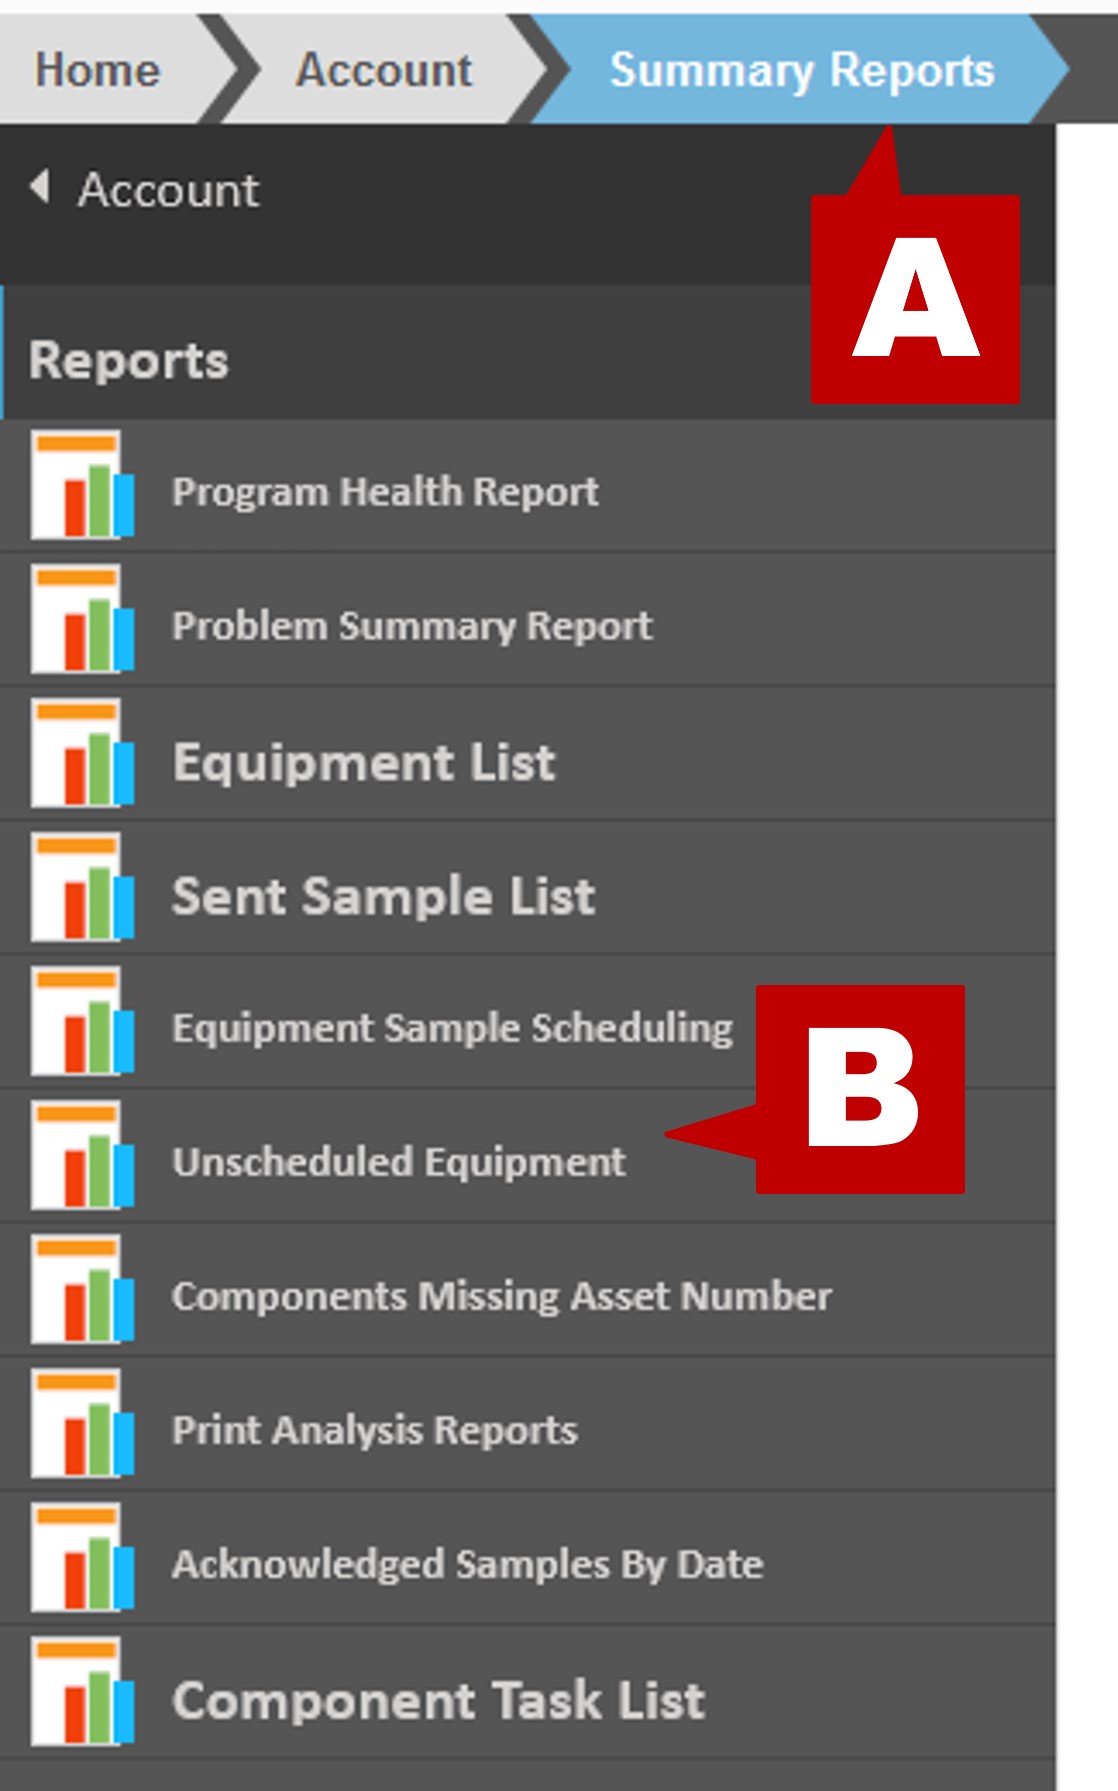
- Click on the location bar above the report onto “Summary Reports” (A).
- From the left menu, select “Unscheduled Equipment” (B).
- As with Scheduled Components, select the Customer and click the “Generate Report” button.
- You will now have a spreadsheet view of all components for that customer that are not scheduled.
- You can print this report or export to Excel for review.
- You can also click the “Edit Global Scheduling Rules” link and edit your scheduling rules accordingly.