Reliablility Alerts
Alerts are reminders for you or someone else to follow up and make sure maintenance actions are performed.
Issuing Alerts
- Typically you’ll be in the Review New Results task found under Test Results in the left navigation menu.
- CLICK on the sample you want to create an alert for. This will open the sample report.
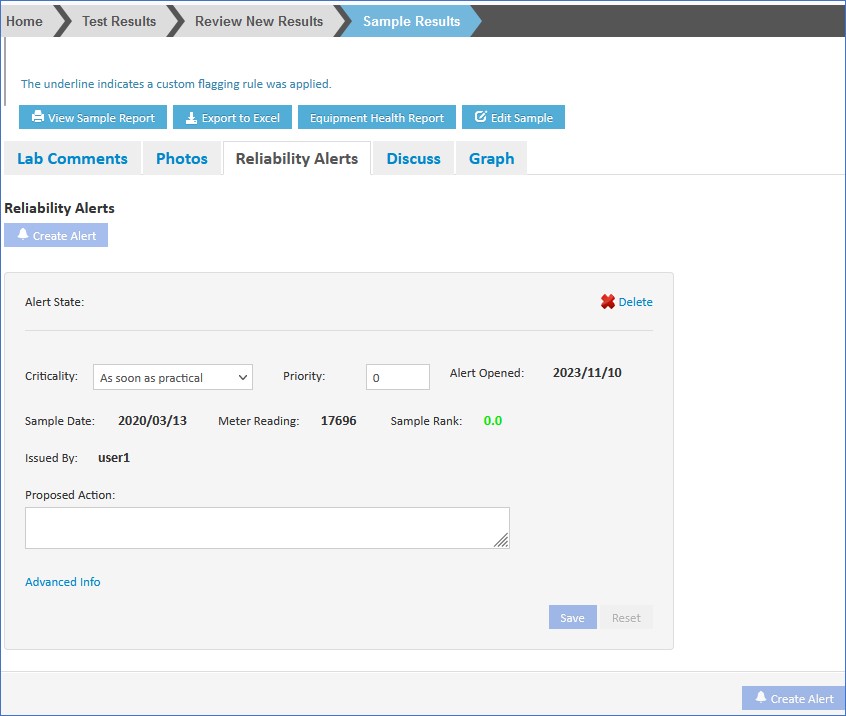
- At the bottom of the sample report, click the Create Alert button on the bottom right.

- This opens the Reliability Alerts tab on the sample report.
- Here you can set Criticality, Priority, Alert Opened, Sample Date, Meter Reading, Sample Rank, Issued By and Proposed Action for the alert. You can set those to which level is applicable to your concern.
- Click the Save button once you’ve completed entering the required information for the alert.
- It now becomes an open, needing response alert for whoever in your group is responsible for scheduling.
- You can view any alerts by clicking on the Reliability Alerts tab.
- CLICK Home.
Responding to Alerts
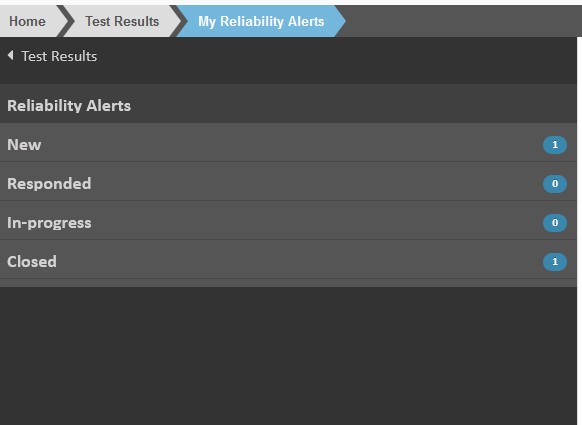
- The My Reliability Alerts task can be found under Test Results in the left navigation menu.
- The task will show the number of open alerts in the green highlight in the menu.
- Click on the My Reliability Alert task.
- Alerts are grouped in several categories which represent the stages at which an alert is at as it moves to completion.
- New
- Responded
- In-Progress
- Closed
- These alerts can come from you, or other users creating them while reviewing sample results.
- They can also be issued by Fluid Life’s Reliability Solutions team if you have a condition assessment and reliability evaluation program.
- For most of the stages the alerts are sorted by criticality and issue date.
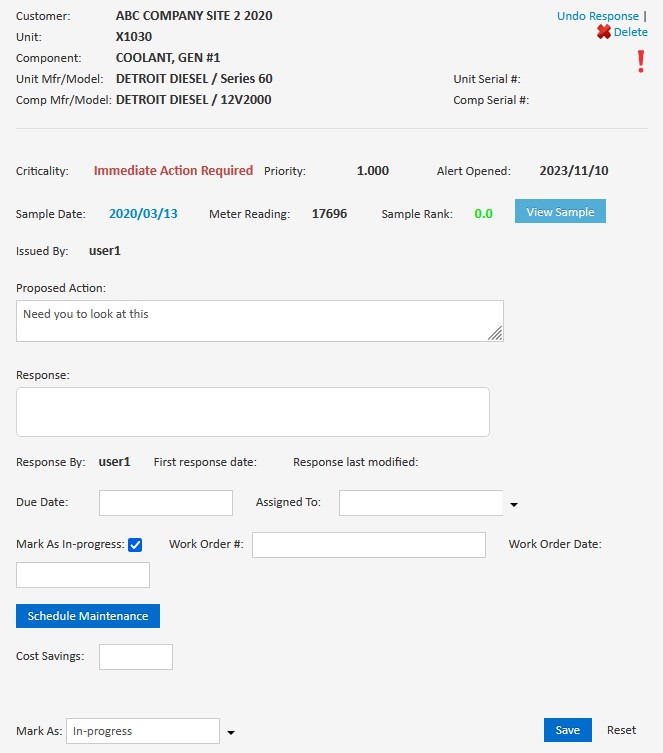
- In the alert you can see:
- The criticality of the alert (tells you the urgency to complete the alert_.
- When the alert was opened and who it was Issued By.
- The sample date and Sample Rank for the sample that the alert is in response to.
- View the sample by clicking on the blue View Sample button.
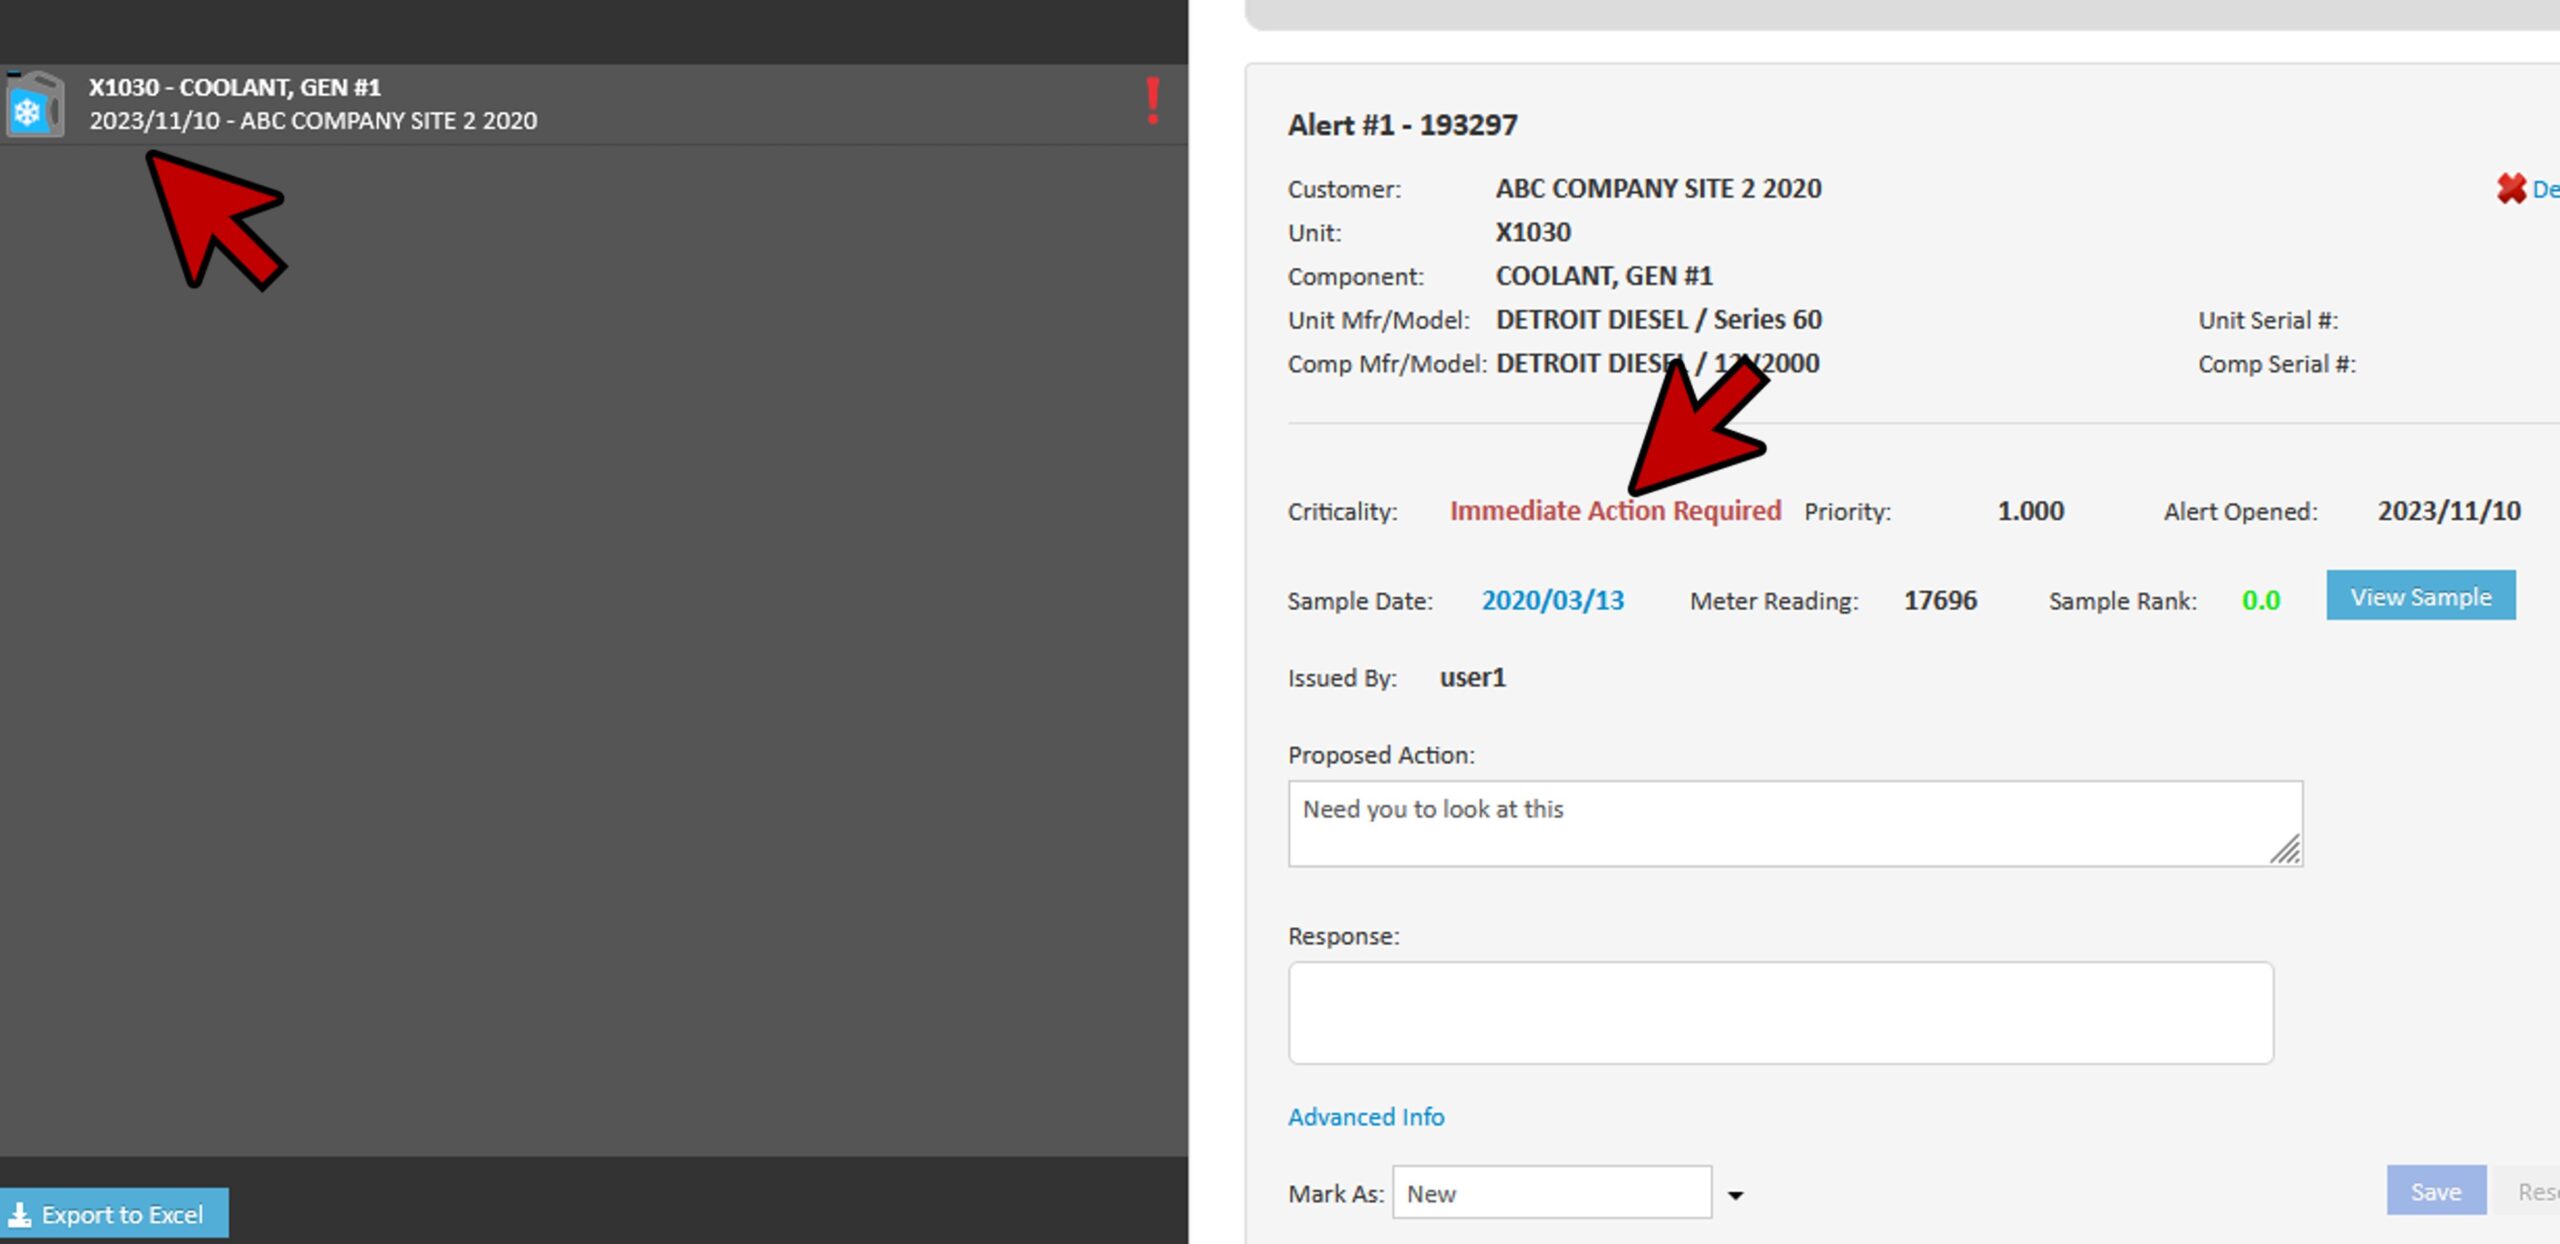
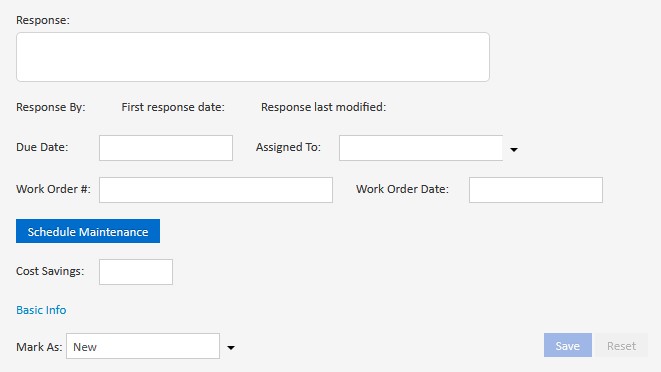
- To respond to an alert, simply enter your response in the section marked Response. Typically this is a description of the action you’ll take. You can also do this from the sample view page if you prefer.
- If you schedule the work and have a work order number, you enter that by clicking on Advanced Info. Insert the work order information accordingly in the fields provided (Work Order Number and Work Order Date).
- When you’re done update the Mark As field to Responded.
- Click Save.
- The alert is now moved to the next stage.
- Your alert will be moved to the Responded stage.
- If you are managing the alert, you can then open the alert under Responded and check the Mark as In Progress check box which automatically changes the Mark As drop down at the bottom of the screen.
- Click Save.
- At this point you are waiting for the action to be performed.
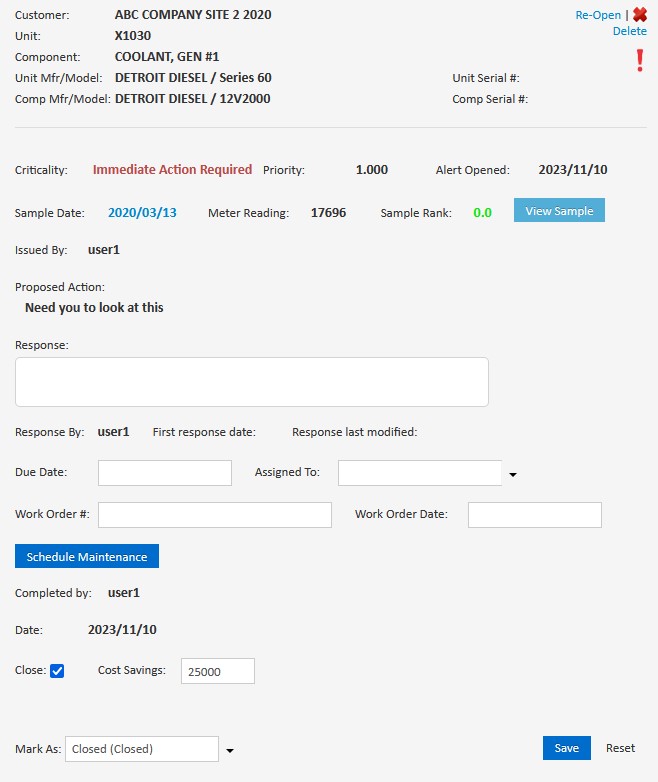
- Once the work is done, open the alert in the In-Progress tab and click the Close check box.
- Alerts from a reliability solutions program will typically have a suggested cost savings here.
- For your own alerts enter an estimate of the costs avoided by performing the work instead of allowing the component to fail.
- CLICK back on My Reliability Alerts. All of your closed alerts are available in the Closed stage.
- Unlike the other stages, this stage is sorted by alert date, with the most recent ones on top.
- Older alerts may be on multiple pages depending on how many you have.
- You can also always see the alerts for a component on the latest result view.