-
myLab
-
Services
-
- Acid Number
- Analytical Ferrography
- Base Number: ASTM D2896 vs. D4739
- Crackle Test: Monitoring Water in Used Oil
- Demulsibility
- FTIR Direct Trend Methodology
- Fuel Distillation (ASTM D86)
- ISO Particle Count
- Karl Fischer Water Titration
- Optical Particle Classification (OPC)
- Remaining Useful Life Evaluation Routine (RULER)
- SEM-EDS Wear Debris Analysis
- Total Magnetic Iron (TMI)
- Varnish Potential
-
-
Sampling
-
- Coolant Sampling Procedures
- Grease Sampling Procedures
- Oil Sampling Basics (Short Course)
- Oil Sampling Procedures (Video)
- Oil Sampling Procedures: Good-Better-Best (PDF)
- Sample Collection Basics
- Sampling Oil Using a Drain Plug
- Sampling Oil Using a Pushbutton or KST-Series Valve
- Sampling Oil Using a Sample Pump
- Sampling Oil Using Thread-On Probe Style Valves
- Used Oil Filter Sampling
- Sampling from Filter Carts
-
-
Data Interpretation
-
- Analytical Ferrography Reporting
- Basic Testing Interpretation (PDF)
- Common Wear Mechanisms (PDF)
- Comparison: Wear Debris Analysis Technologies
- DEF Specifications: ISO 22241
- DEF Testing: Data interpretation
- Oil Cleanliness: ISO vs. NAS
- Potential Source of Spectrometry Metals (PDF)
- Reading the OA Report (PDF)
- Understanding ISO Particle Counts (PDF)
- Wear Metal Origins (PDF)
- Why Diesel Fuel Dilution is Bad for Your Engine
-
- Data Interpretation Process (Video)
- Data Interpretation: Compressors (Video)
- Data Interpretation: Diesel Engines (Video)
- Data Interpretation: Grease Analysis for Wind Turbines (VIDEO)
- Data Interpretation: Hydraulics (Video)
- Data Interpretation: Natural Gas Engines (Video)
- Data Interpretation: Oil Analysis for Wind Turbines (Video)
- Data Interpretation: Reducers (Video)
- Data Interpretation: Turbines (Video)
-
-
Whitepapers
-
Success Stories
- Case Study: Early Detection of Bearing Wear
- Rapid Nitrite Depletion in Modern Excavator Cooling Systems: Causes and Solutions
- Unlocking Millions in Maintenance Cost Savings
- Strategic Optimization of Oil Drain Intervals
- The Case for Building Strong Partnerships
- Case Study: Extended Drain Interval
- CARE & Oil Analysis for Early Detection of Issues
- Fuel Dilution of Engine Oil in Mining Dozer
- Early Detection of Wear Metals in Gearbox
- Coolant Contamination in Dozer Engine Oil
- Case Study: The Right Test Slate for the Correct Failure Mode
-
FAQ
-
Release Notes
< All Topics
Print
Setting Up Due Samples
Posted
Updated
ByFluid Life
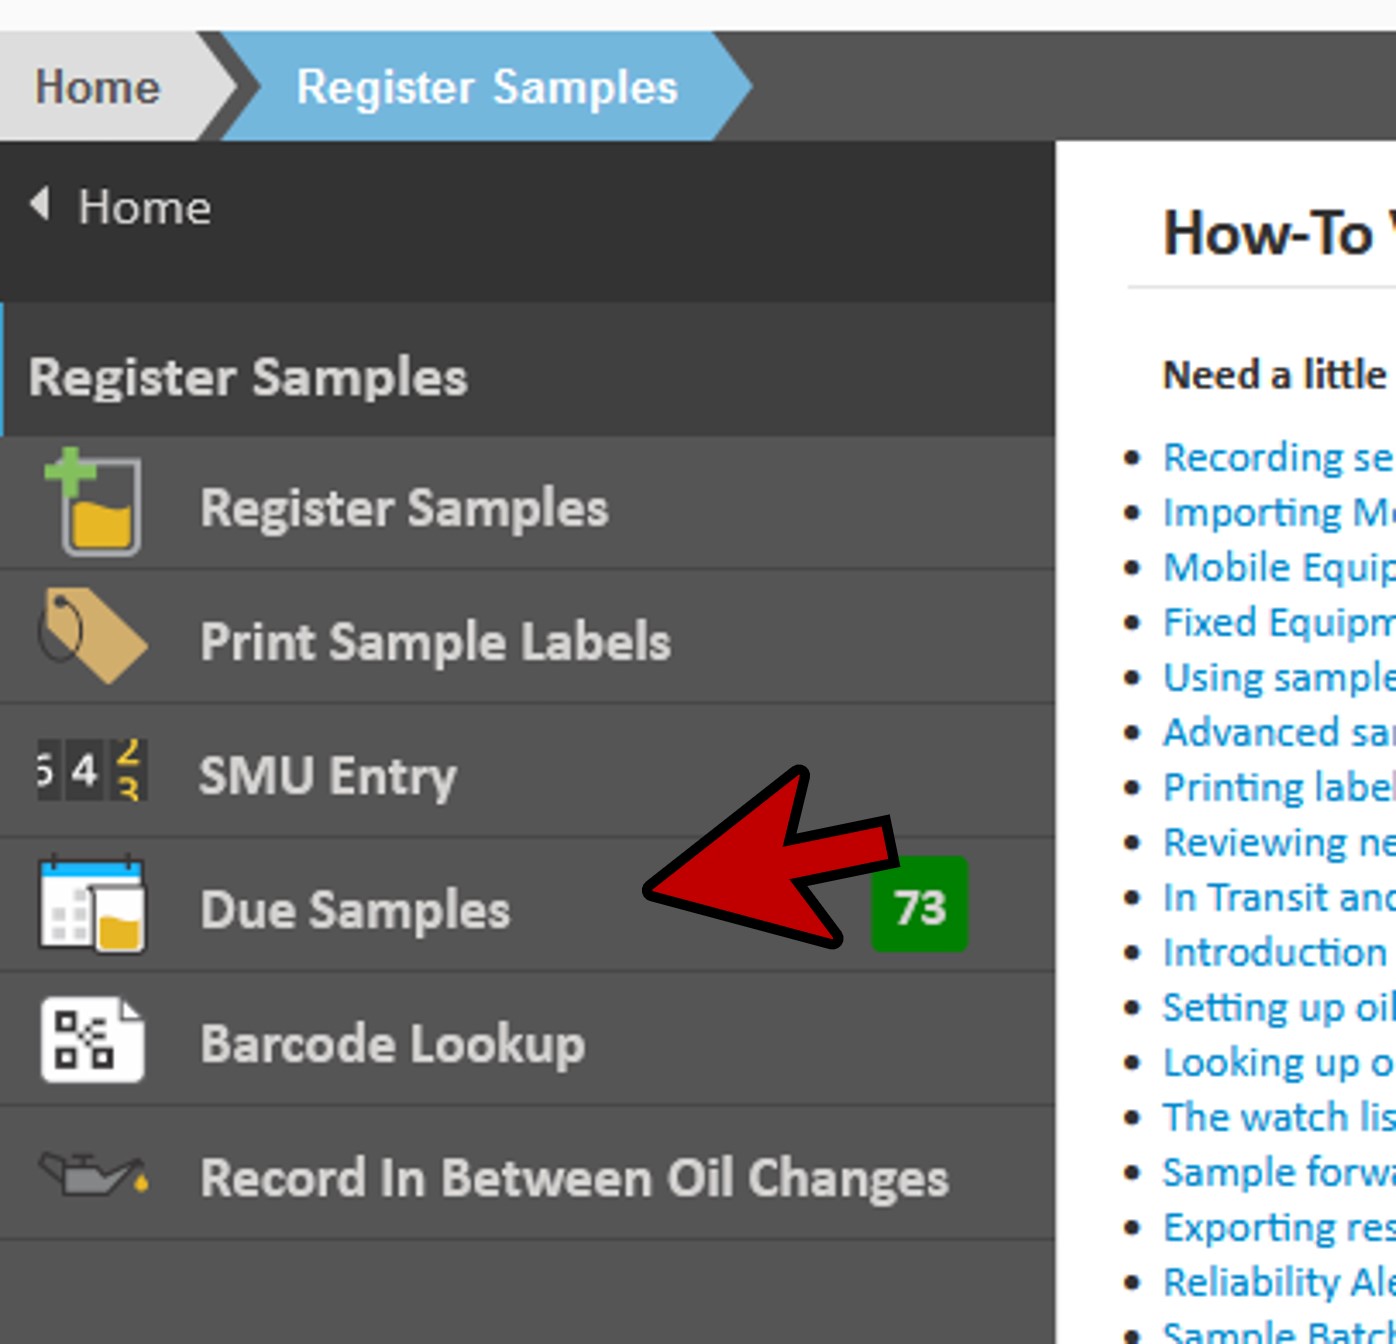
- From the left menu bar on the Home Page, select Register Samples>>Due Samples
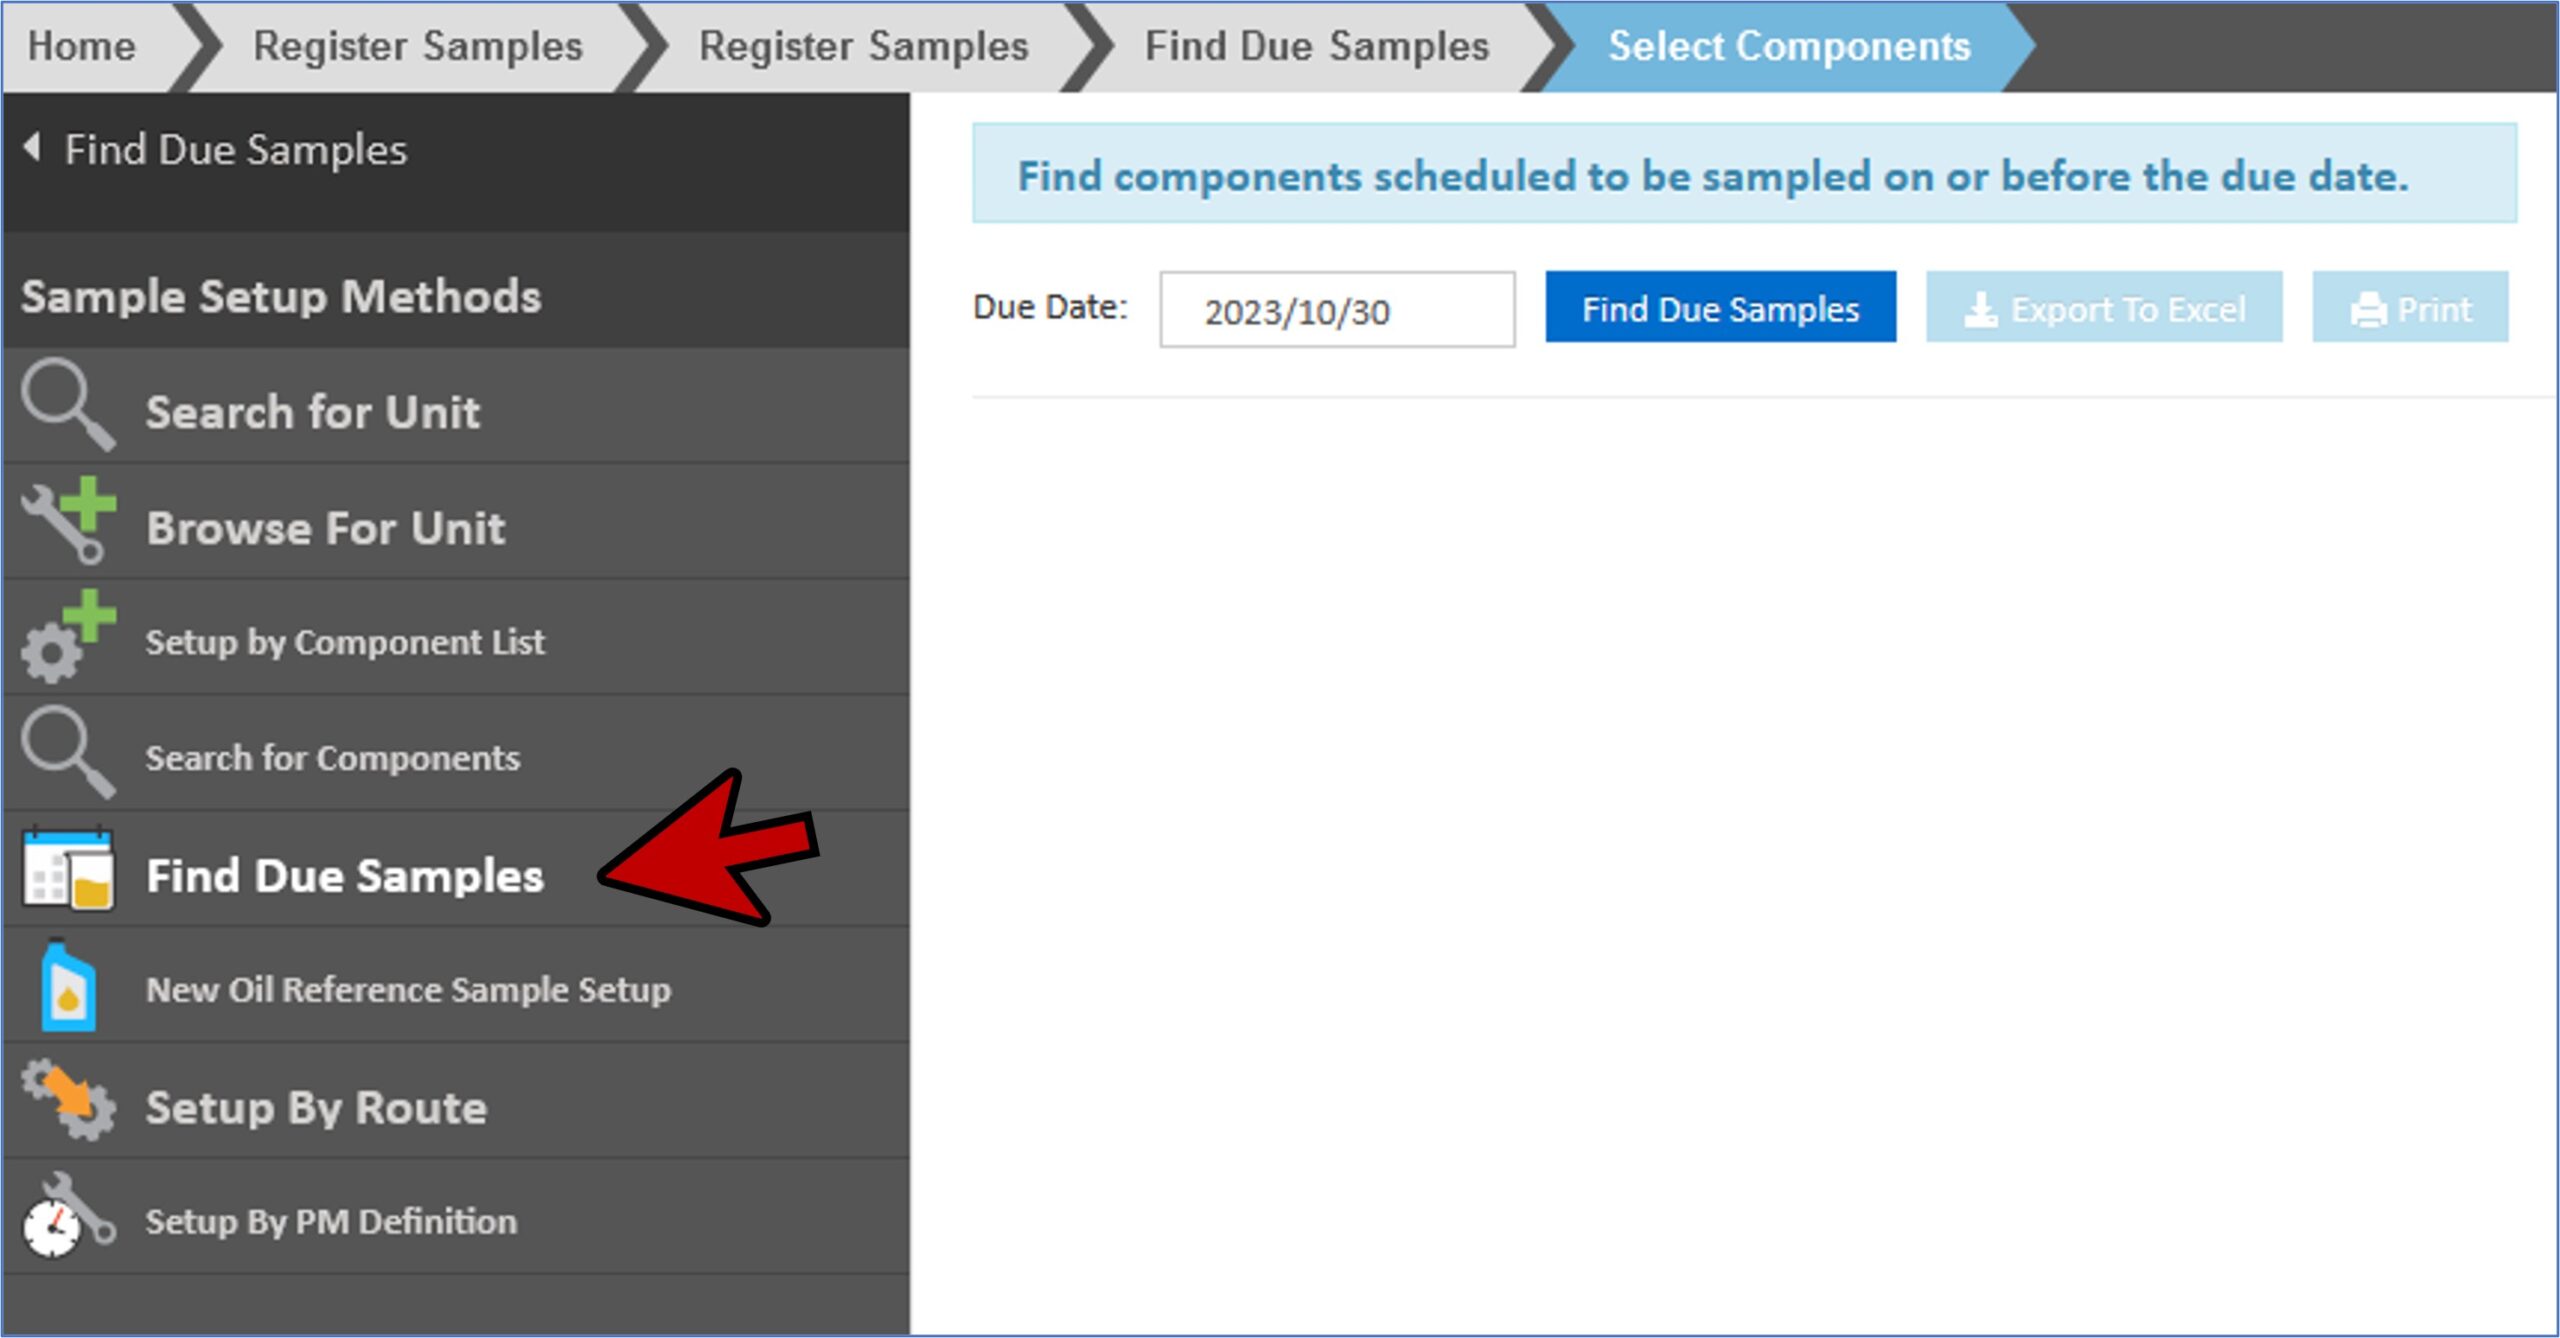
- CLICK on Find Due Samples.
- In the right screen, enter the Due Date. This will find all the components scheduled to be sampled BEFORE this date.
- Click the blue Find Due Samples button beside the due date field.
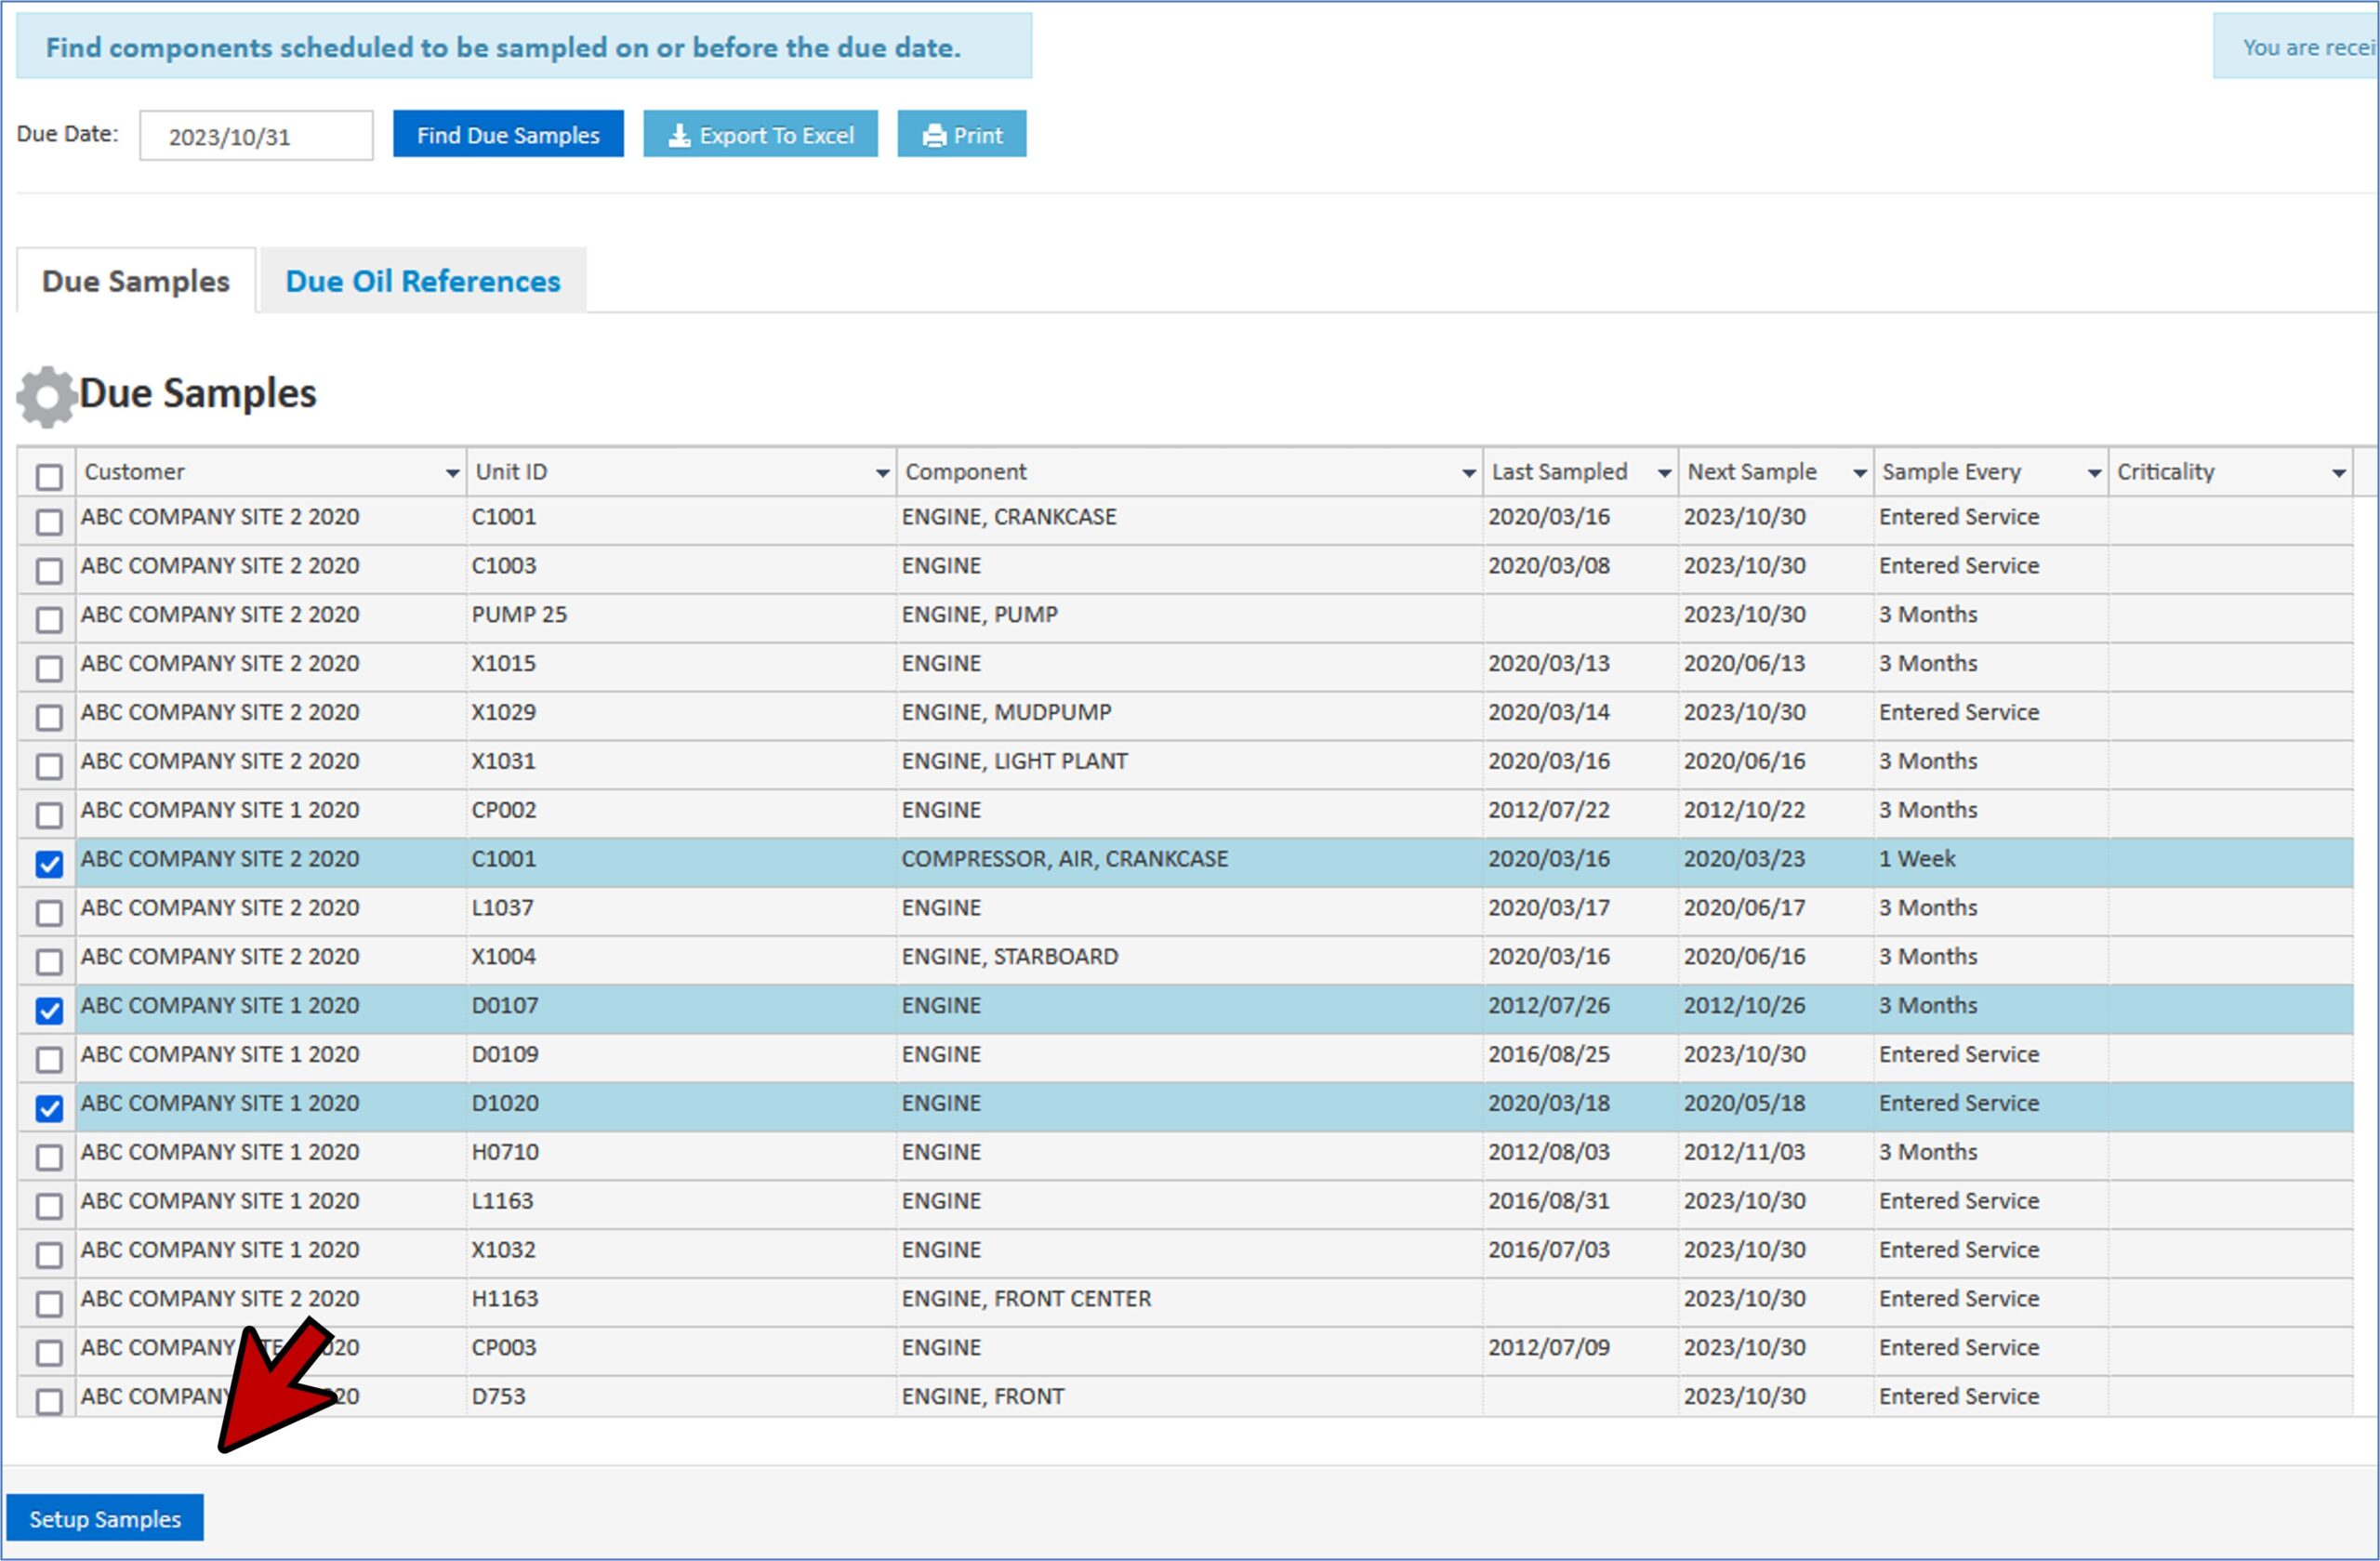
- myLab does all of the calculations for you and gives you a list of all of the due components in a spread sheet.
- You can use the check boxes here to select which ones you’d like to sample.
- Once you have selected the components you want to sample, click the Setup Samples button at the bottom of the screen.
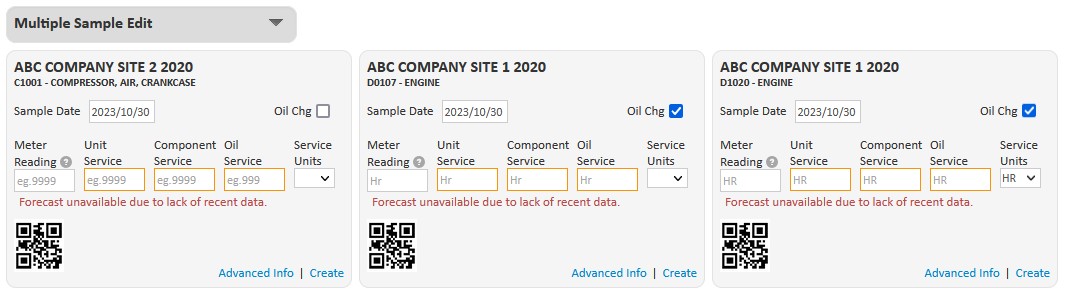
- The rest of the registration process is the same as normal. (Select on Basic Info or Advanced Info to enter all the required information)
- CLICK Home.
Tags:
Table of Contents