Advanced Sample Setup
In this article, we will review sample setup using advanced features such as changing the oil type, indicating if the sample is rush or a resample, including a request for additional testing, and multiple sample editing.
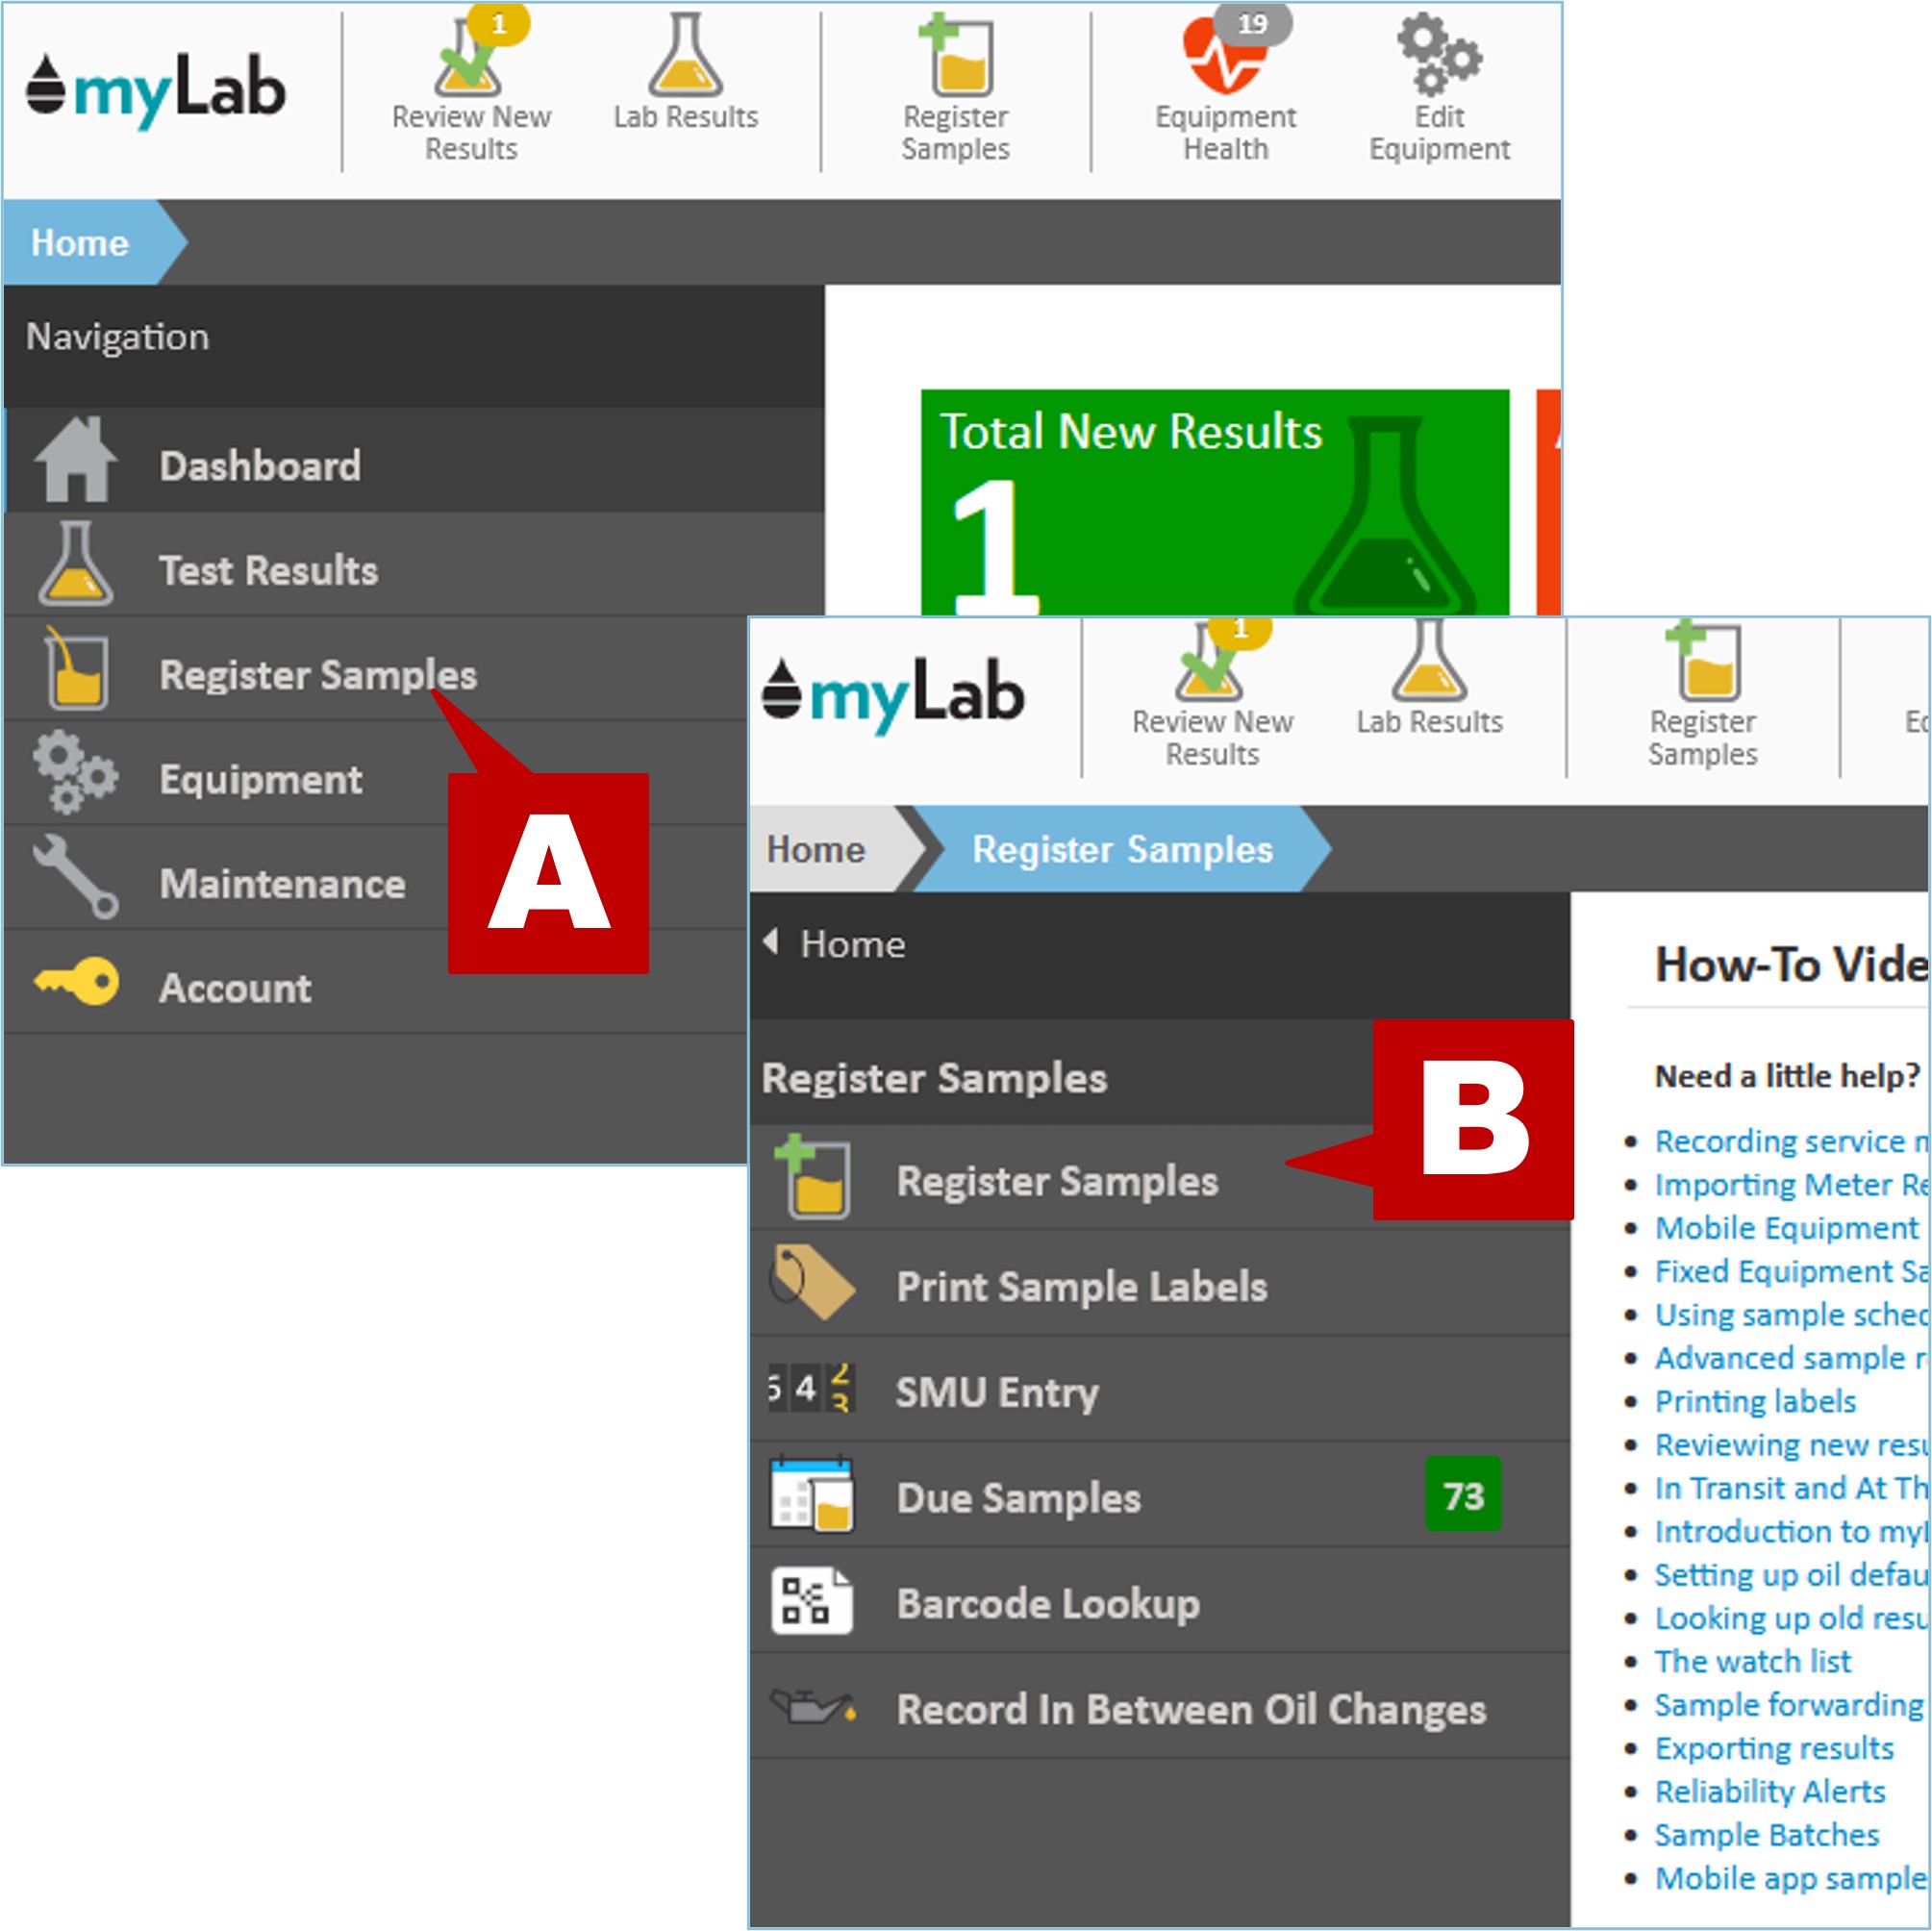
- On the home page, select “Register Samples” (A) and then “Register Samples” (B) once again in the left menu.
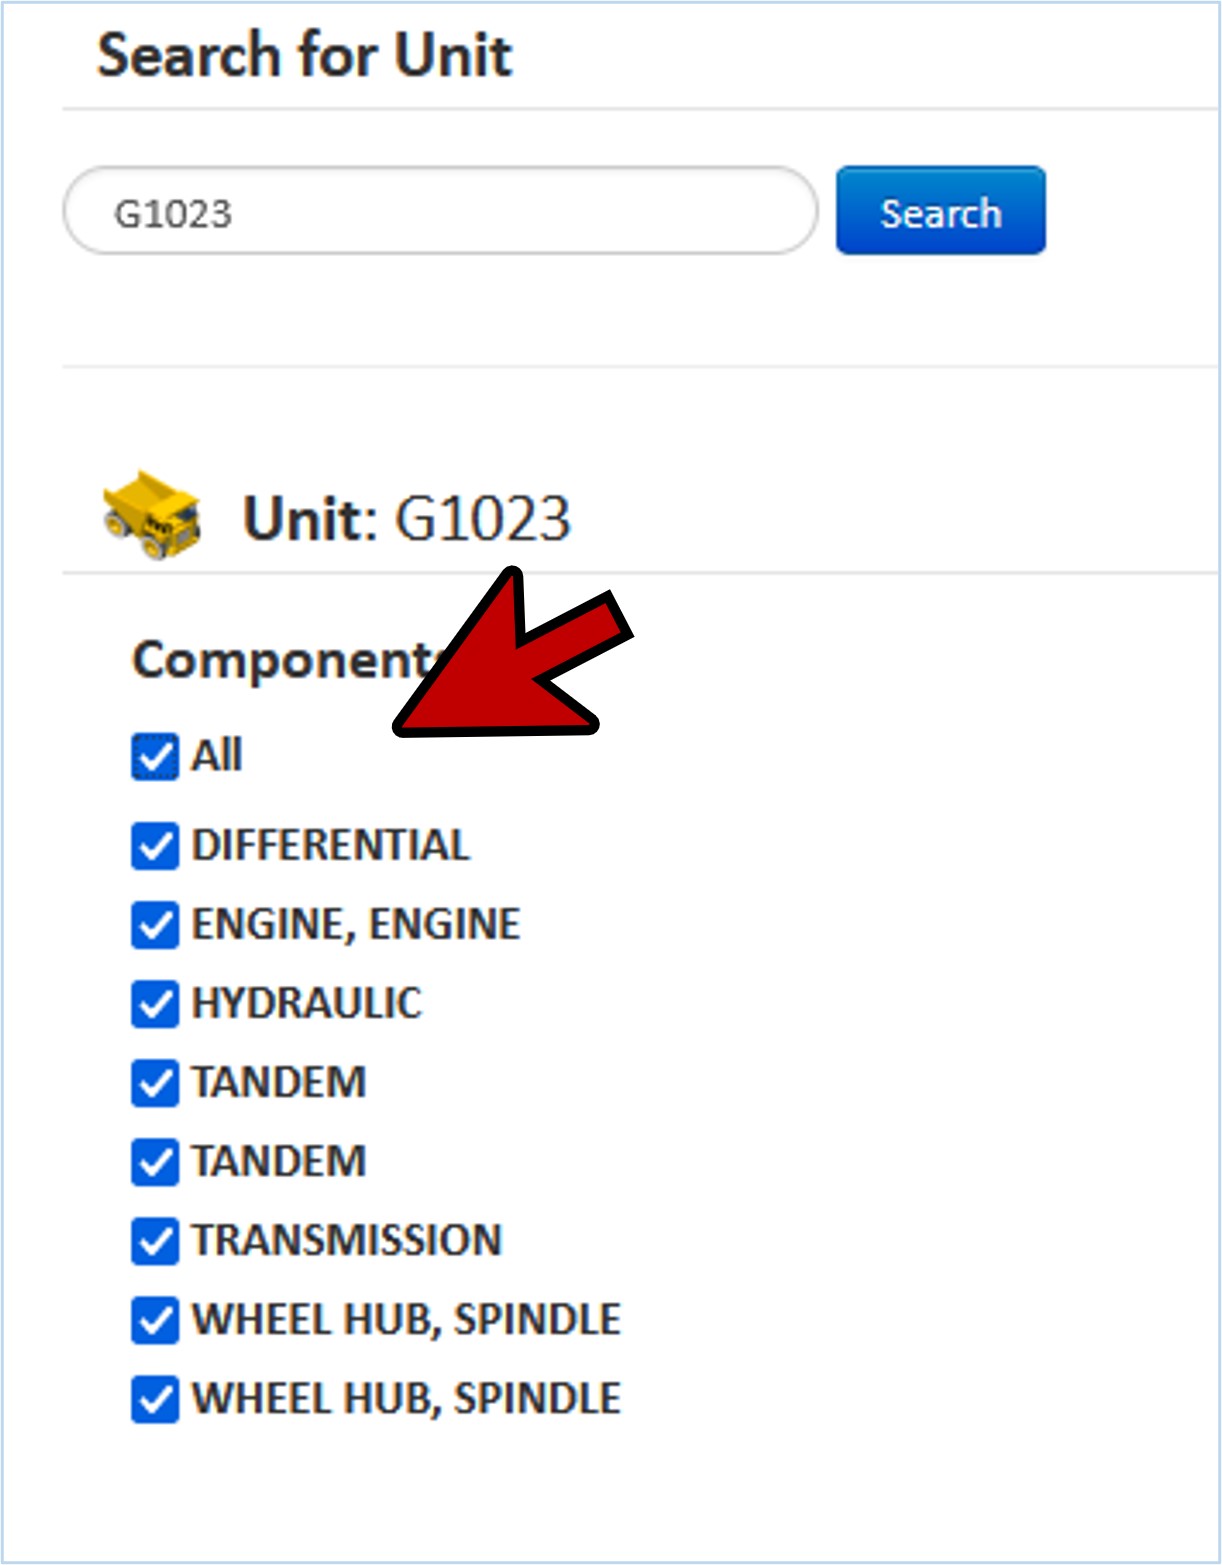
- In this example, we’ll find our units/components by using the “Search for Unit” option (A).
- Enter the unit number (in this case G1023) in the search box and click “Search” (B).
- A list of all of the components associated with that unit will then be shown under the Search box (C).

- Select the components you are sampling.
- If you sampled multiple components on a single unit, you can click “All” to include all components.
- Click on “Setup Samples” at the bottom of the page.
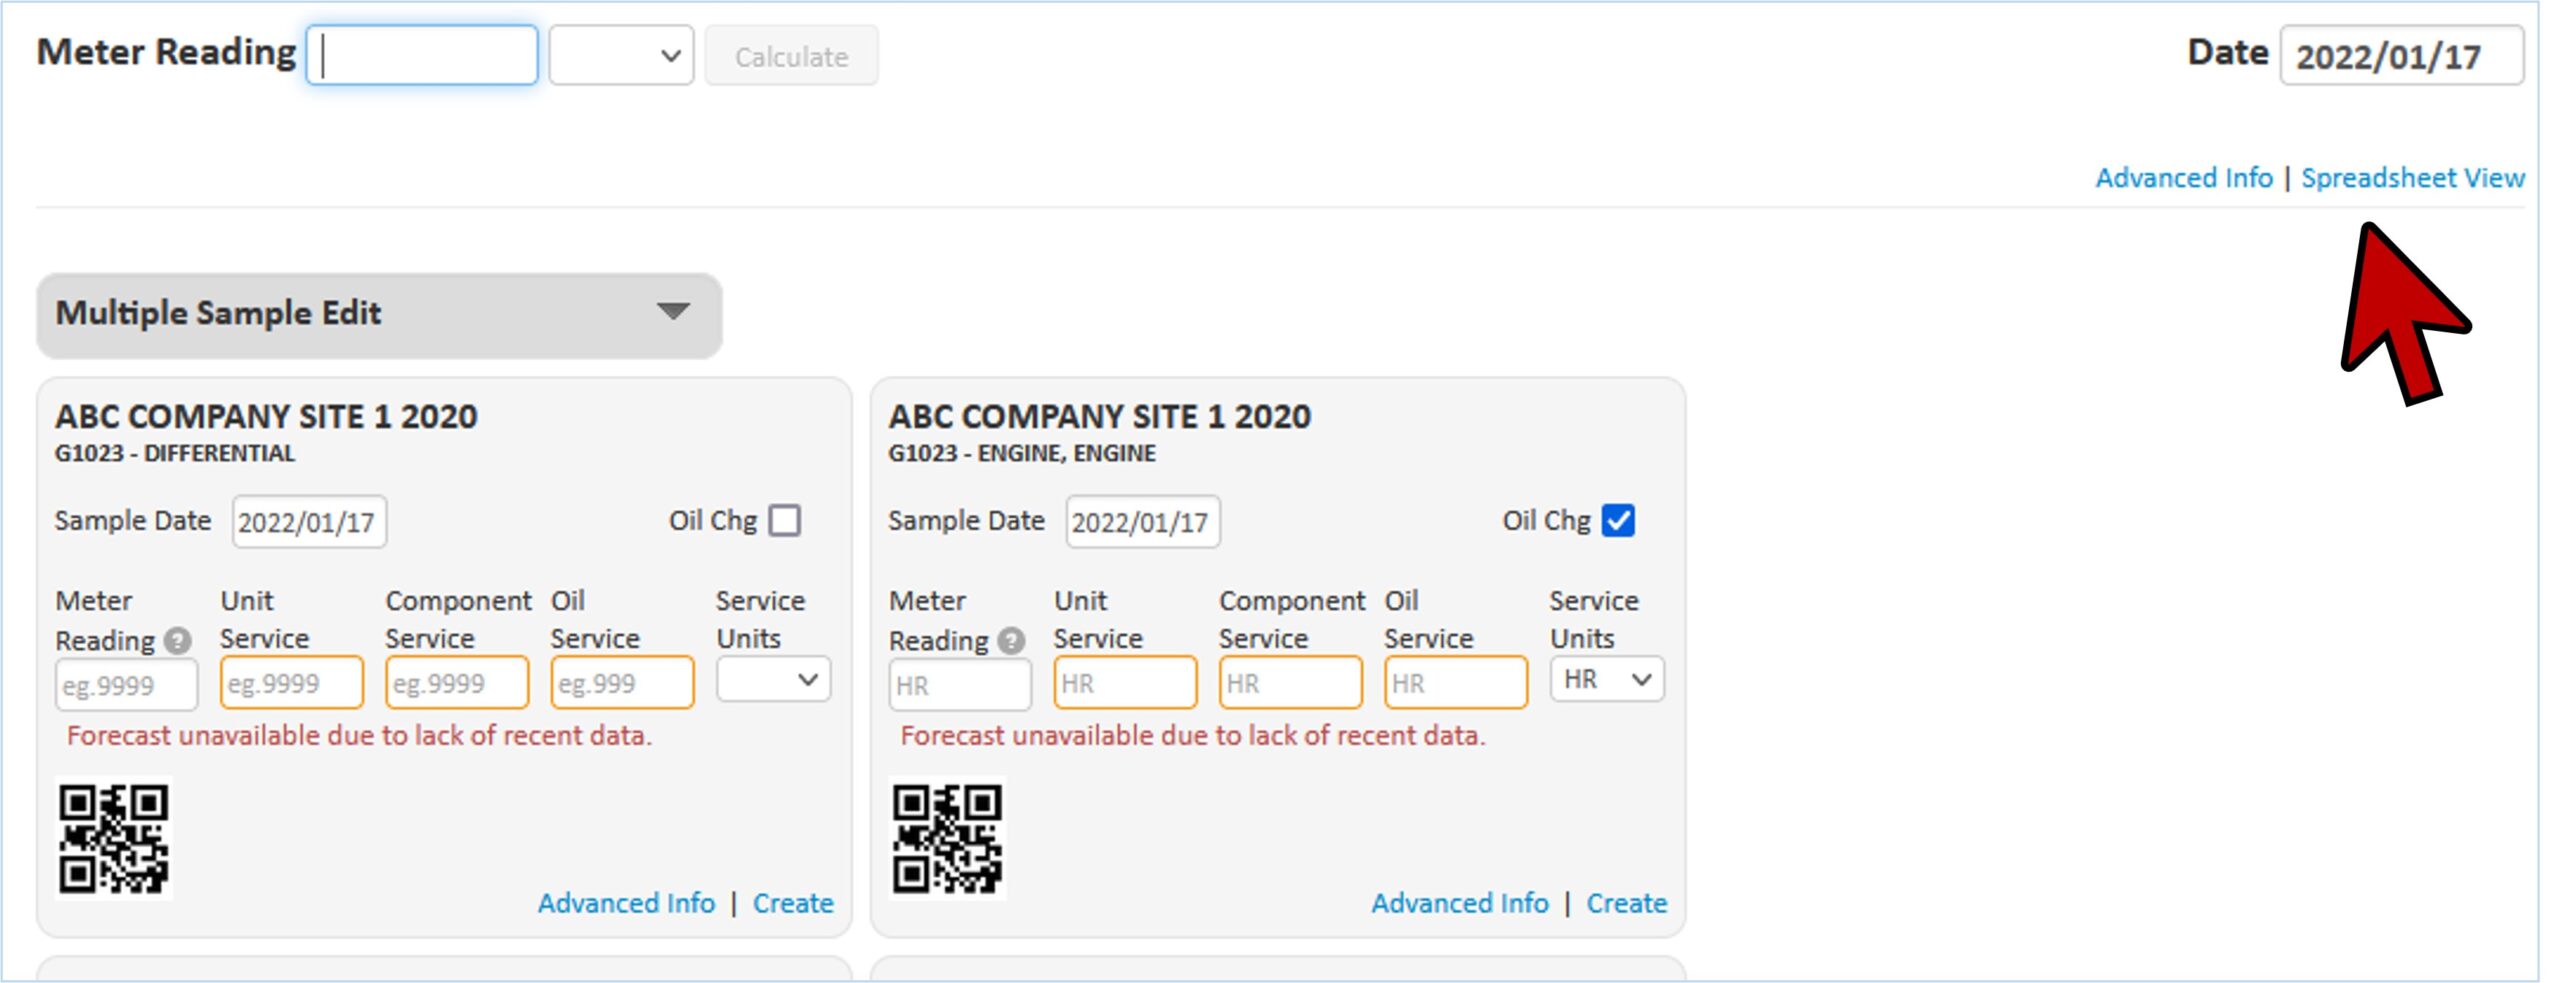
Modify Meter Reading & Date
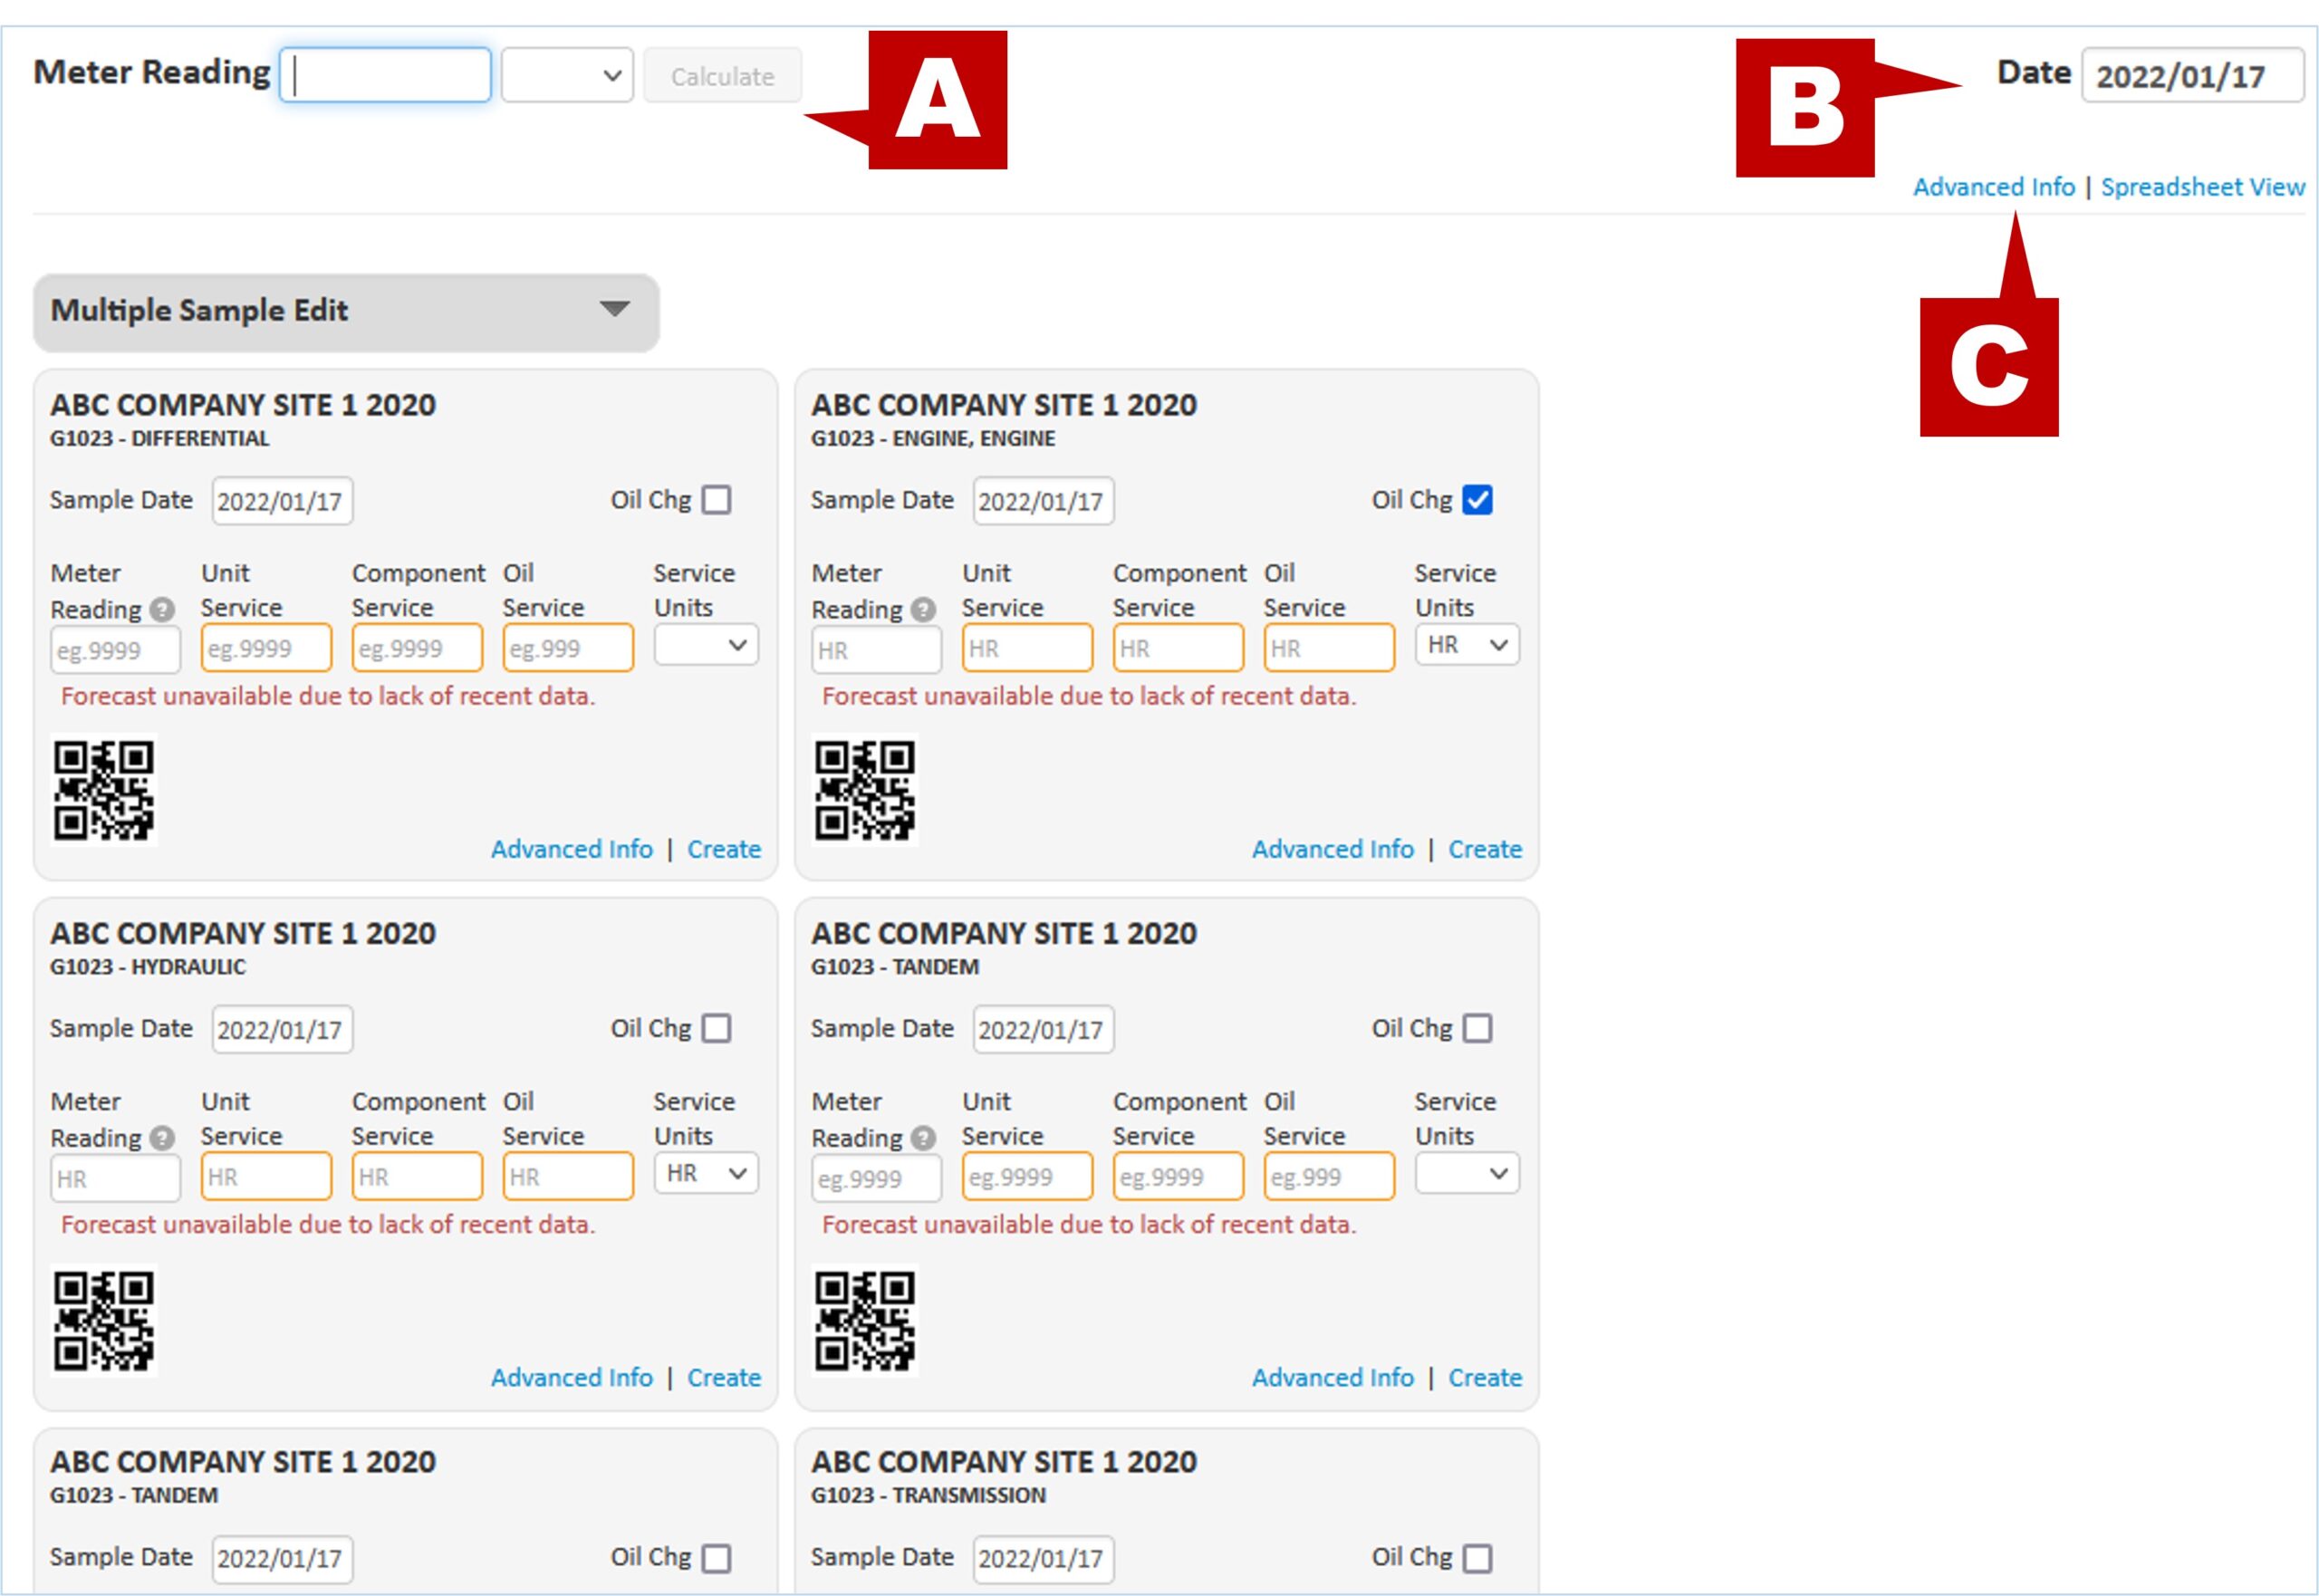
- You will now see all of the sample labels for the components selected.
- On this page you can change the meter reading for all components (A), change the date to match the date the samples were taken (B), and switch to the advanced settings screen by clicking “Advanced Info” (C).
Advanced Information
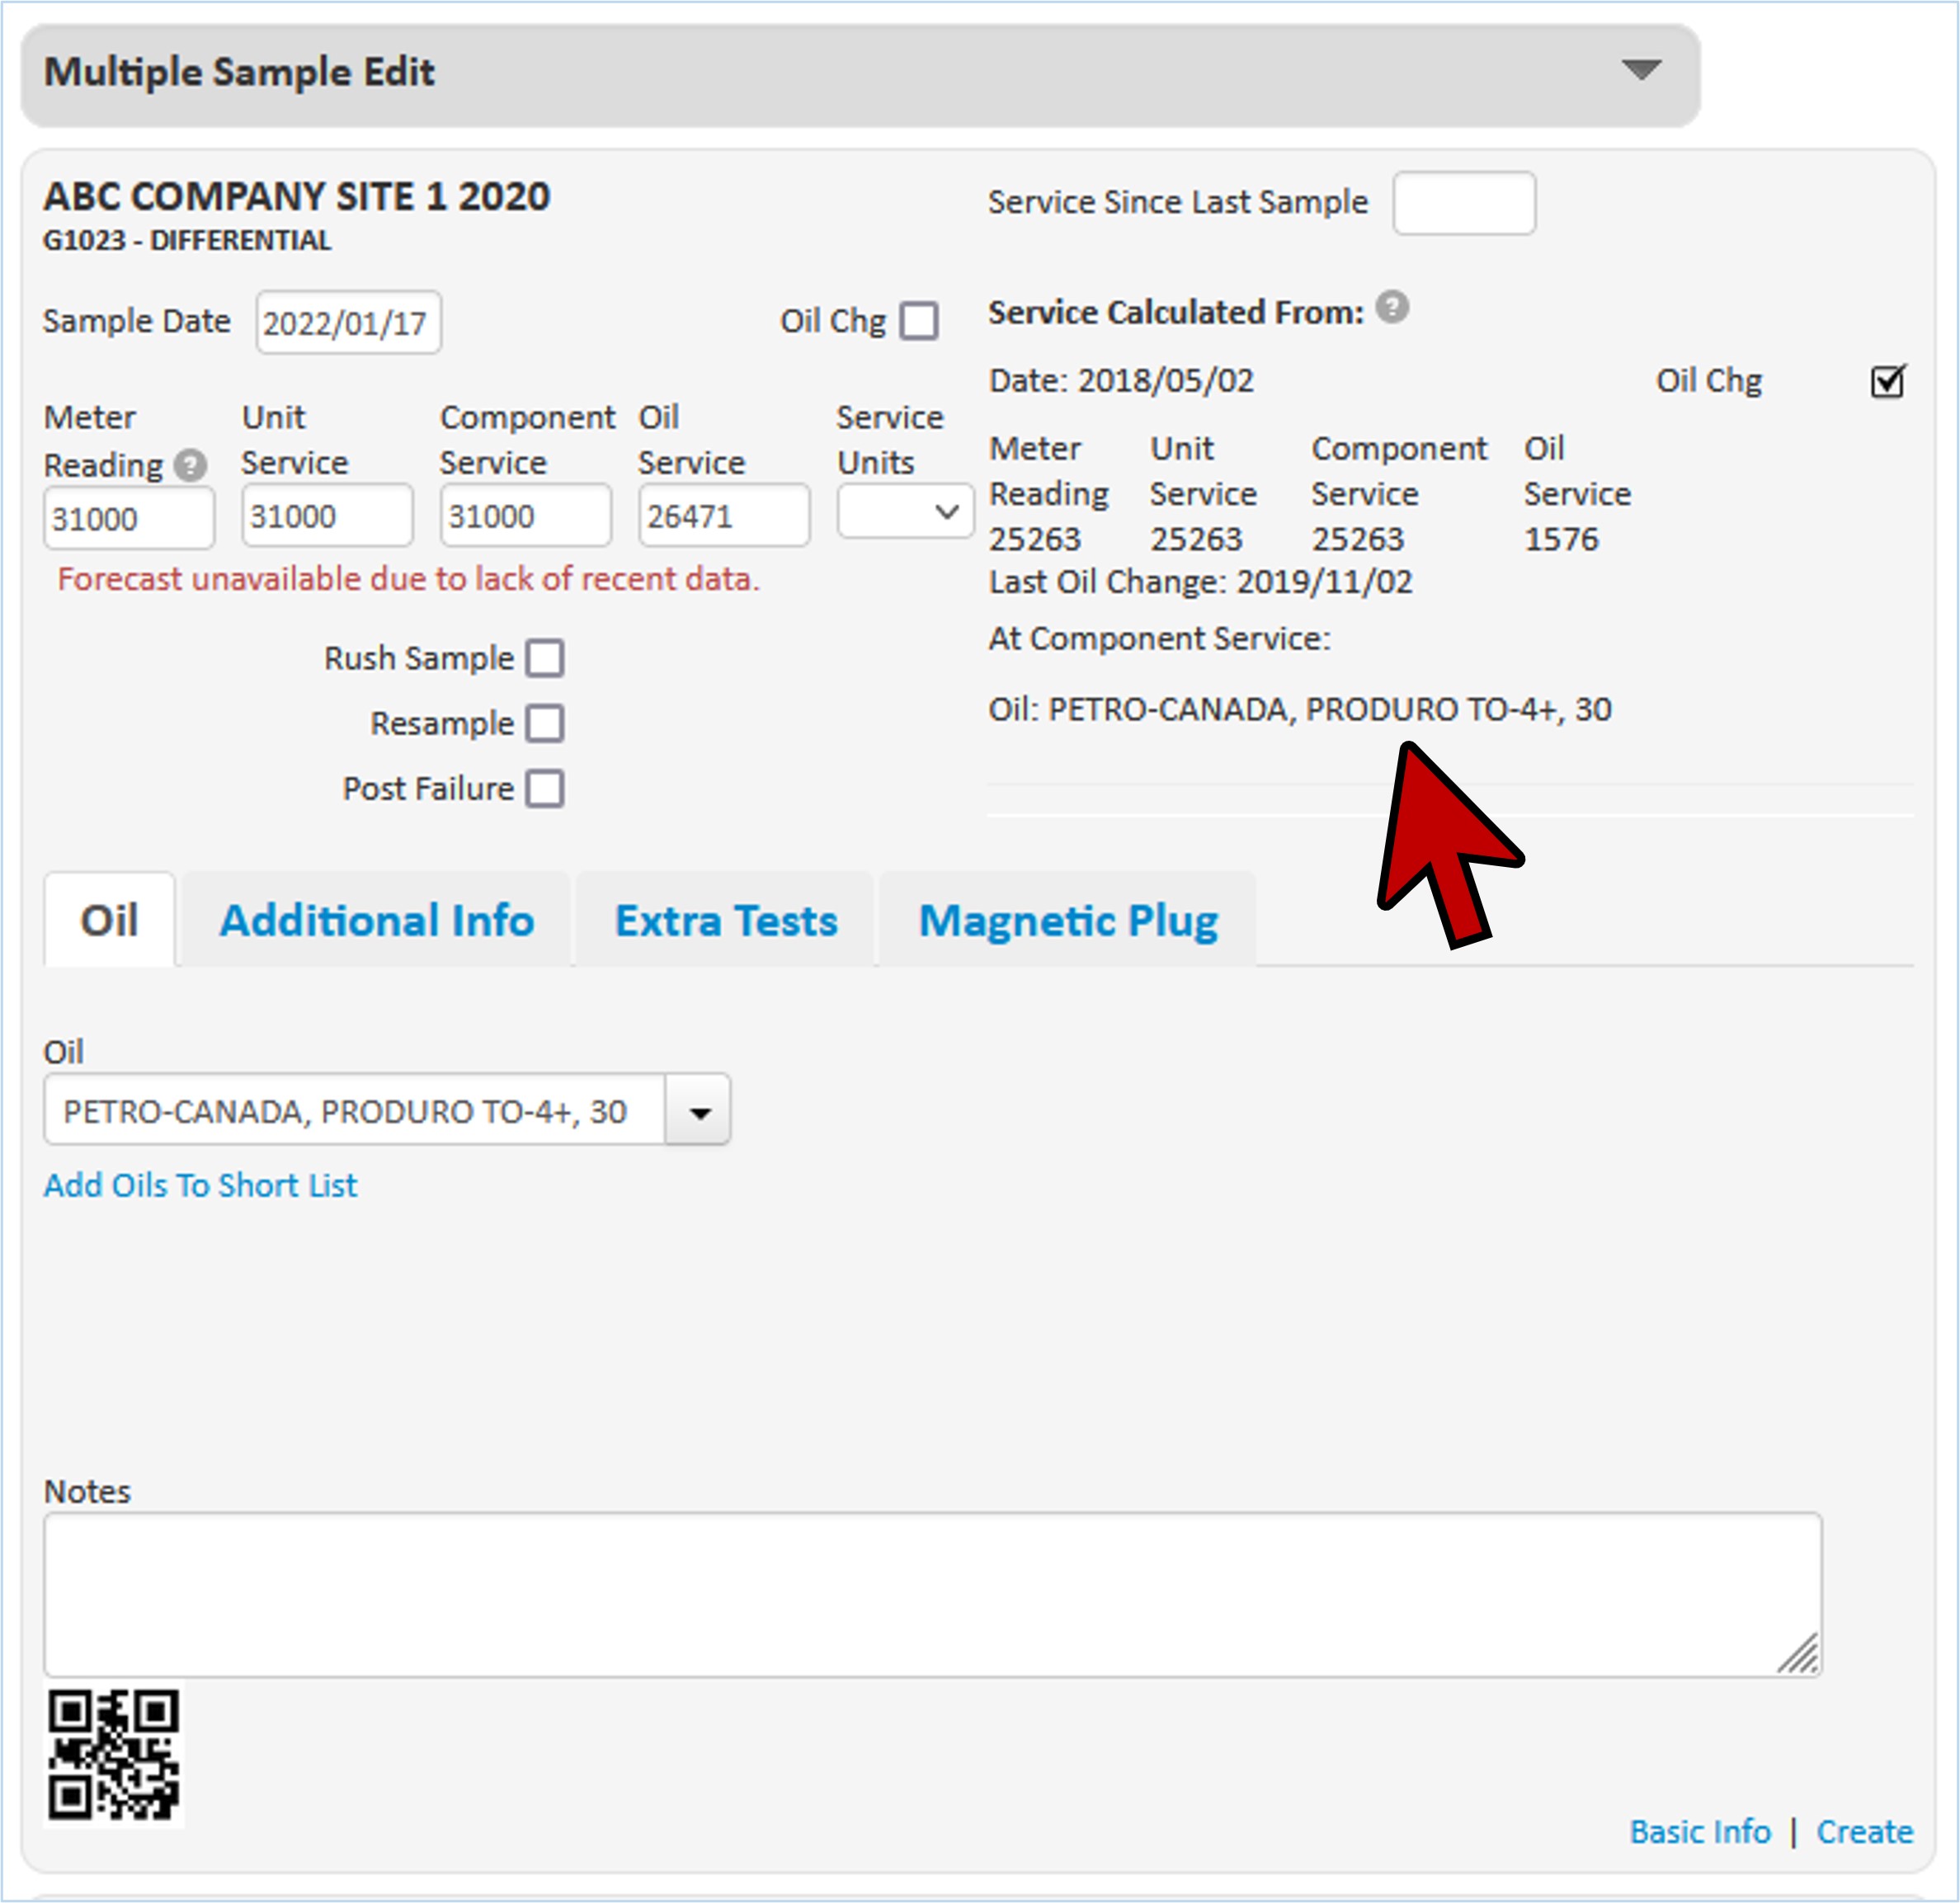
- After clicking “Advanced Info”, the next page will expand each of the sample labels so you can view the full information about these samples including the previous sample that myLab is using to calculate the rest of the service information.
Changing Oil Type
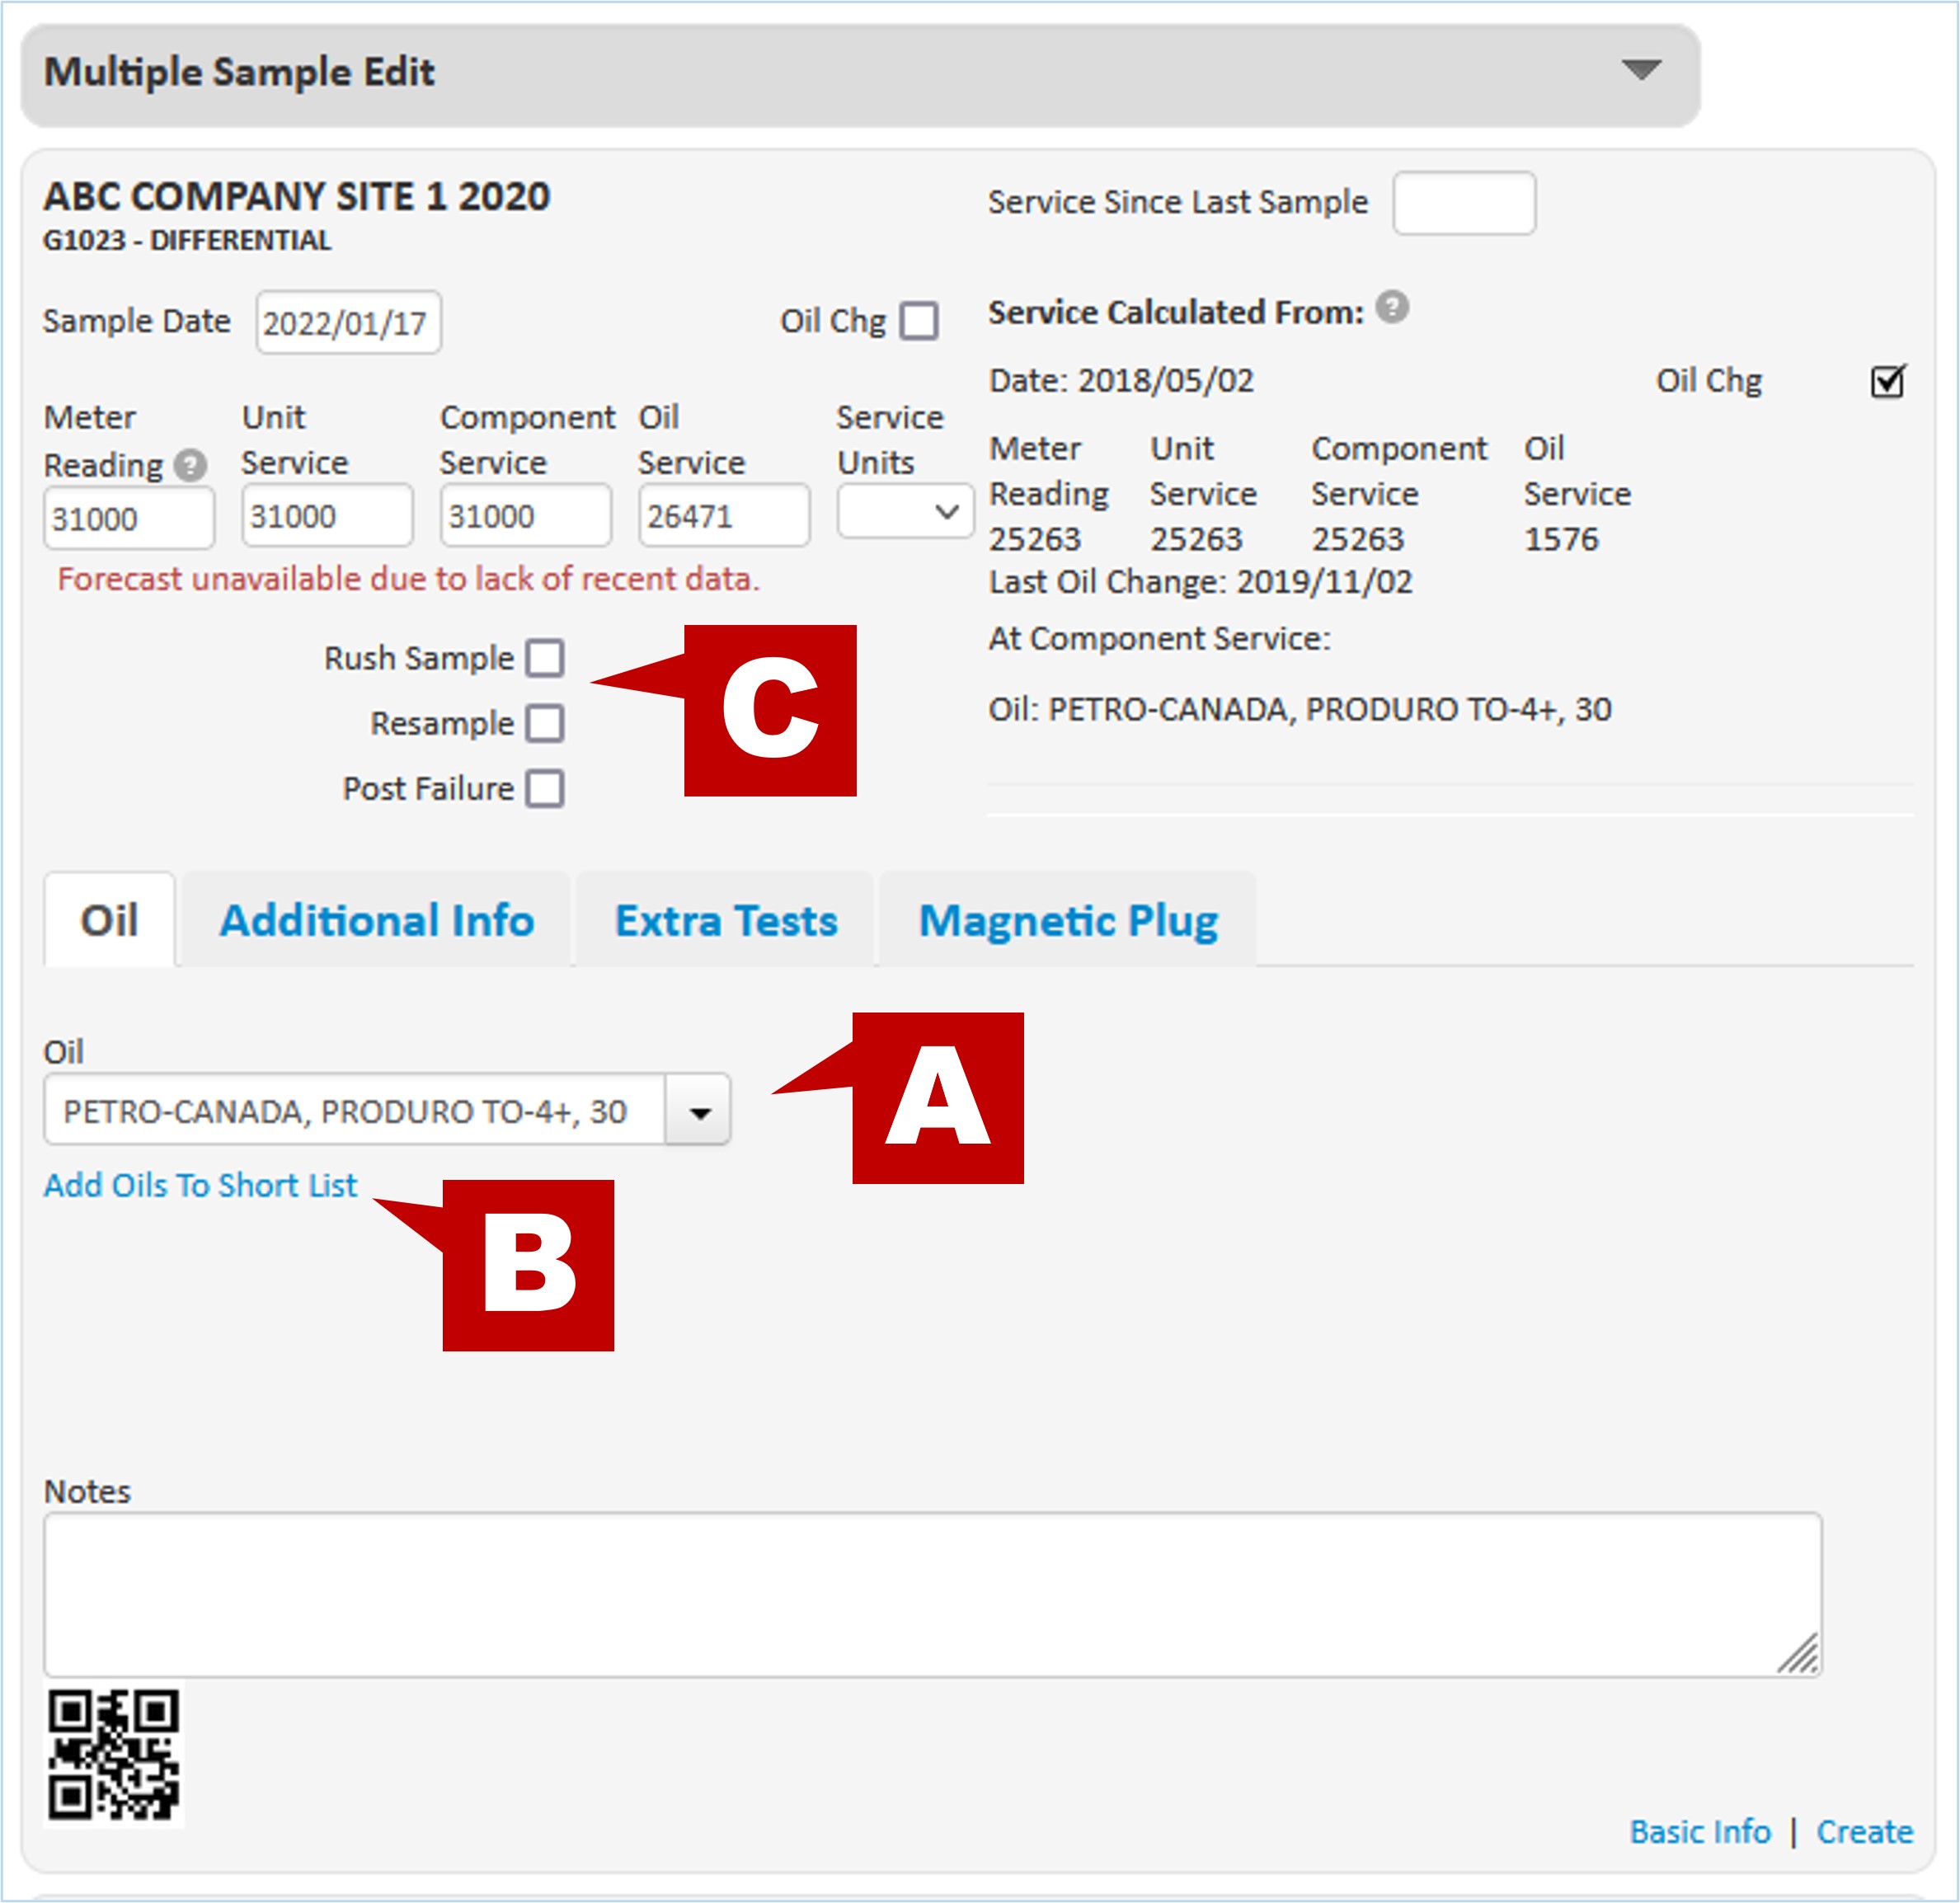
- Under the “Oil” tab, you will find a list of all of the oil types myLab has copied from the component defaults.
- Use the drop list to select a different oil if you are updating the oil type (A).
- If the oil type isn’t in the drop list, click “Add Oils to Short List” to add the oil type (B).
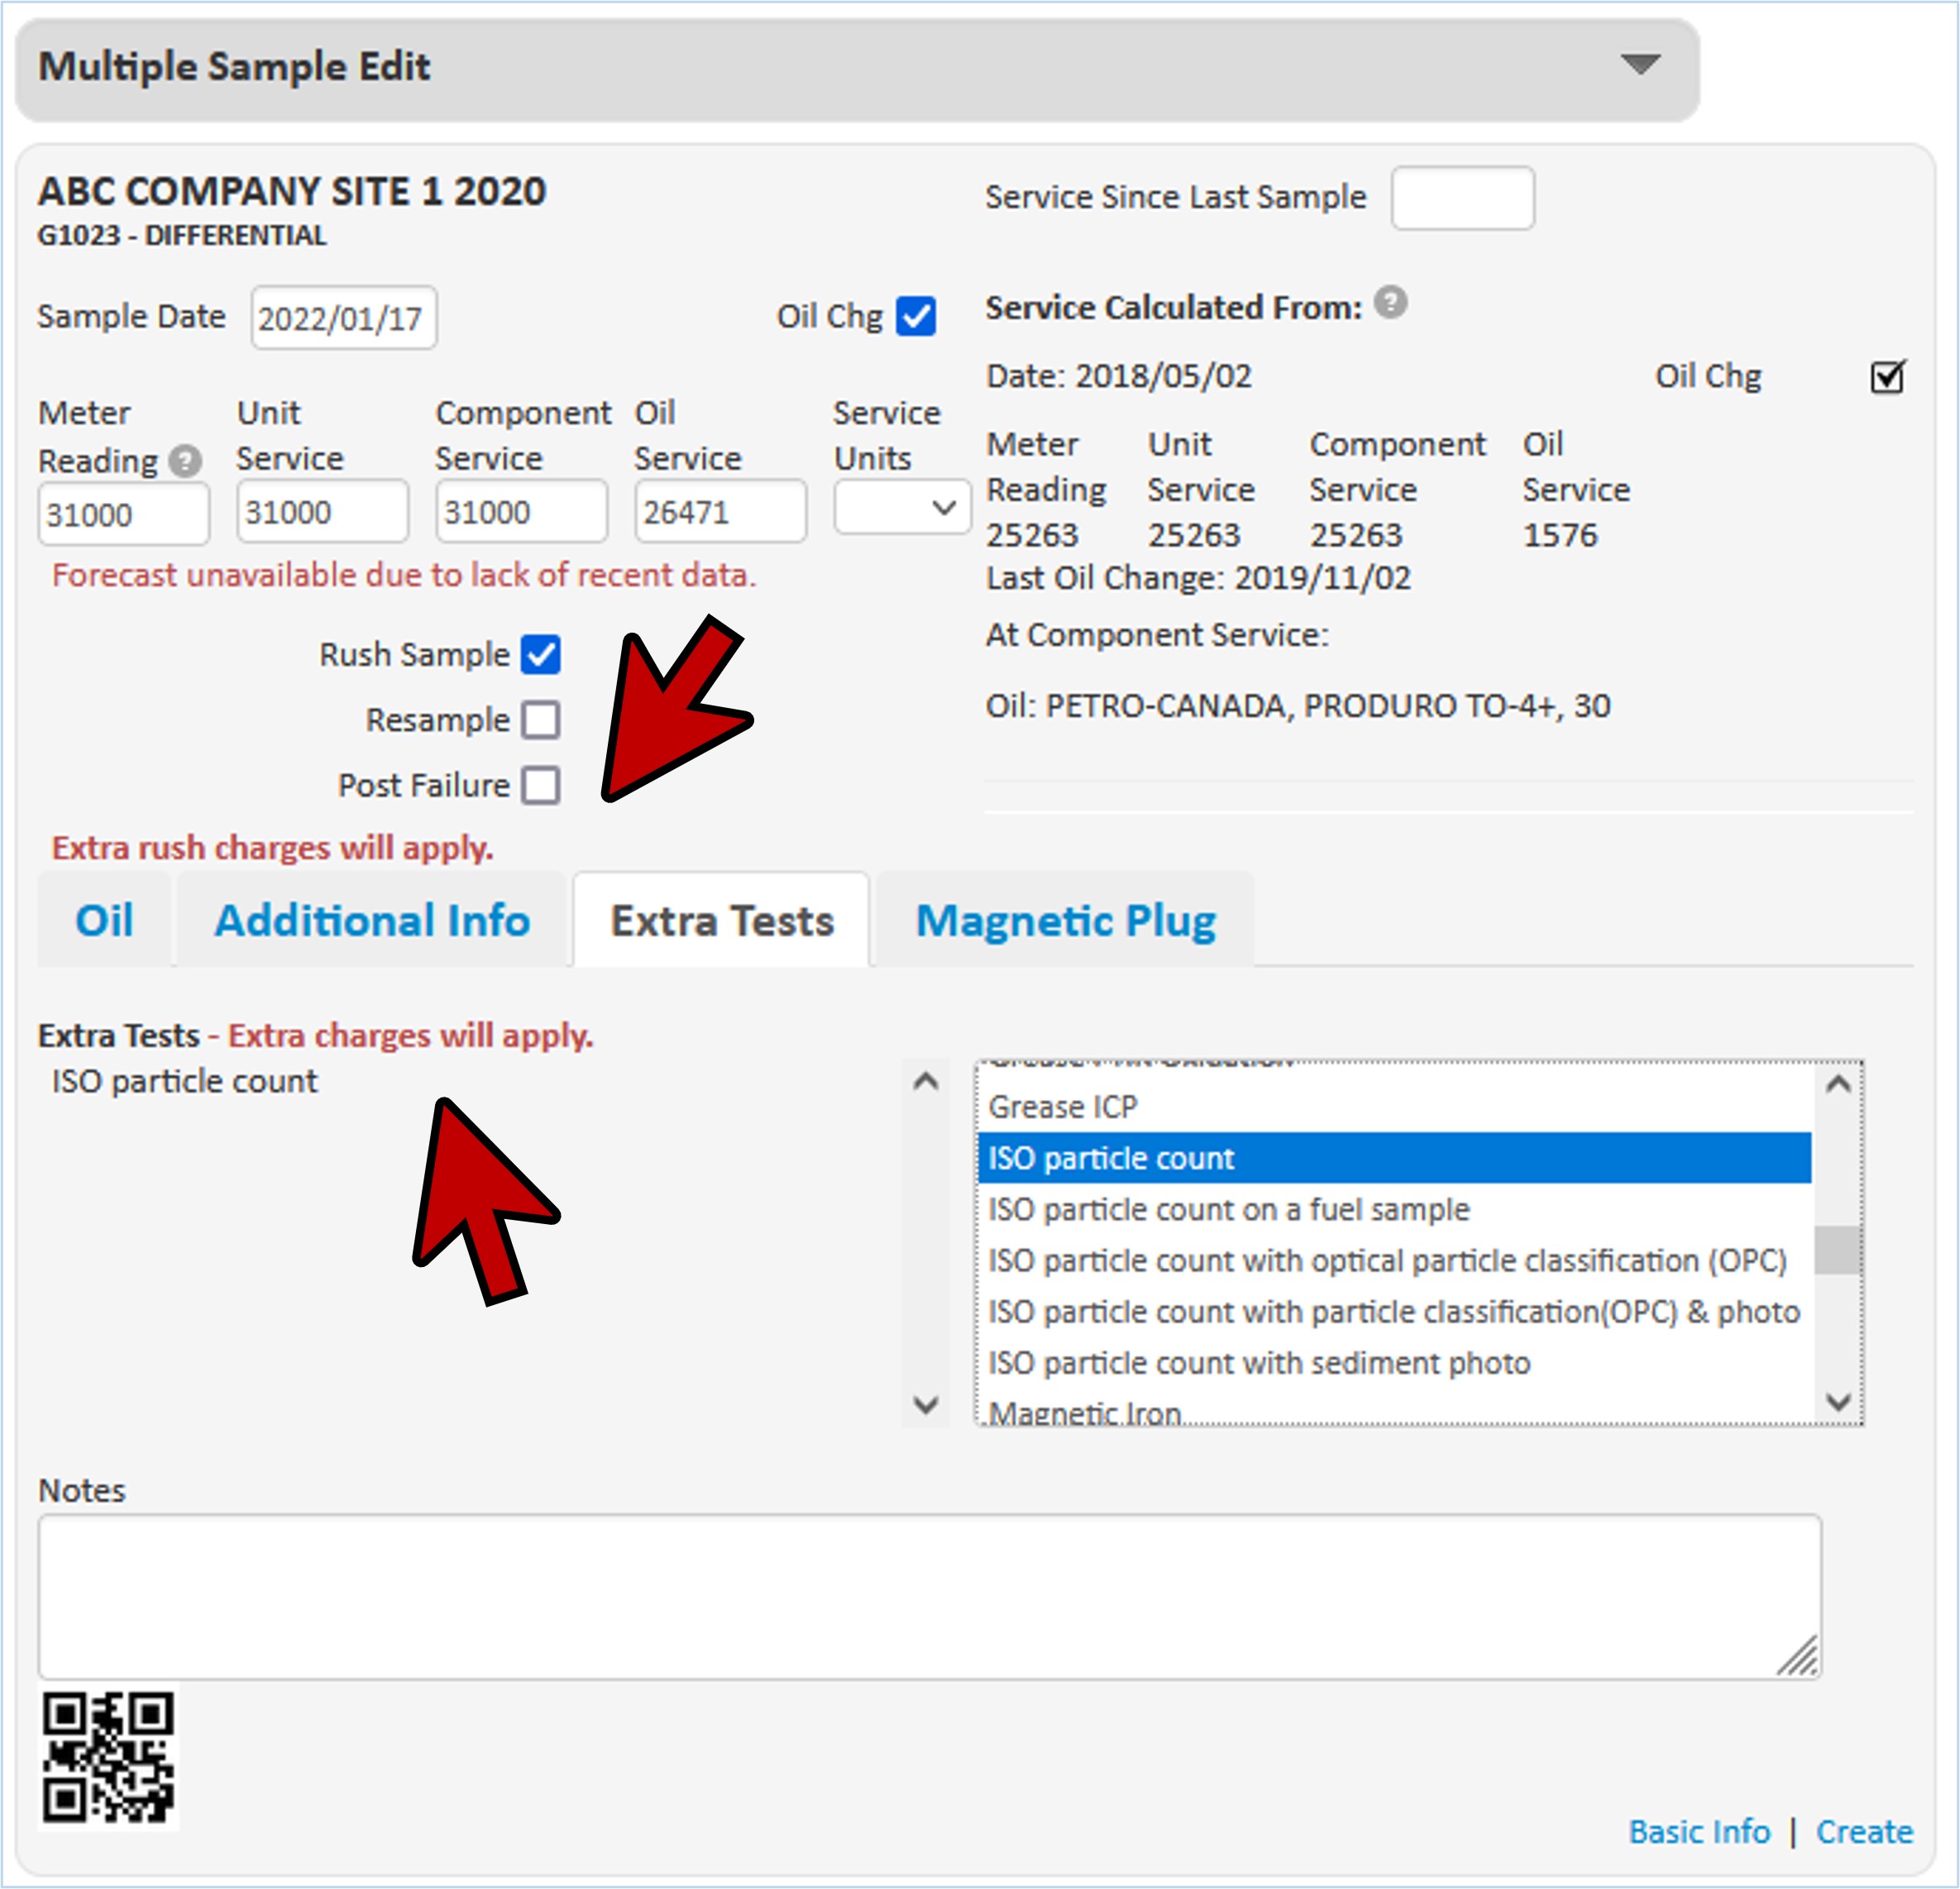
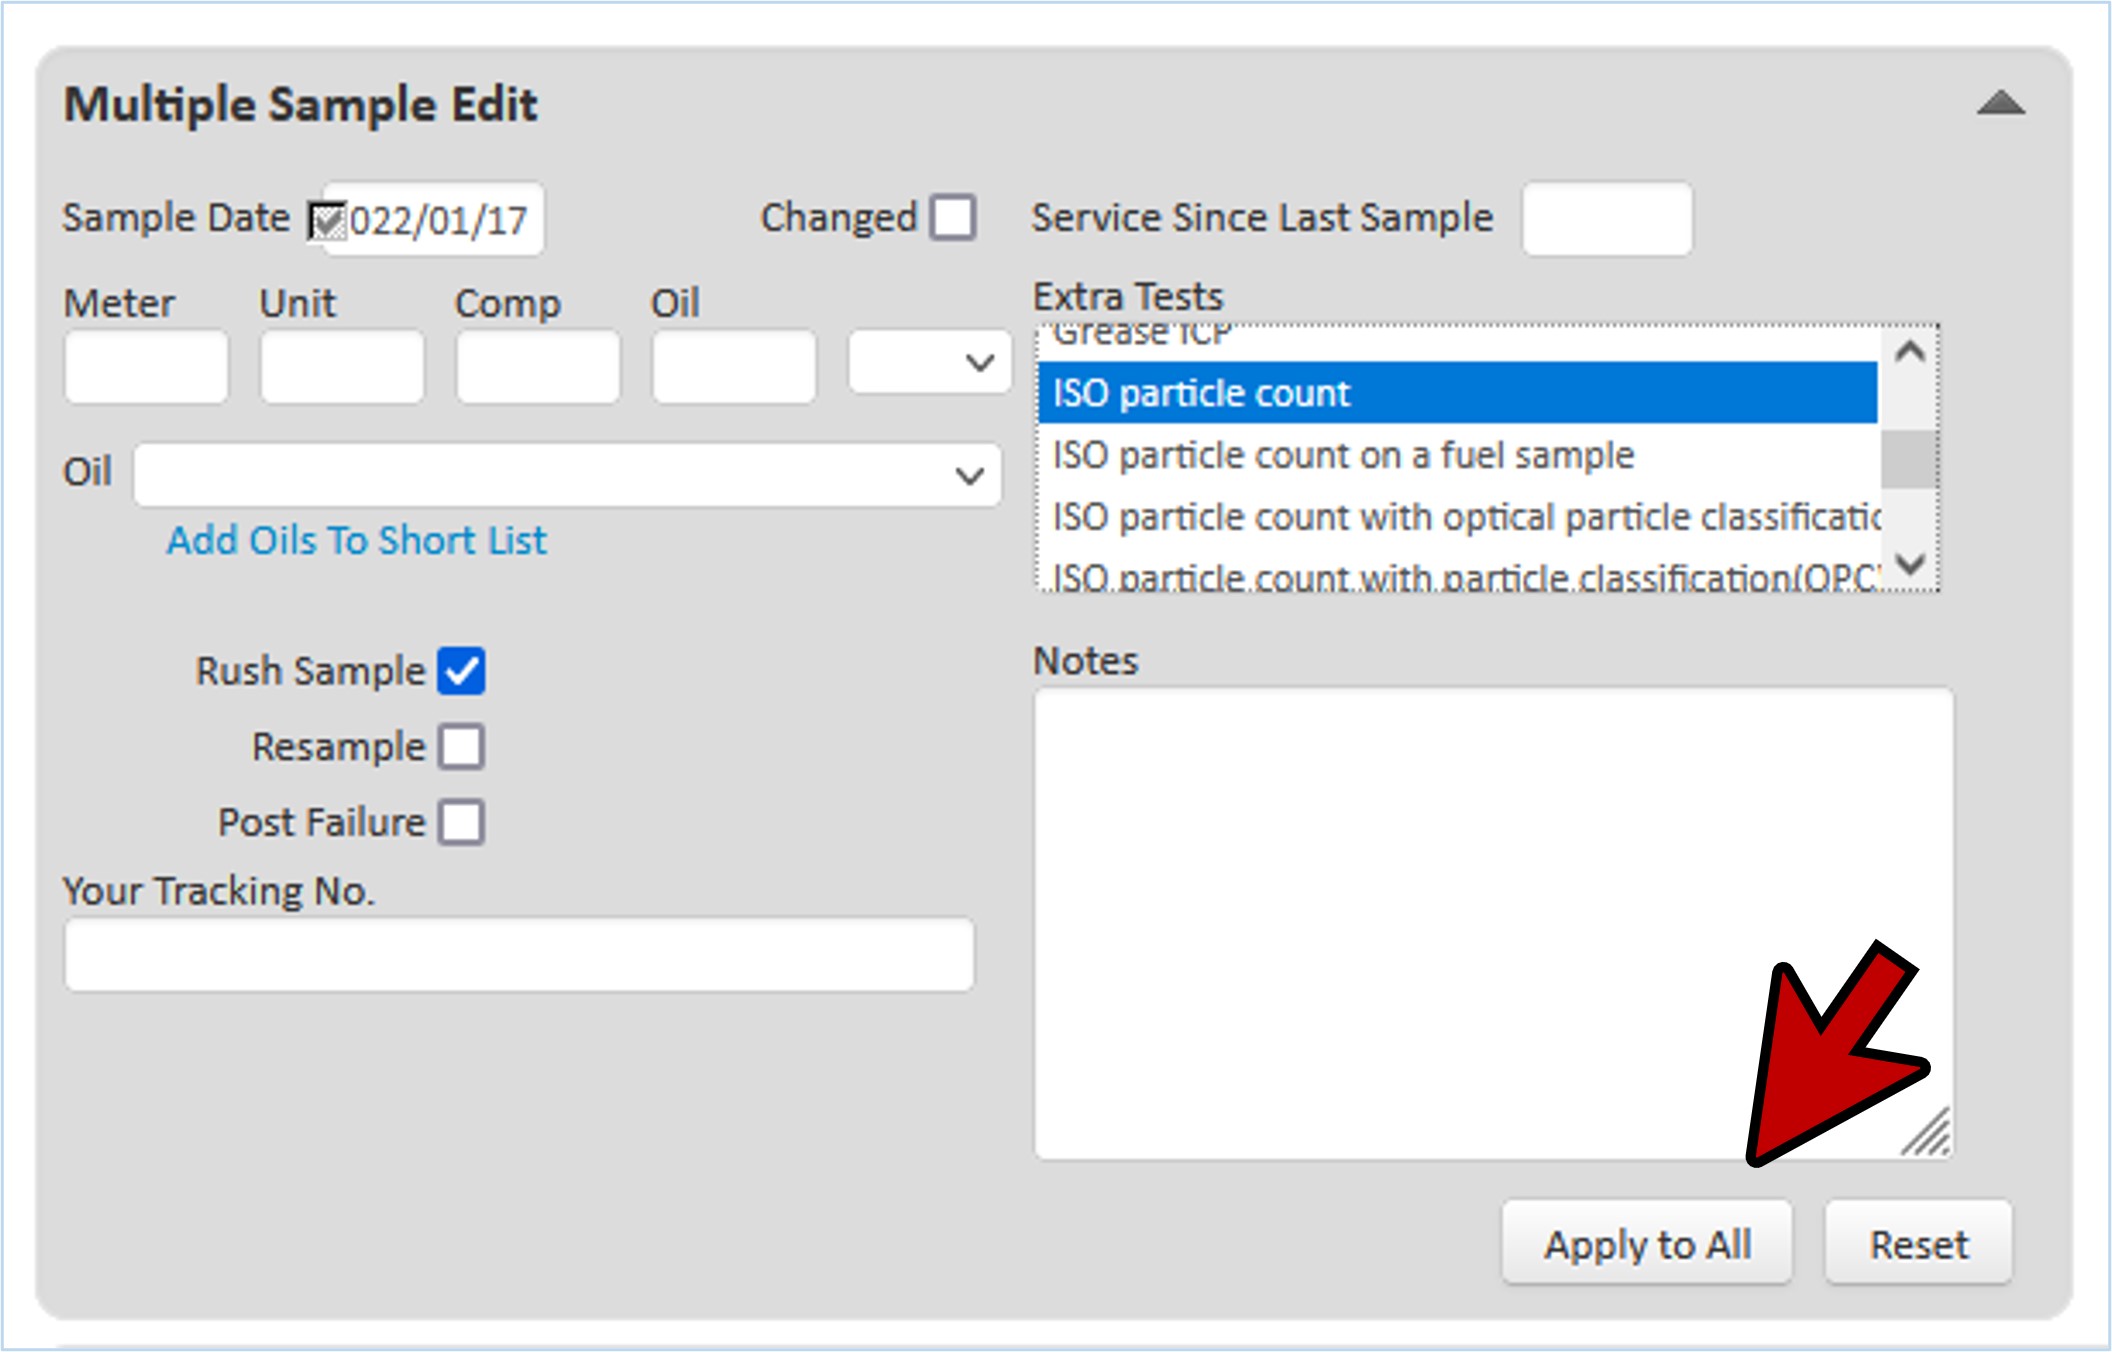
- Indicate to the lab if the sample is a “Rush Sample”, “Resample” or a sample taken “Post Failure”.
- Note, if you select “Rush Sample”, extra charges will apply. The main myLab contact will be contacted to verify the extra costs for a rush sample.
Additional Testing
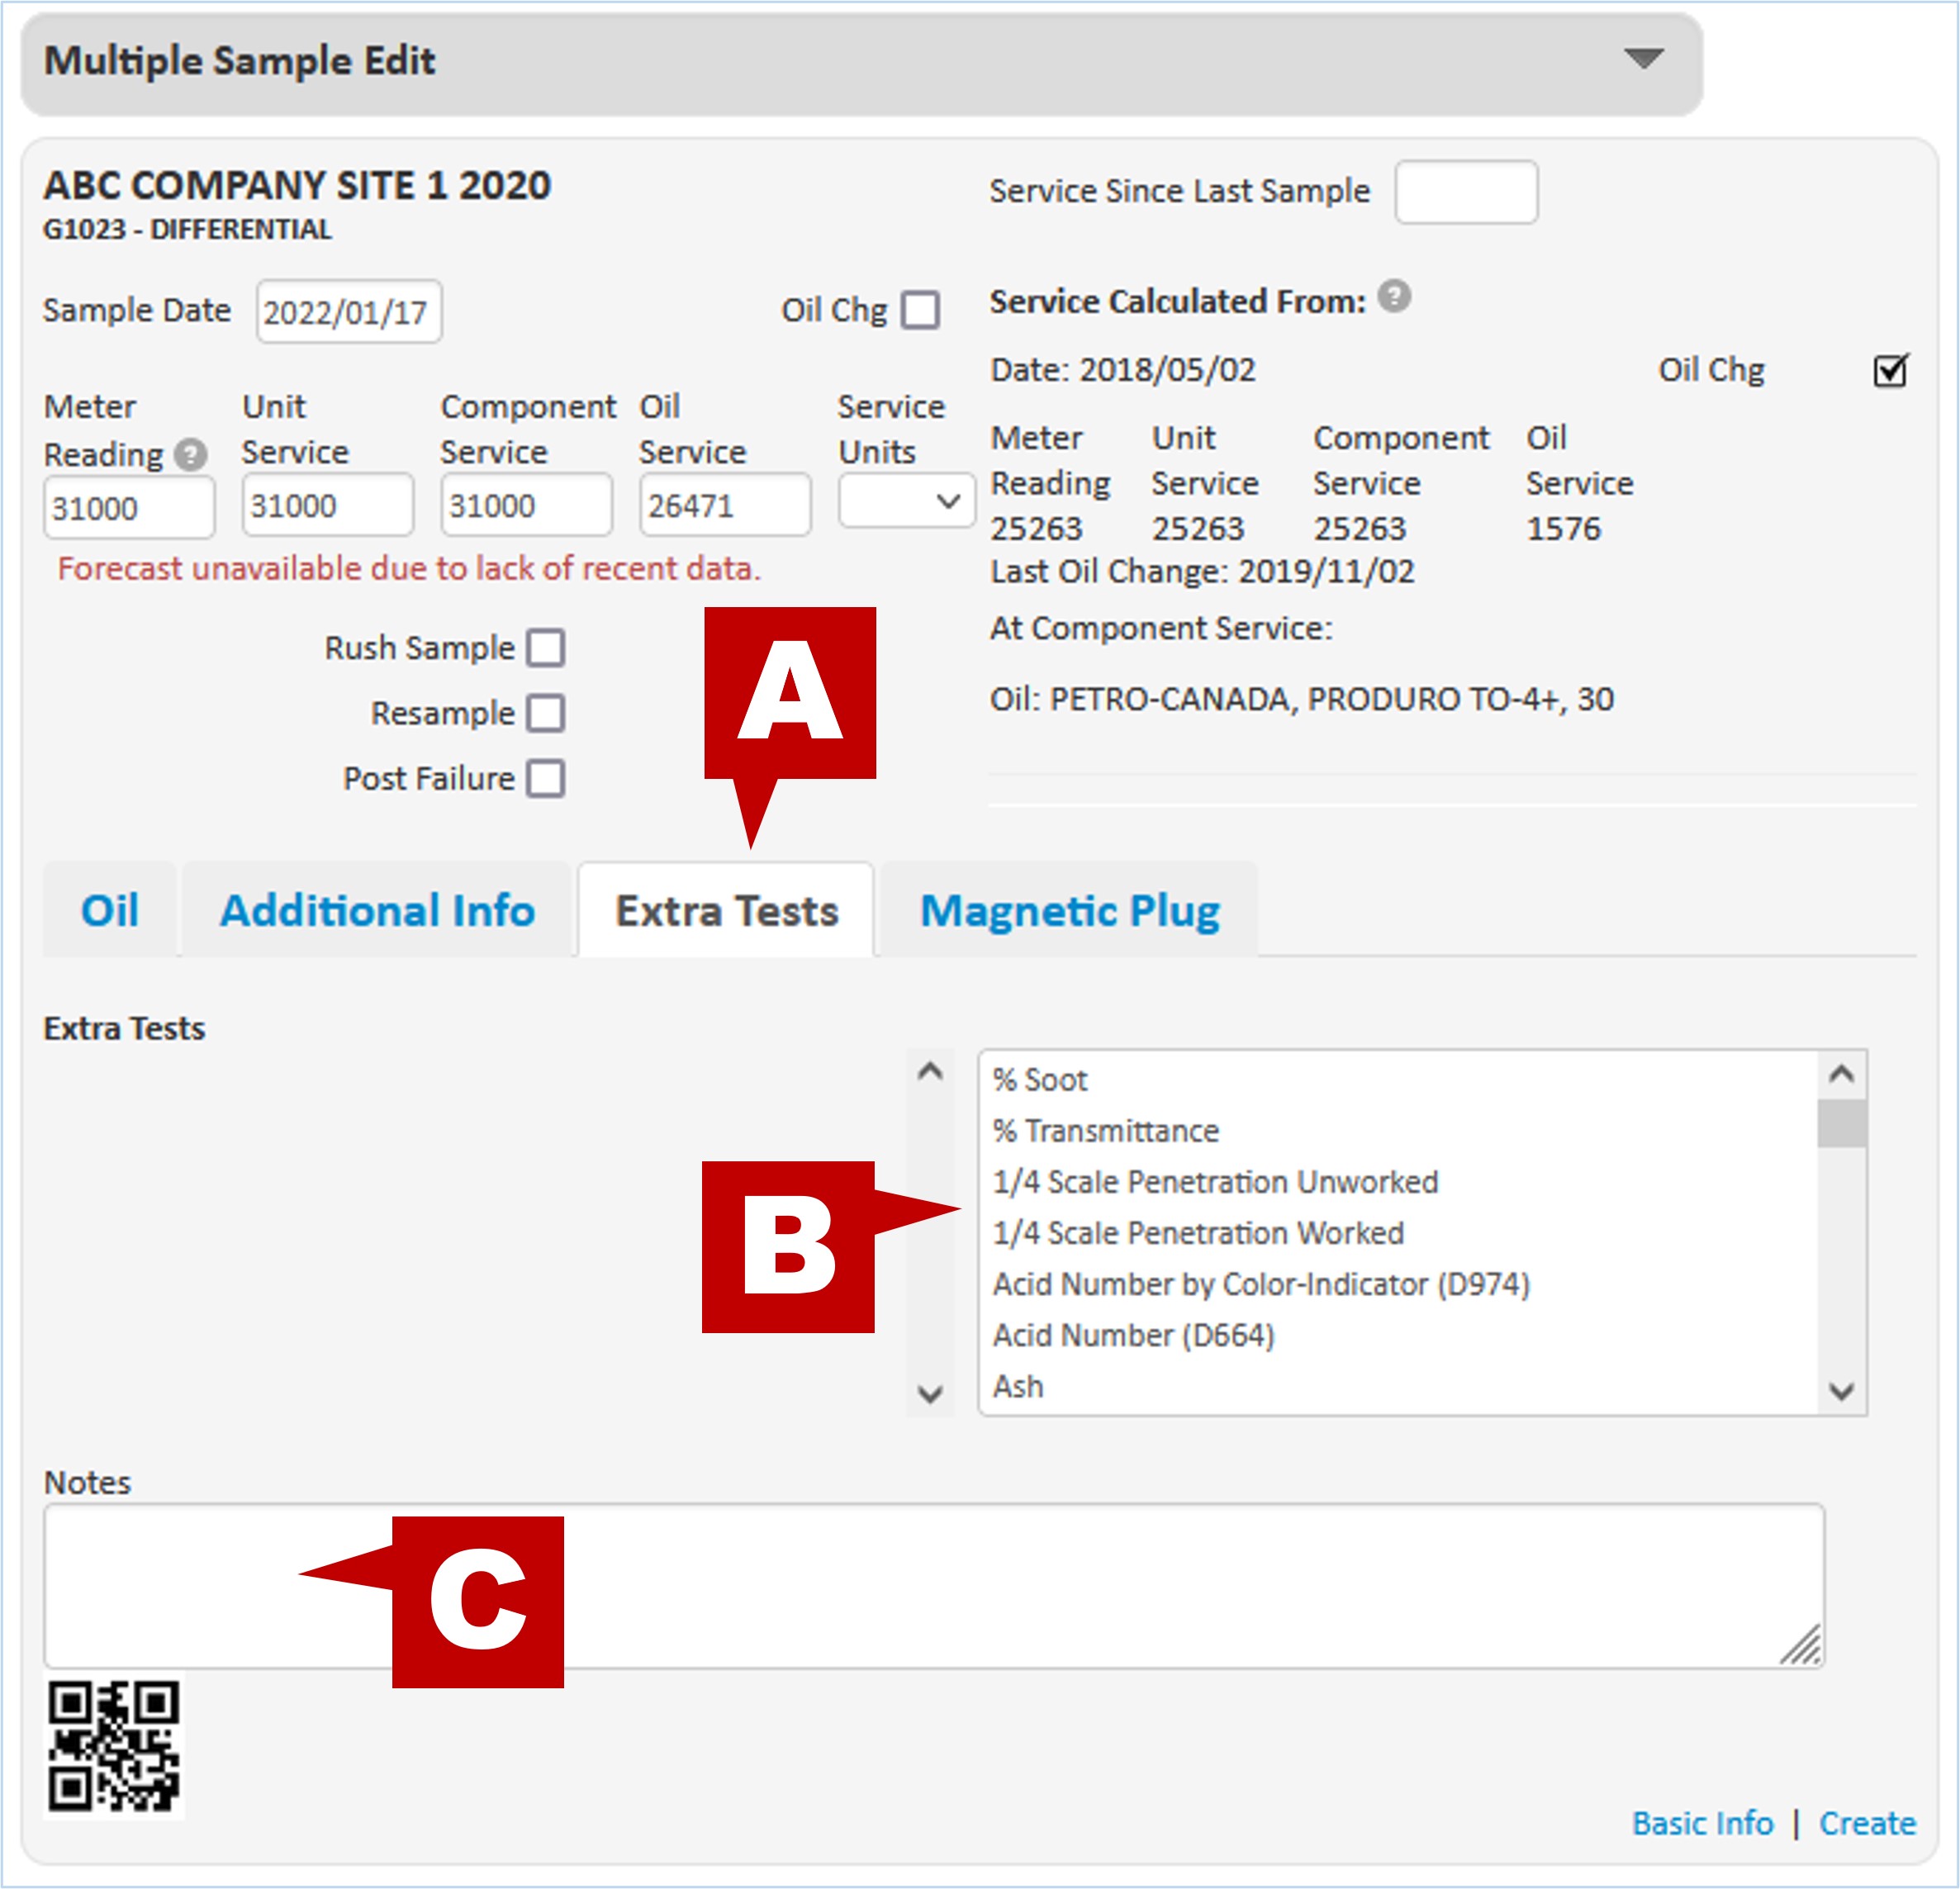
- Request additional testing by clicking on the “Extra Tests” tab (A).
- Select the tests you want to include for the sample by clicking in the multi-select list on the right (B). Once the tests are selected, they will appear under the “Extra Tests” column to the left.
- Include any notes for the lab or for your own records in the text box (C). These notes will remain with the sample when the results are provided.
- You will note that once you’ve added in your extra tests and rush samples, messages appear indicating that extra charges will apply. These charges will be submitted to the primary user (Admin) of the myLab account.
Magnetic Plug
- Track the status of magnetic plugs within myLab.
- Click on the Magnetic Plug tab in Advanced Settings.
- Upload a photo for tracking purposes.
- Select a Mag. Plug Rating (1 to 5) based on the Magnetic Plug Rating Chart (download).
- 1: Normal wear.
- 2: Advanced stages of fines showing early stages of bearing race and roller wear.
- 3: Shiny metal particles exist.
- 4: Well advanced failure of components with accumulated contaminants since last inspection.
- 5: Failure has occurred with this amount of contaminant accumulation since last inspection and not residue from a previous failure.

Multiple Sample Editing
- You can make changes to all samples at the same time by clicking “Multiple Sample Edit”.
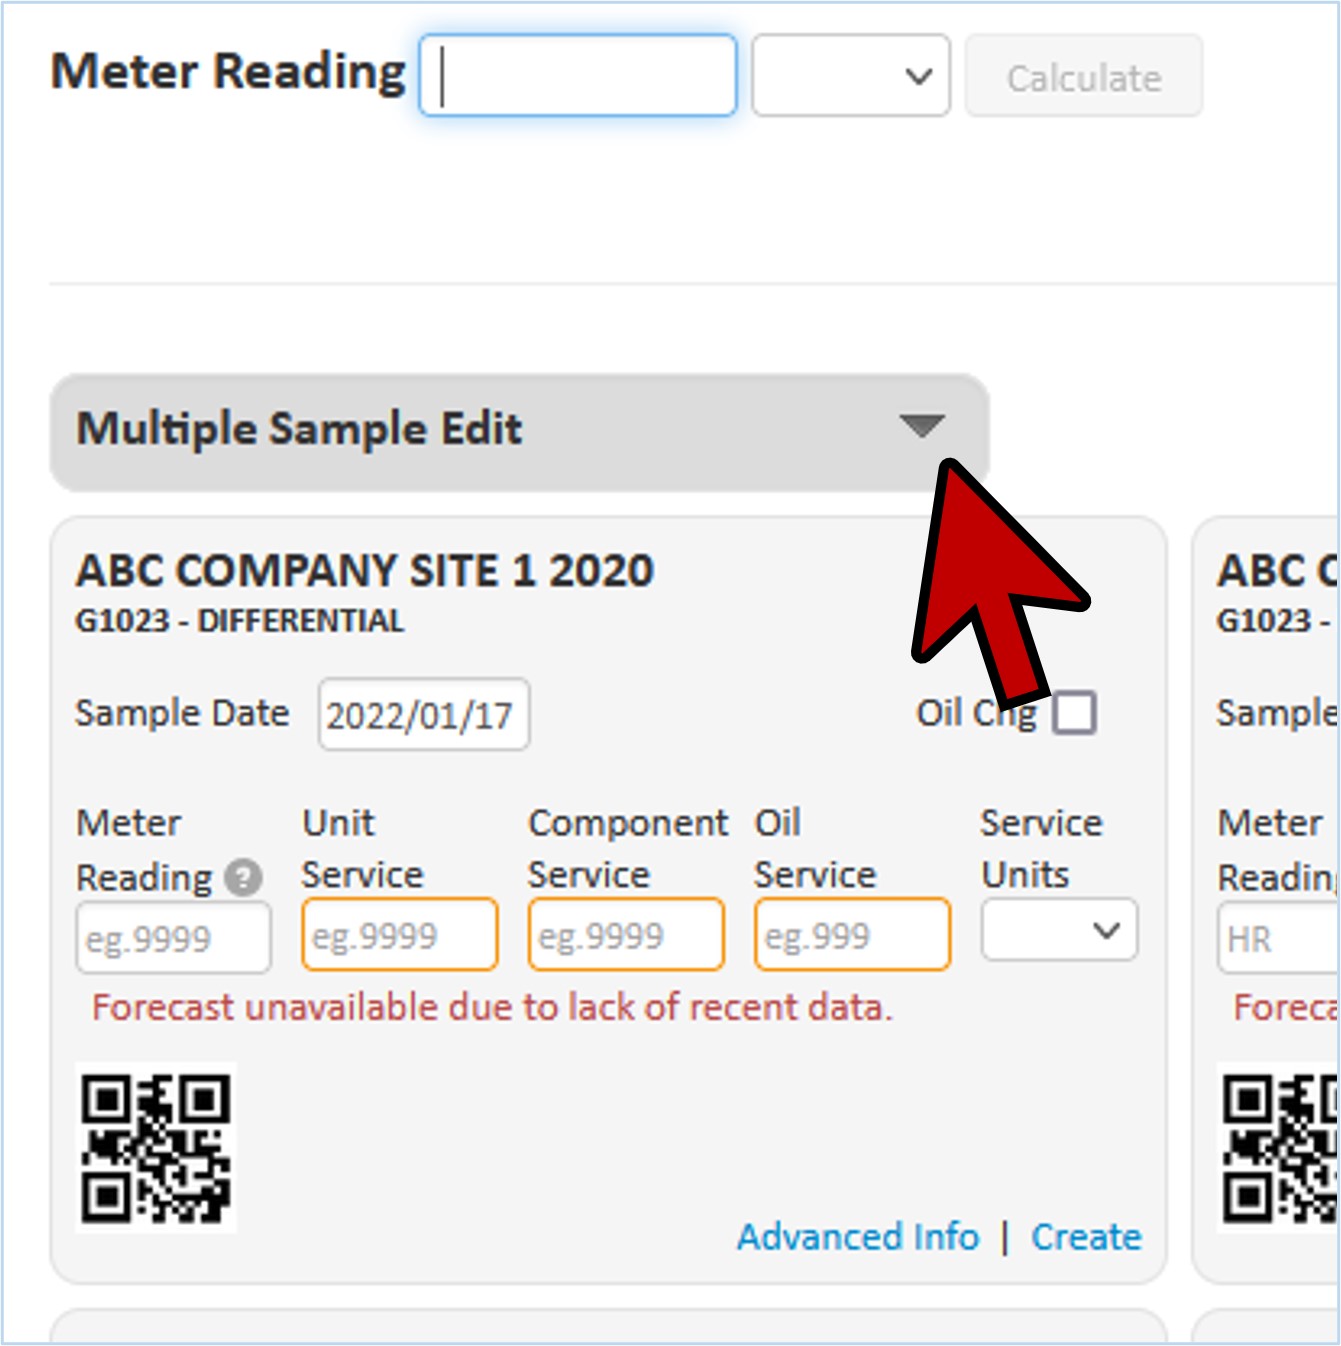
- This opens a section that allows you to make edits to all the key information including adding rush samples and extra tests. Once you have made all the required edits, click “Apply to All” to make the changes applicable to all samples in this batch.
Spreadsheet View
- If you have a lot of samples to work with at the same time, it may be easier to use the spreadsheet view.
- On the sample label page, click the “Spreadsheet View” link located under the date.
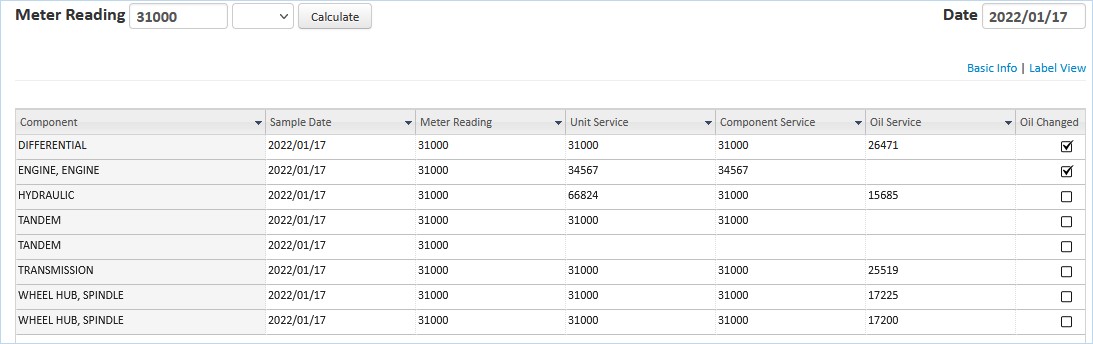
- You can now enter data similar to an Excel spreadsheet.
- Click on a value or a blank cell and enter data for individual components.
- Fill a range of cells with the same value by entering the value in one row and pressing enter. Click on the cell and drag while holding the left mouse button down to the end of the range you want to populate. When you release the button, you’ll get a pop-up asking you to confirm the change.
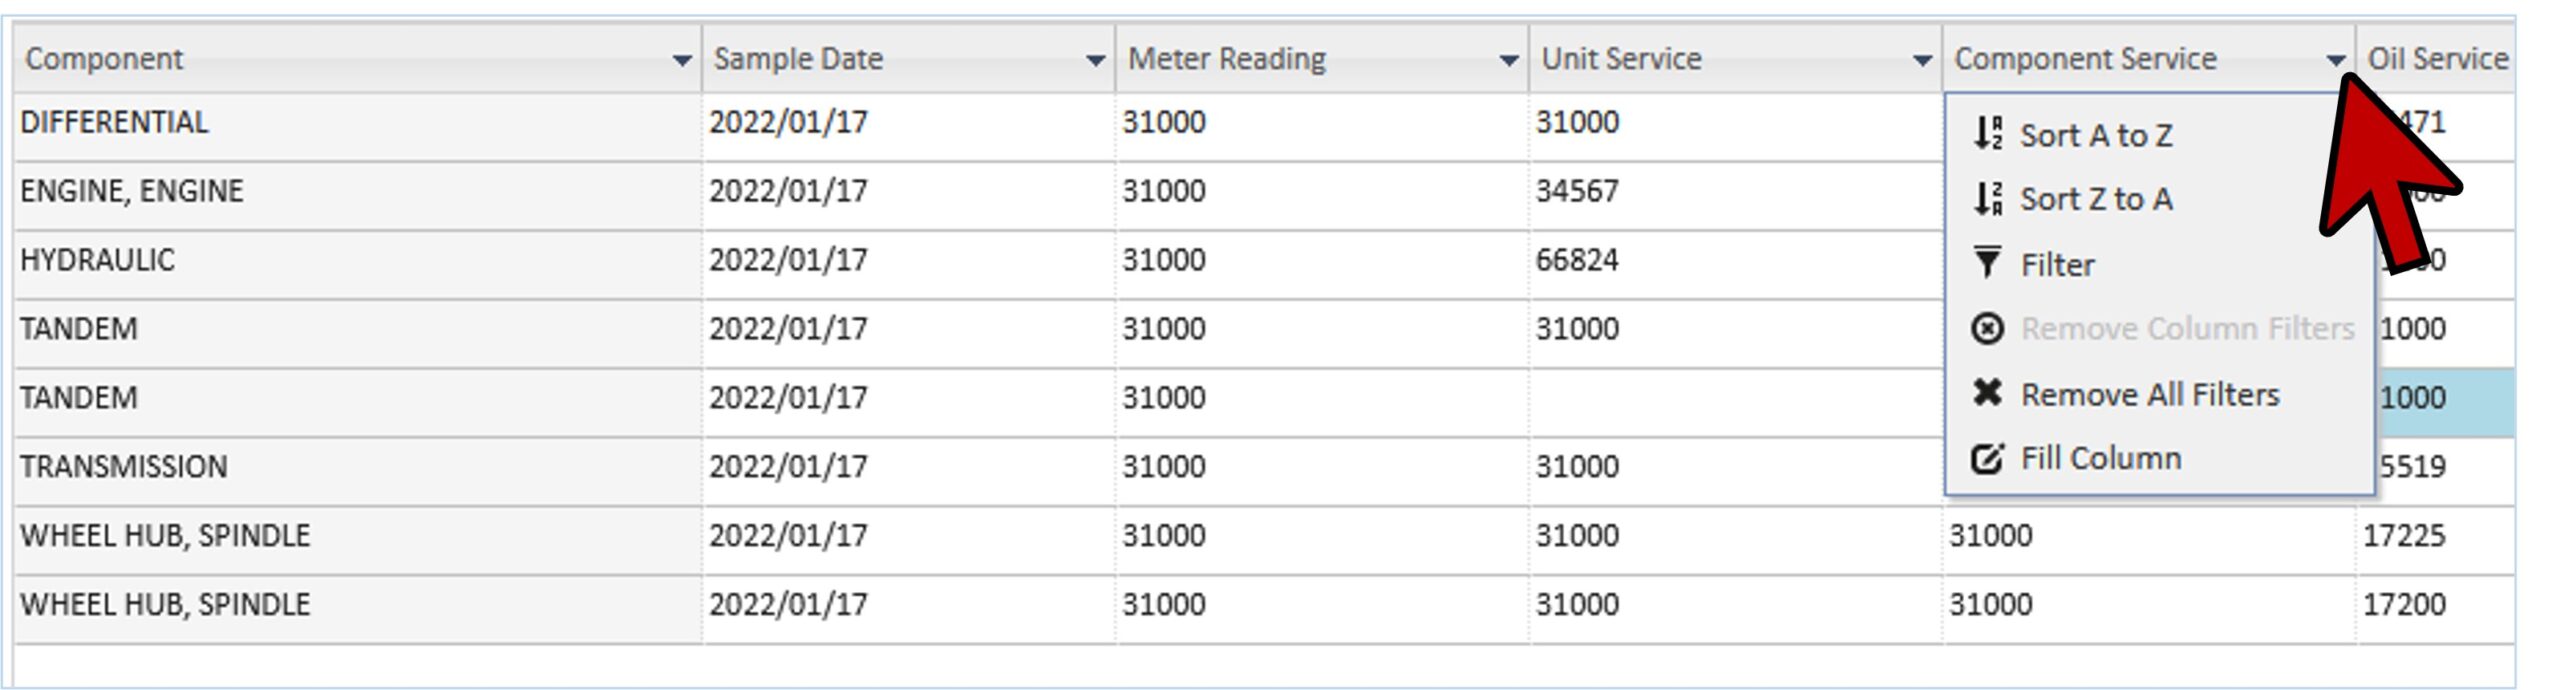
- You can also filter, sort, and fill entire columns using the pull down tools.
- Once you have completed making all of your changes to your sample data, click “Create Labels” at the bottom of the page.
- Complete the sample registration by writing the tracking numbers for each sample on the respective sample bottles or print the labels and affix to the bottles. (see Sample Setup by Unit or Sample Setup by Component List)
- When done, click “Home” to return to the home page of myLab.