Sampling Oil Using a Sample Pump
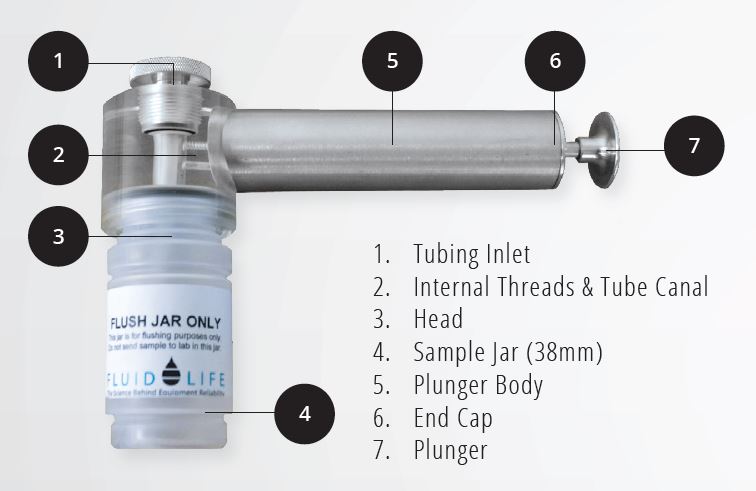
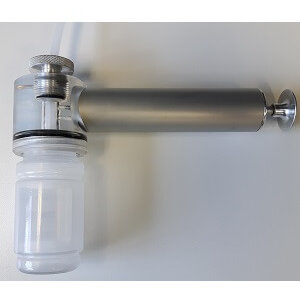
The following is a sampling procedure using the Fluid Life 38U Sample Pump (Figure 1). The pump kit comes complete with a 38mm suction pump, some heat resistant tubing and a flush jar. This procedure can be used for oil pumps/reservoirs, where dipstick, fill-cap, or other access is available.
Procedure
- Take sample under normal operating conditions when possible or immediately after shutting unit down. That will
ensure a homogeneous sample of hot flowing oil. - Wipe excess contamination from sample area.
- To use the 38mm Vampire Pump, screw a sample jar onto the bottom of the pump head.
- Insert a clean piece of plastic tubing through the top of the pump only until it is protruding into the sample jar by 1 – 2 cm (0.5″). Tighten the aluminum nut to seal the unit.
- Place the free end of the tubing into the reservoir that you are sampling through the dipstick or fill port to approximately the midpoint of the oil. If sampling down a dipstick, the tubing should be inserted to the same depth as the end of the dipstick in order to prevent hitting moving parts. Take care not to sample directly on the bottom of the sump to avoid sampling any contaminants which may have settled there. The sample tubing can be fixed to a rigid item like a rod (Figure 2). This will ensure the tubing reaches the desired sump depth and location.

- Two to three strokes of the plunger are all that are usually required to begin drawing a sample. Try to keep the pump level and be careful not to draw the oil into the plunger body or overfill the jar, as this will require disassembling and
cleaning of the pump. - Before taking the sample, attach flush jar and extract oil. (Minimum flush volume: 15ml or total volume of sample tube) This flushing procedure removes debris or stagnant oil and ensures a more representative sample. Detach flush jar, discard oil, retain flush jar for future use.
- Attach sample jar and collect sample. As the oil level in the jar nears the top, loosen the jar to break the vacuum and stop the flow. Avoid overfilling the sample jar. Fill sample jar to or above the fill line but below the threads of the jar. Seal the jar tightly, wipe clean.
- Pre-label or label sample jar immediately after filling to avoid mix-ups. Make sure jars are labeled with full sample details (i.e. unit number, component type, date, kilometers/service hours on unit/component/oil, oil manufacturer, brand, and grade, repairs/service during drain interval, oil changed Y/N). Register samples on myLab via mobile app or web portal.
- Ship the sample to the appropriate Fluid Life location immediately. Do not stockpile samples for shipping.
Watch Video
Download PDF
Purchase
-
 Sample Pump$68.00
 -
 Sample Tubing, Individual, 6′ lengths$225.00