Sampling Oil Using Thread-On Probe Style Valves
These are the sampling procedures for a pressurized and non-pressurized fluid applications equipped with a “Thread-on Probe” style sample valve.
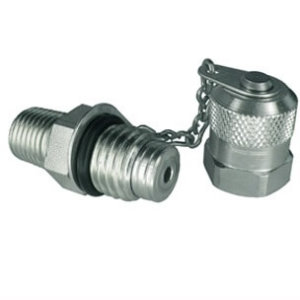
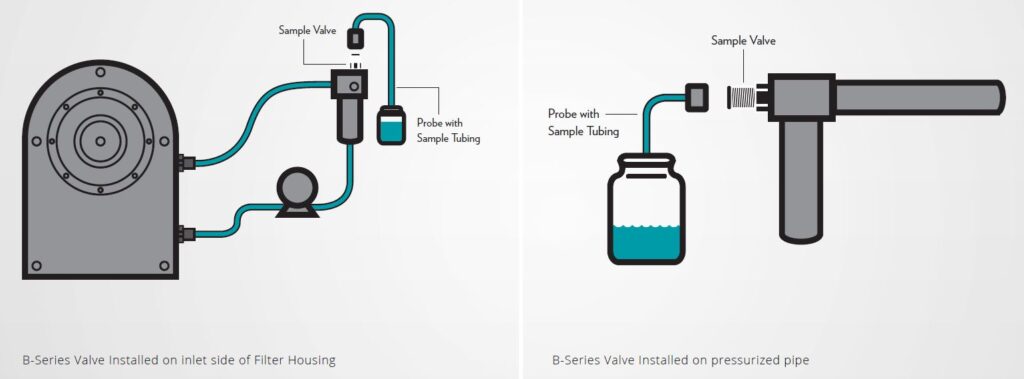
Pressurized Applications: B-Series Sample Valve
The following is a sampling procedure for a pressurized fluid system equipped with a “Thread-on Probe” style sample valve ( i.e. Fluid Life B-Series Sample Valve).
Procedure
- Take sample under normal operating conditions when possible or immediately after shutting unit down. That will ensure a homogeneous sample of hot flowing oil.
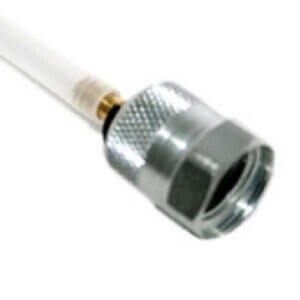
- Wipe excess contamination from sample area. Remove the protective cap and wipe the valve with a clean, dry cloth.
- Attach the sample probe to a new piece of disposable sample tubing that is long enough to direct oil from the valve to the sample jar. Slowly thread the probe onto the sample valve until the valve is opened and the adapter is secured on the sample valve. (CAUTION: Fluid under pressure may be dangerous or difficult to control. Take all necessary safety precautions to ensure safe sample extraction.)
- Before taking the sample, attach flush jar and extract oil. (Minimum flush volume: 15ml or total volume of tube / valve / probe / dead legs of pipe/hose in system upstream of jar) This flushing procedure removes debris or stagnant oil and ensures a more representative sample. Detach flush jar, discard oil, retain flush jar for future use.
- Attach sample jar and collect sample. Avoid overfilling the sample jar. Fill sample jar to or above the fill line but below the threads of the jar. Seal the jar tightly, wipe clean.
- Pre-label or label sample jar immediately after filling to avoid mix-ups. Make sure jars are labeled with full sample details (i.e. unit number, component type, date, kilometers/service hours on unit/component/oil, oil manufacturer/ brand/grade, repairs/service during drain interval, oil changed Y/N).
- Ship the sample to the appropriate Fluid Life location immediately. Do not stockpile samples for shipping.
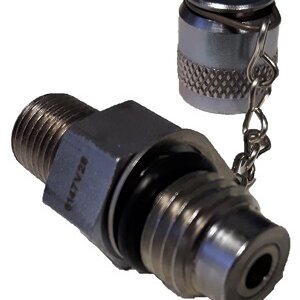
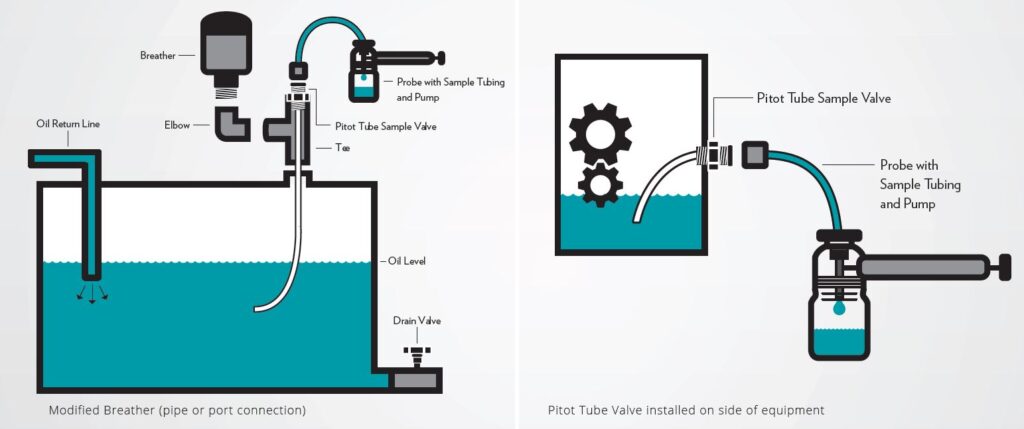
Non-Pressurized Applications: M-Series Valve
The following is a sampling procedure for a “Thread-on Probe” style sample valve. (i.e. Fluid Life M/ MT Series Sample Valve) installed in an application with little or no fluid pressure ( i.e. splash lubricated gear box, sumps/reservoirs).
Procedure
- Take sample under normal operating conditions when possible or immediately after shutting unit down. That will
ensure a homogeneous sample of hot flowing oil. - Wipe excess contamination from sample area.
- To use the 38mm Sample Pump, screw a sample jar onto the bottom of the pump head.
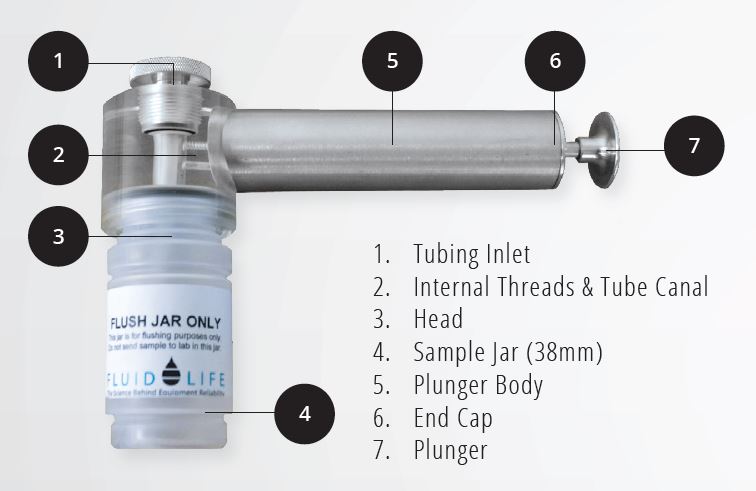
- Insert a clean piece of plastic tubing through the top of the pump only until it is protruding into the sample jar by 1 – 2 cm (0.5″). Tighten the aluminum nut to seal the unit.
- Wipe excess contamination from area around the sample valve. Attach a sample probe to the disposable sampling tube. Thread the probe onto the sample valve until the valve is opened and the probe is closely secured on the sample valve.
- Two to three strokes of the plunger are all that are usually required to begin drawing a sample. Try to keep the pump level and be careful not to draw oil into the plunger body or overfill the jar, as this will require disassembling and cleaning of the pump.
- Before taking the sample, attach flush jar and extract oil. (Minimum flush volume: 15ml or total volume of tube / valve / probe / dead legs of pipe/hose in system upstream of jar.) This flushing procedure removes debris or stagnant oil and ensures a more representative sample. Detach flush jar, discard oil, retain flush jar for future use.
- Attach sample jar and collect sample. As the oil level in the jar nears the top, loosen the jar to break the vacuum and stop the flow. Avoid overfilling the sample jar. Fill sample jar to or above the fill line but below the threads of the jar. Seal the jar tightly, wipe clean.
- Pre-label or label sample jar immediately after filling to avoid mix-ups. Make sure jars are labeled with full sample details (i.e. unit number, component type, date, kilometers/service hours on unit/component/oil, oil manufacturer, brand, and grade, repairs/service during drain interval, oil changed Y/N).
- Ship the sample to the appropriate Fluid Life location immediately. Do not stockpile samples for shipping.
Download PDF
Purchase
-
 Sample Probe, B-Series$51.00
 -
Sample Probe, M-Series$30.00
-
Sample Valve, B-Series 1/4″$18.00
-
Sample Valve, B-Series 1/8″$18.00
-
Sample Valve, M-Series$45.00
-
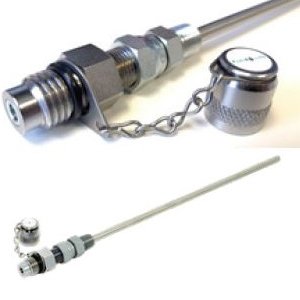
Sample Valve, M-Series 12″ Pitot Tube$90.00
-
Sample Valve, M-Series, 18″ Pitot Tube$100.00
-
Sample Valve, M-Series, 24″ Pitot Tube$110.00